Connect MySQL to VS Code with Selfmade Ninja Labs: A Step-by-Step Guide
Efficient database management is essential for modern developers, and Selfmade Ninja Labs offers an innovative solution. By integrating MySQL with Visual Studio Code (VS Code) through Selfmade Ninja Labs, you can streamline your workflow. This guide walks you through the process, enabling you to manage databases using Adminer—a lightweight yet powerful database interface—right within VS Code.
Why Use Selfmade Ninja Labs for MySQL Integration?
For aspiring IT students and professionals, Selfmade Ninja Lab cloud lab training for aspiring IT students provides a centralized, efficient way to handle coding and database management. Integrating MySQL with VS Code allows you to work seamlessly in one environment. Adminer enhances this experience by offering a simple, browser-based interface to manage your databases effortlessly.
Step 1:
Access Adminer in VS Code
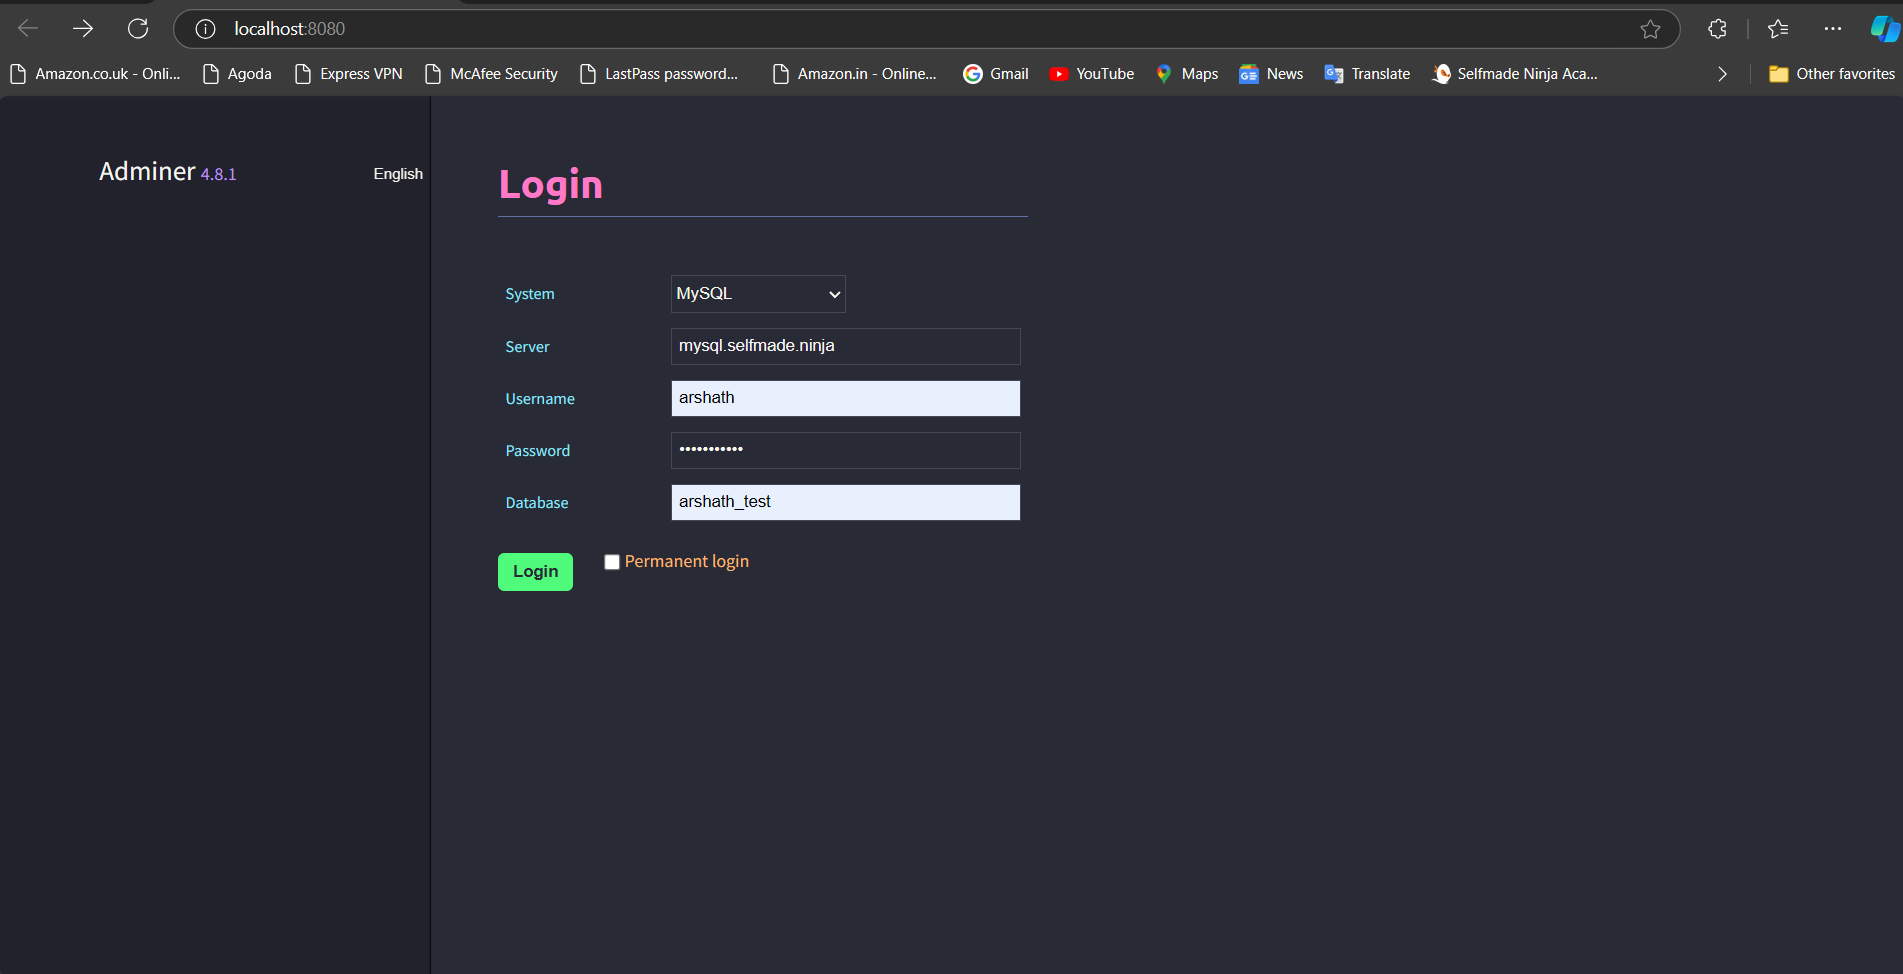
After setting up port forwarding, access Adminer, a lightweight database management tool, directly in VS Code or via a browser. Adminer simplifies database tasks and is especially useful during Selfmade Ninja Lab cloud lab training for aspiring IT students.
- Visit labs.selfmade.ninja
- Follow the signup instructions to create your account.
- Adminer is accessible at http://localhost:8080/.
Step 2:
Configure MySQL Port Forwarding in VS Code
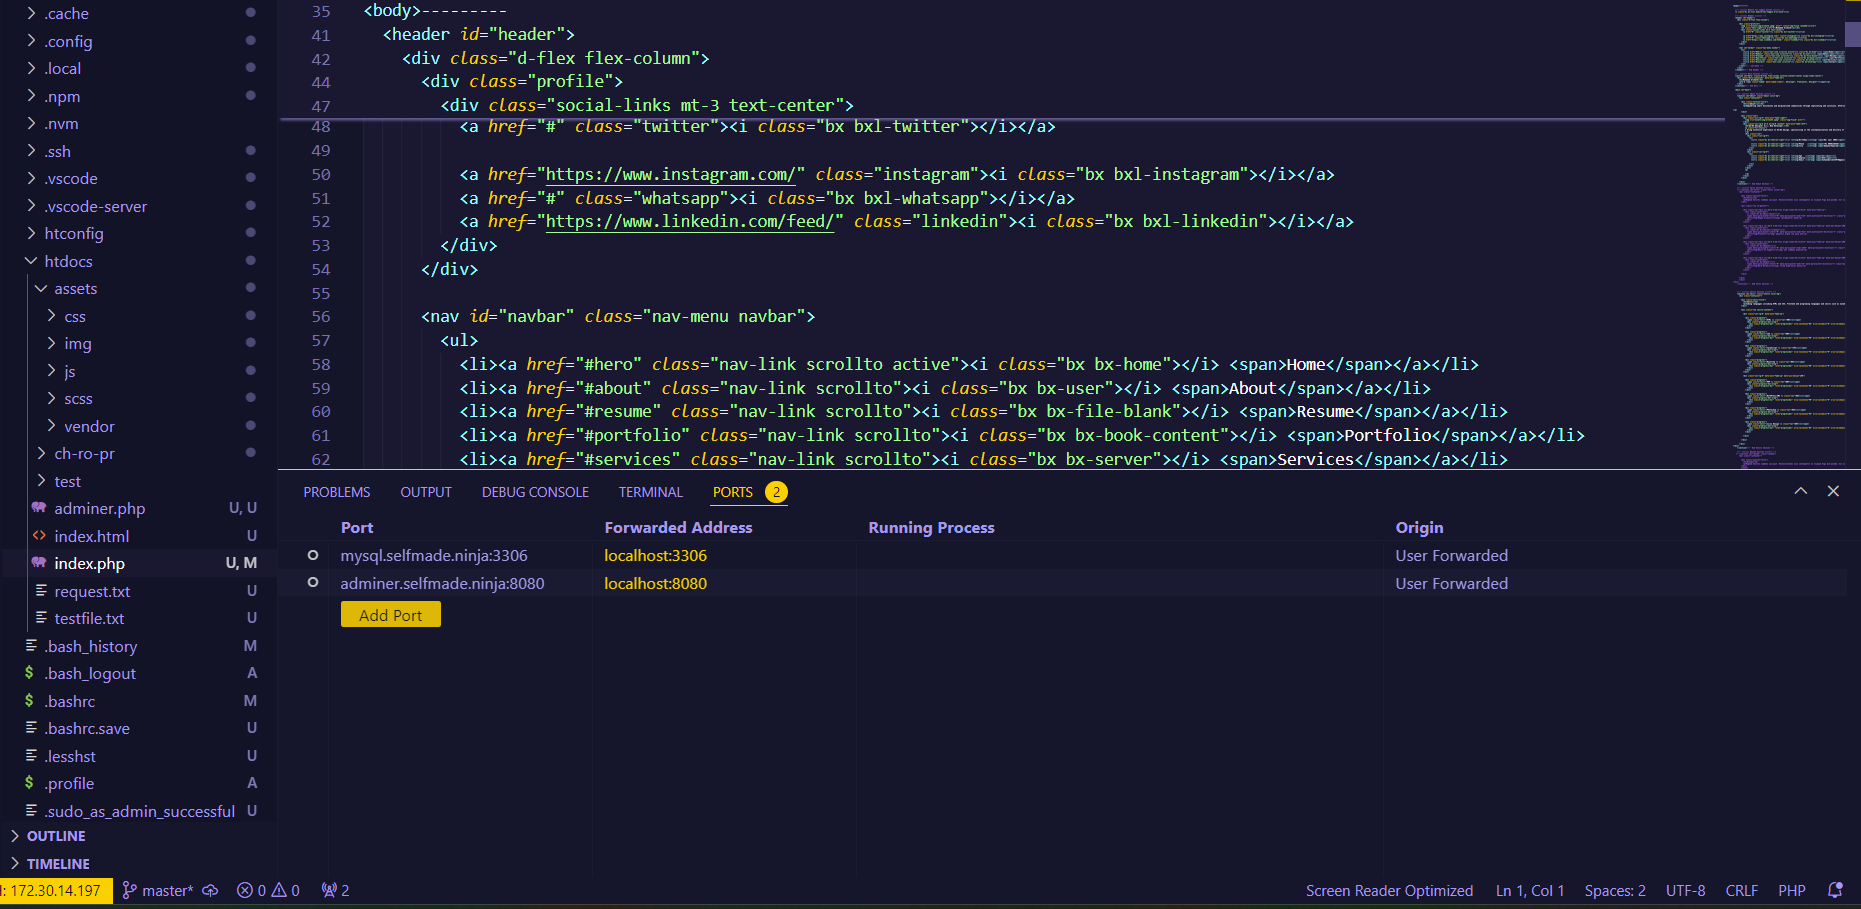
The first step to getting everything connected is to set up MySQL port forwarding in VS Code. Don’t worry – this sounds more complex than it is! Start by opening VS Code and navigating to the Ports section. You can find this in the Remote Explorer section, or simply hit the command palette (Ctrl+Shift+P on Windows or Cmd+Shift+P on Mac) and type in “Ports” to locate it.
Once there, it’s time to add a port. This is like opening a door to allow MySQL to connect to VS Code. Here’s what you need to enter:
- Host: mysql.selfmade.ninja
- Port: 3306

Step 3:
Navigating the Adminer Dashboard
With Adminer up and running, you’ll see a clean, user-friendly interface designed to make database management easy. You can access Adminer directly at http://localhost:8080/. The dashboard is divided into sections to help you quickly locate what you need. Here’s a quick look at what you can do with each section:

- Tables: Want to see all the tables in your MySQL database? The Tables section gives you a full list. From here, you can click on each table to view, edit, or delete records.
- Queries: Need to run a quick query? The Query section is where you can type out SQL commands and execute them instantly.This is super handy if you’re testing new data or running checks on your database.
- Import/Export: If you’re working with large data sets, you’ll likely need to import or export data. Adminer’s import/export feature lets you handle this effortlessly without needing additional software.
This layout makes it easy to stay organized, even if you’re working with multiple databases. You’ll feel like a database pro in no time!
Wrapping Up: Enjoy Seamless Database Management in VS Code
And that’s it! By following these steps, you’ve connected MySQL to VS Code with Selfmade Ninja Labs, and you’ve got Adminer set up to manage your databases smoothly. This setup isn’t just efficient – it’s also a major productivity boost. By keeping everything within VS Code, you can code, manage databases, and test all in one place, helping you stay focused and streamlined.
Using Adminer in VS Code will make database management feel more natural. You’ll save time, reduce distractions, and enjoy a powerful, integrated environment that keeps all your work within reach. Whether you’re a newbie or an experienced developer, this setup is a game-changer. So, go ahead and explore your databases in Adminer, play around with some SQL commands, and make the most of this all-in-one development experience!
With your MySQL and VS Code integration set, your workflow is ready to handle any database task that comes your way. Happy coding!


