Selfmade Ninja Lab provides a cutting-edge platform for aspiring IT students to gain hands-on experience in a secure and practical environment. This guide will walk you through hosting a WordPress website using Selfmade Ninja Lab’s reliable and flexible infrastructure.
we will focus on how to install WordPress on Ubuntu 18.04. WordPress is a free and open-source content management platform based on PHP and MySQL. It’s the world’s leading blogging and content management system with a market share of over 60%, dwarfing its rivals such as Joomla and Drupal. WordPress was first released on May 27th, 2003 and powers over 60 million websites to date! So powerful and popular it has become that some major brands/companies have hosted their sites on the platform. These include Sony Music, Katy Perry, New York Post, and TED.
It’s very easy to install WordPress on Ubuntu or any other operating system. There are so many open-source scripts to even automate this process. Many hosting companies provide a one-click install feature for WordPress to get you started in no time.
Ease of Use
This platform offers a simple, intuitive dashboard that requires no prior knowledge of programming languages like PHP, HTML5, or CSS3. With just a few clicks, you can build a professional site. Additionally, it provides free templates, widgets, and plugins to simplify the process of starting your blog or website.Responsive Design
The platform is inherently responsive, ensuring your site fits seamlessly across multiple devices. This also boosts your site’s ranking in search engines!Quick Installation and Upgrades
Installation on Ubuntu and other operating systems is straightforward, with numerous scripts available to automate the process. Many hosting providers offer a one-click setup feature, saving you time.SEO-Ready Framework
Built with clean, consistent code, it ensures your site is easily indexable by search engines. Tools like the Yoast plugin can further enhance rankings.Getting Started with Selfmade Ninja Lab
Selfmade Ninja Lab simplifies cloud lab training for aspiring IT students. Here’s how you can begin:
- Sign In or Create an Account:
- If you already have an account, Sign in to Selfmade Ninja Lab (Click here)
- New user? Create your account here.
- Access the Cloud Lab Dashboard:
- Visit Selfmade Ninja Labs.
How to Create a WordPress Database in Selfmade Ninja Cloud Labs
Selfmade Ninja Labs provides an easy and seamless way to set up a WordPress database. Follow these steps to create a WordPress database using their cloud platform:
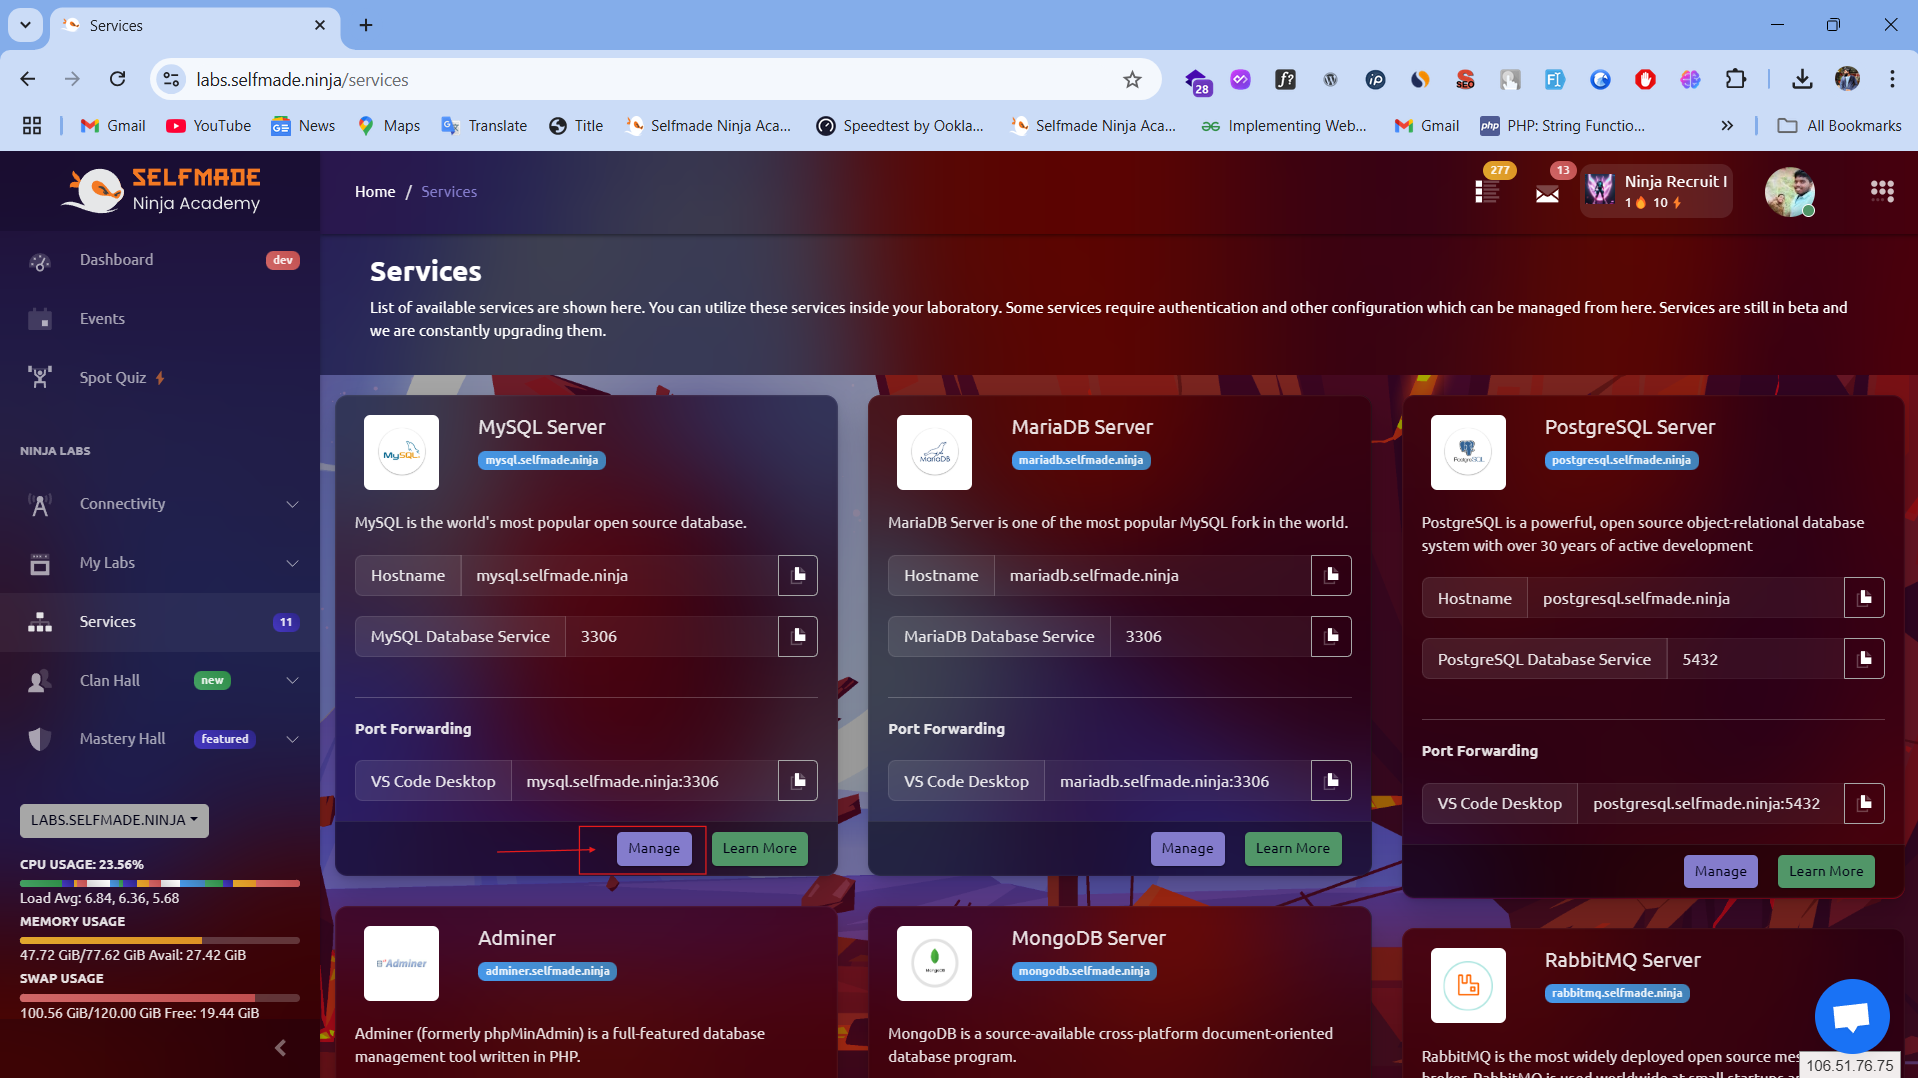
- Navigate to the “Services” section from the left-side navbar and select “MySQL Server.”
- Click the “Manage” button for the MySQL server.
- Select “Add User” and fill in the required fields: username, password, and confirm password. Click to create the new user.
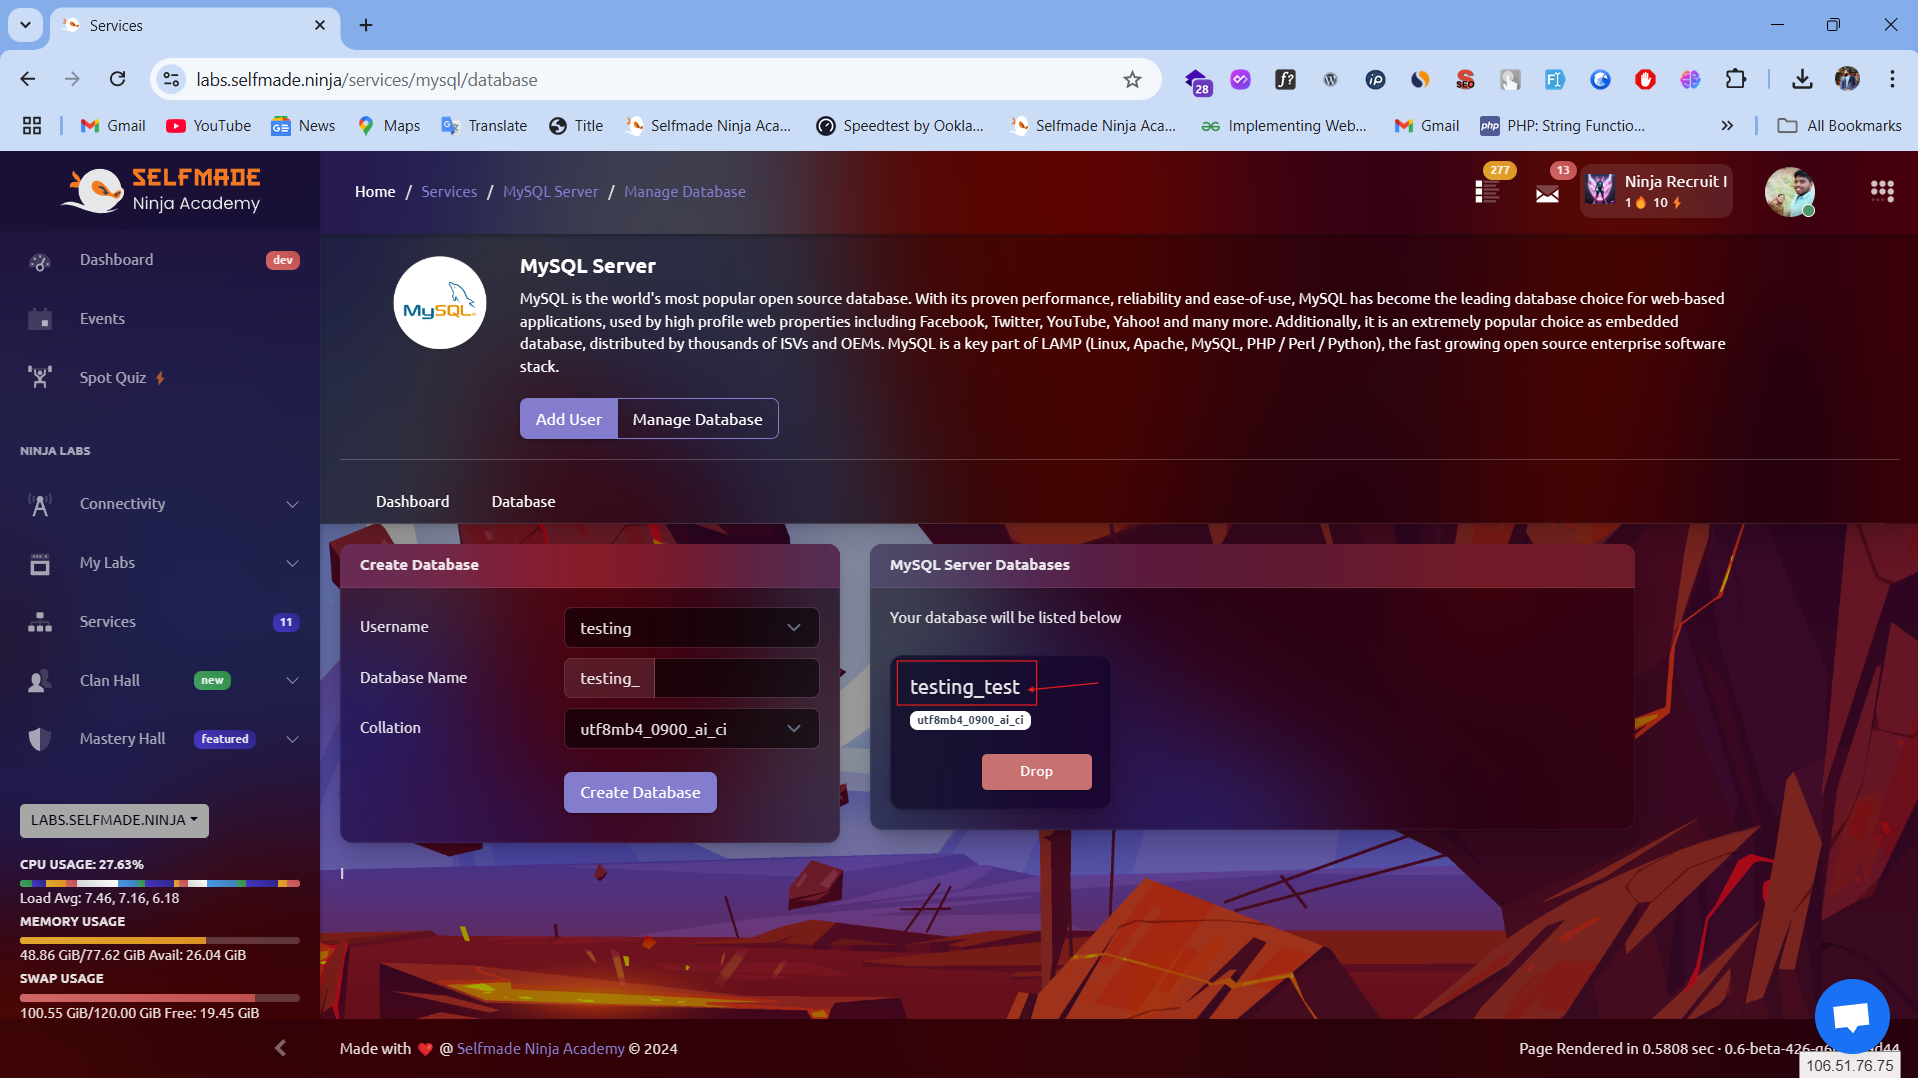
- Once the user is created, click “Manage Database” to create a database name. You can copy the database name & password to your clipboard for later use.
Installing WordPress CMS on Selfmade Ninja Cloud Labs
Setting up WordPress CMS on Selfmade Ninja Labs is simple and efficient. Here’s how to do it:
Step 1: Accessing the Machine Lab
- Navigate to the “My Lab” section from the left-side navbar and select “Machine Lab.”
- Locate the “Essentials Lab” and click the “Dashboard” button (available for free users).
- Click the “Code” button on the top-right side to reveal the “Visual Studio Code on Web” option. Copy the code server password and launch the code IDE.
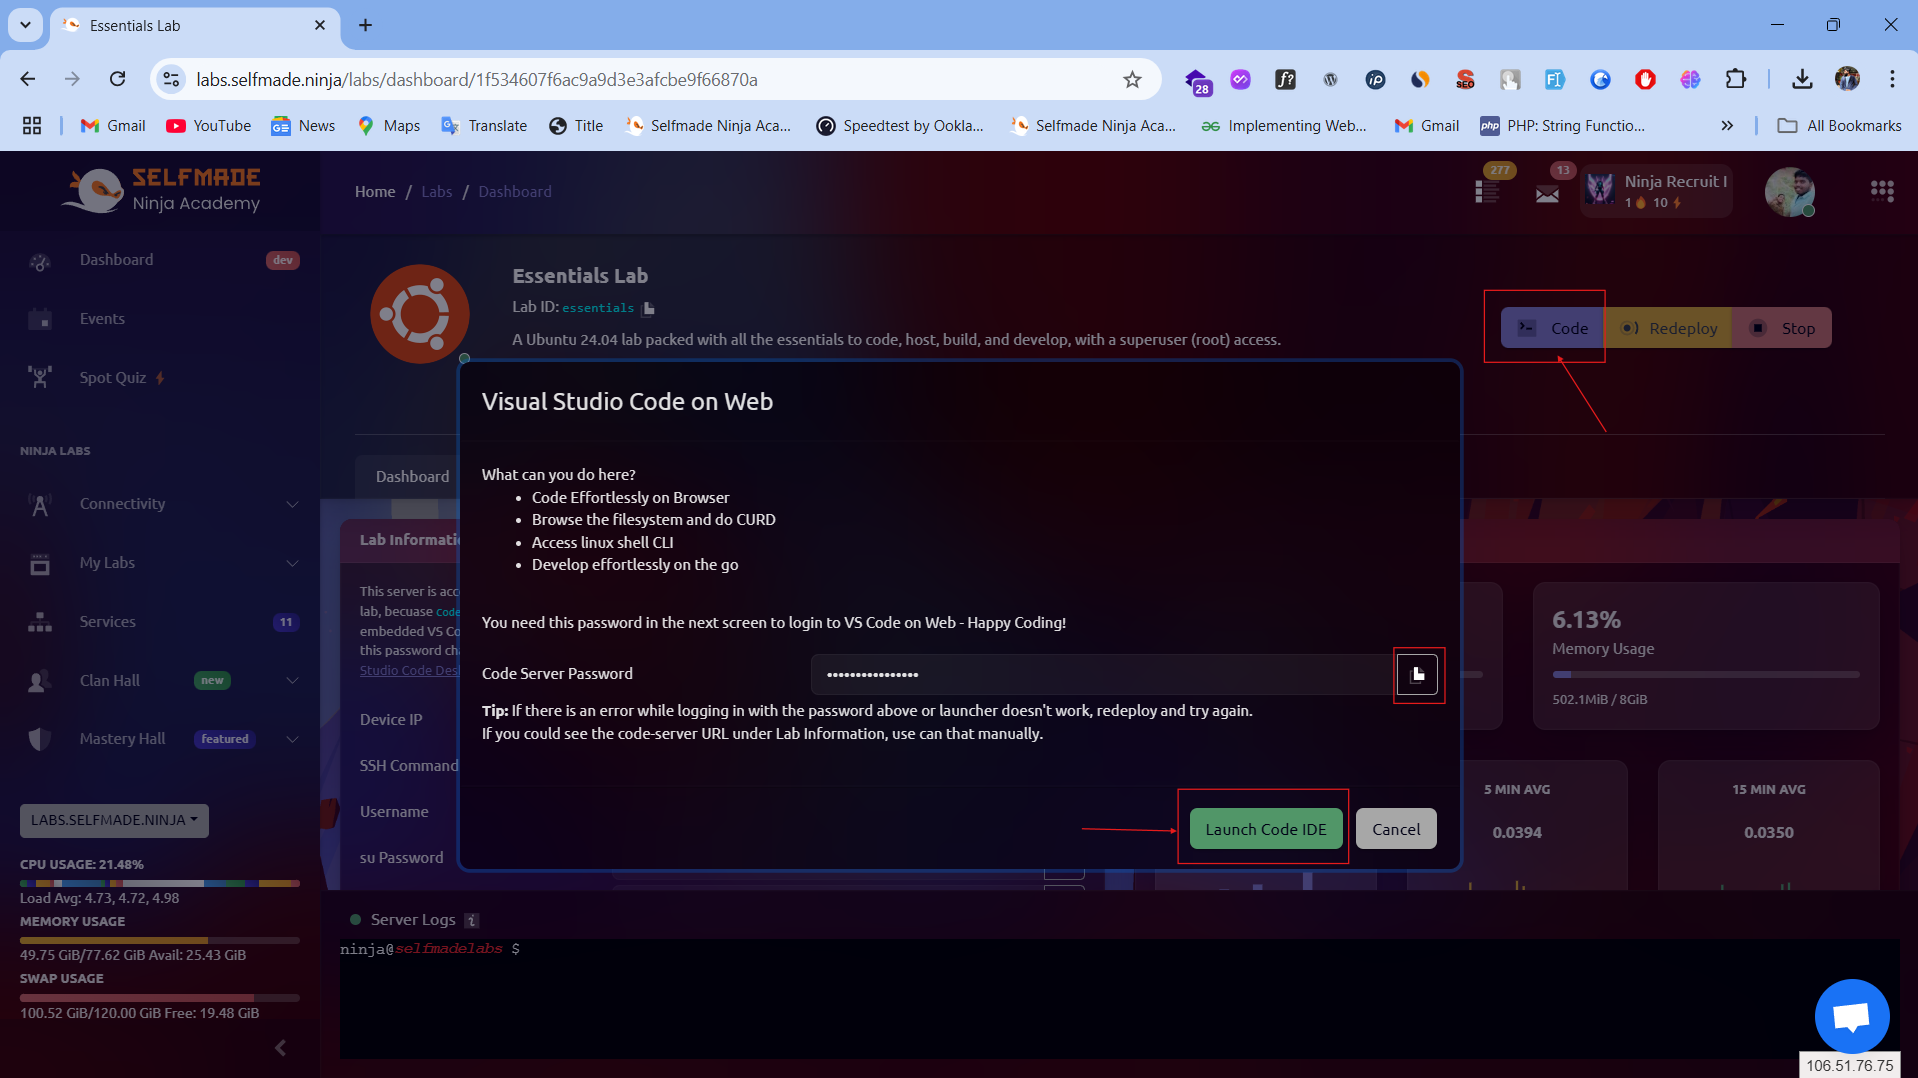
- A new tab will open with Visual Studio Code on the web. Open the terminal and proceed with the following steps.

Step 2: Setting Up WordPress
Now that your server software is configured, you can download and set up WordPress. For security reasons, it is always recommended to get the latest version of WordPress from their site.
Execute the following commands in your terminal to install WordPress:
- Download the latest version of WordPress:
cd /tmp && wget https://wordpress.org/latest.tar.gz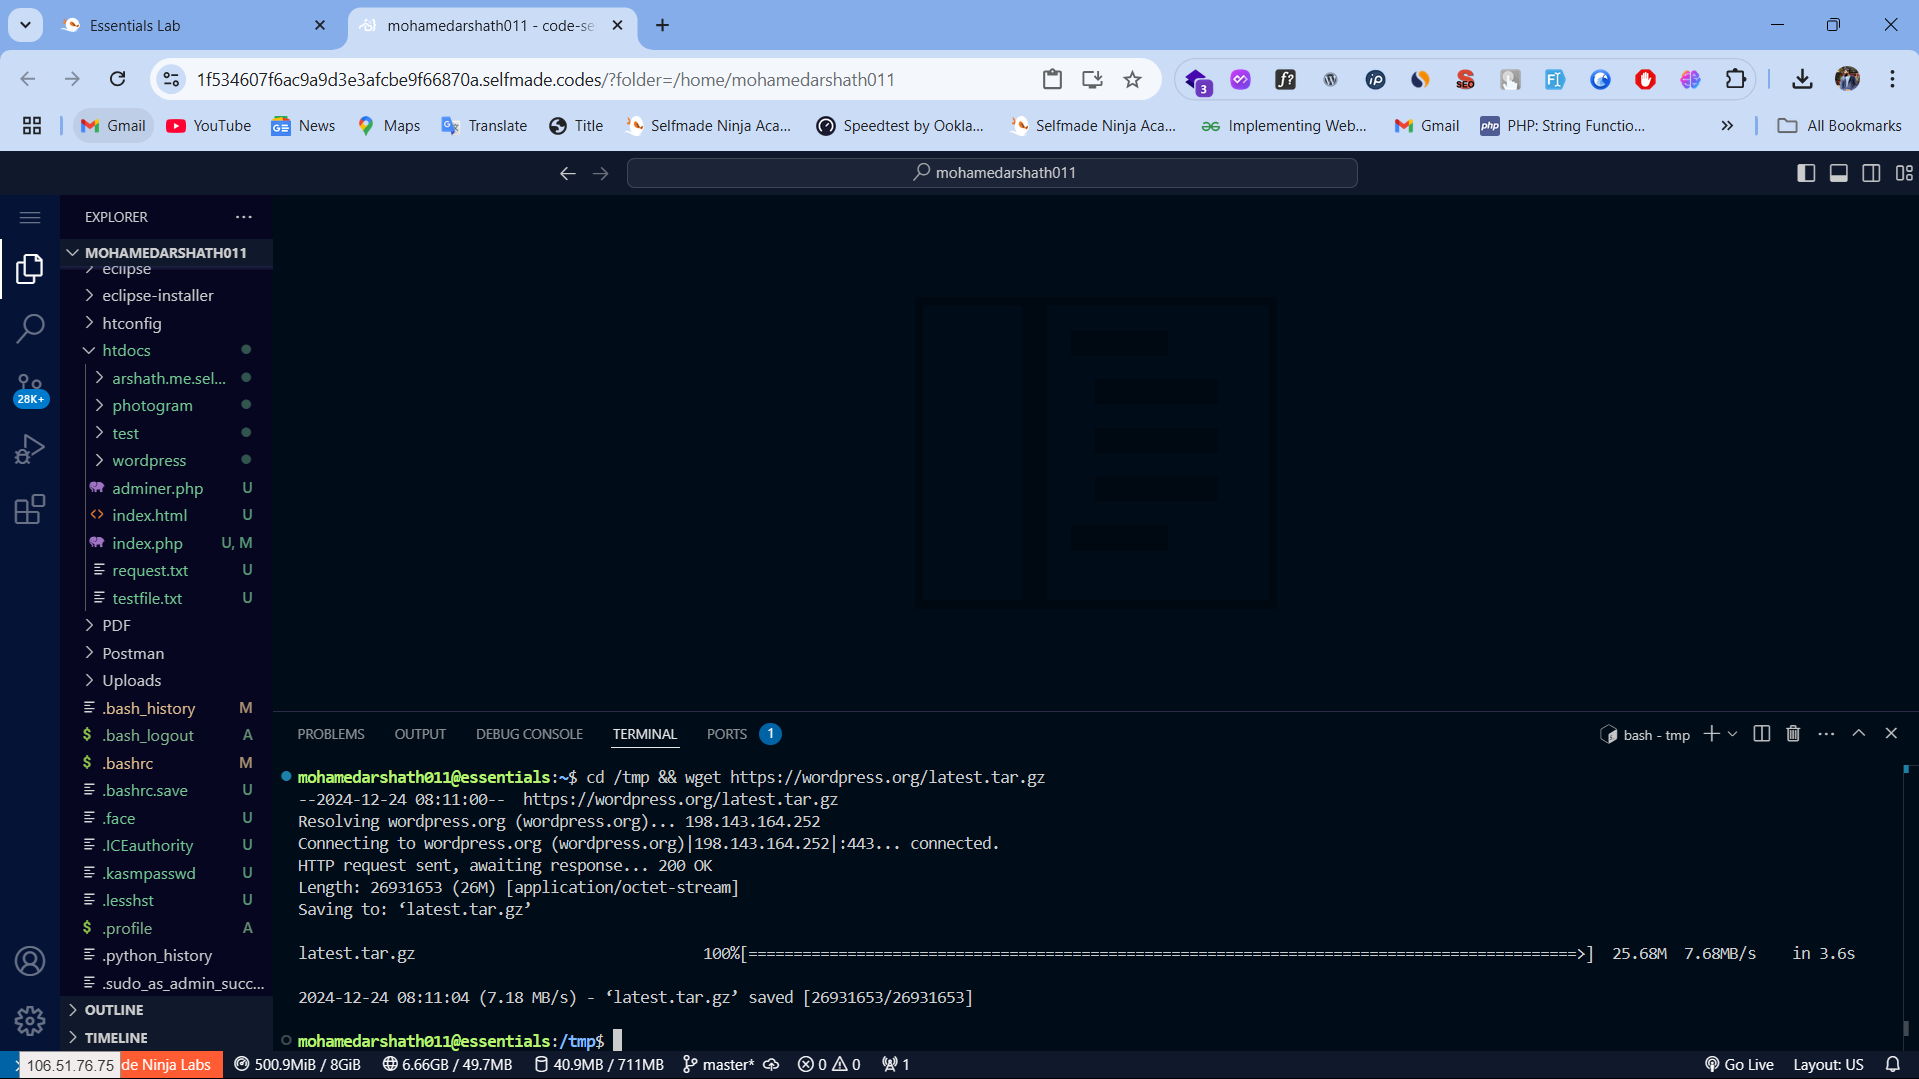
- Uncompress the tarball to generate a folder named “wordpress”:
tar -xvf latest.tar.gz - Copy the WordPress folder to the /var/www/html/ path:
cp -R wordpress /var/www/html/ - Change ownership of the WordPress directory:
chown -R www-data:www-data /var/www/html/wordpress/ - Update file permissions for the WordPress folder:
chmod -R 755 /var/www/html/wordpress/ - Create an “uploads” directory:
mkdir /var/www/html/wordpress/wp-content/uploads - Change permissions for the “uploads” directory:
chown -R www-data:www-data /var/www/html/wordpress/wp-content/uploads/
Setting Up the WordPress Configuration File
Now, you need to make some changes to the main WordPress configuration file. When you open the file, your first task will be to adjust some secret keys to provide a level of security for your installation. WordPress provides a secure generator for these values so that you do not have to try to come up with good values on your own. These are only used internally, so it won’t hurt usability to have complex, secure values here.
- Generate secure keys for added security:
Copy the output generated.curl -s https://api.wordpress.org/secret-key/1.1/salt/ - Open the WordPress configuration file:
sudo nano /var/www/html/wordpress/wp-config.php - Replace the default key placeholders with the secure keys you copied.
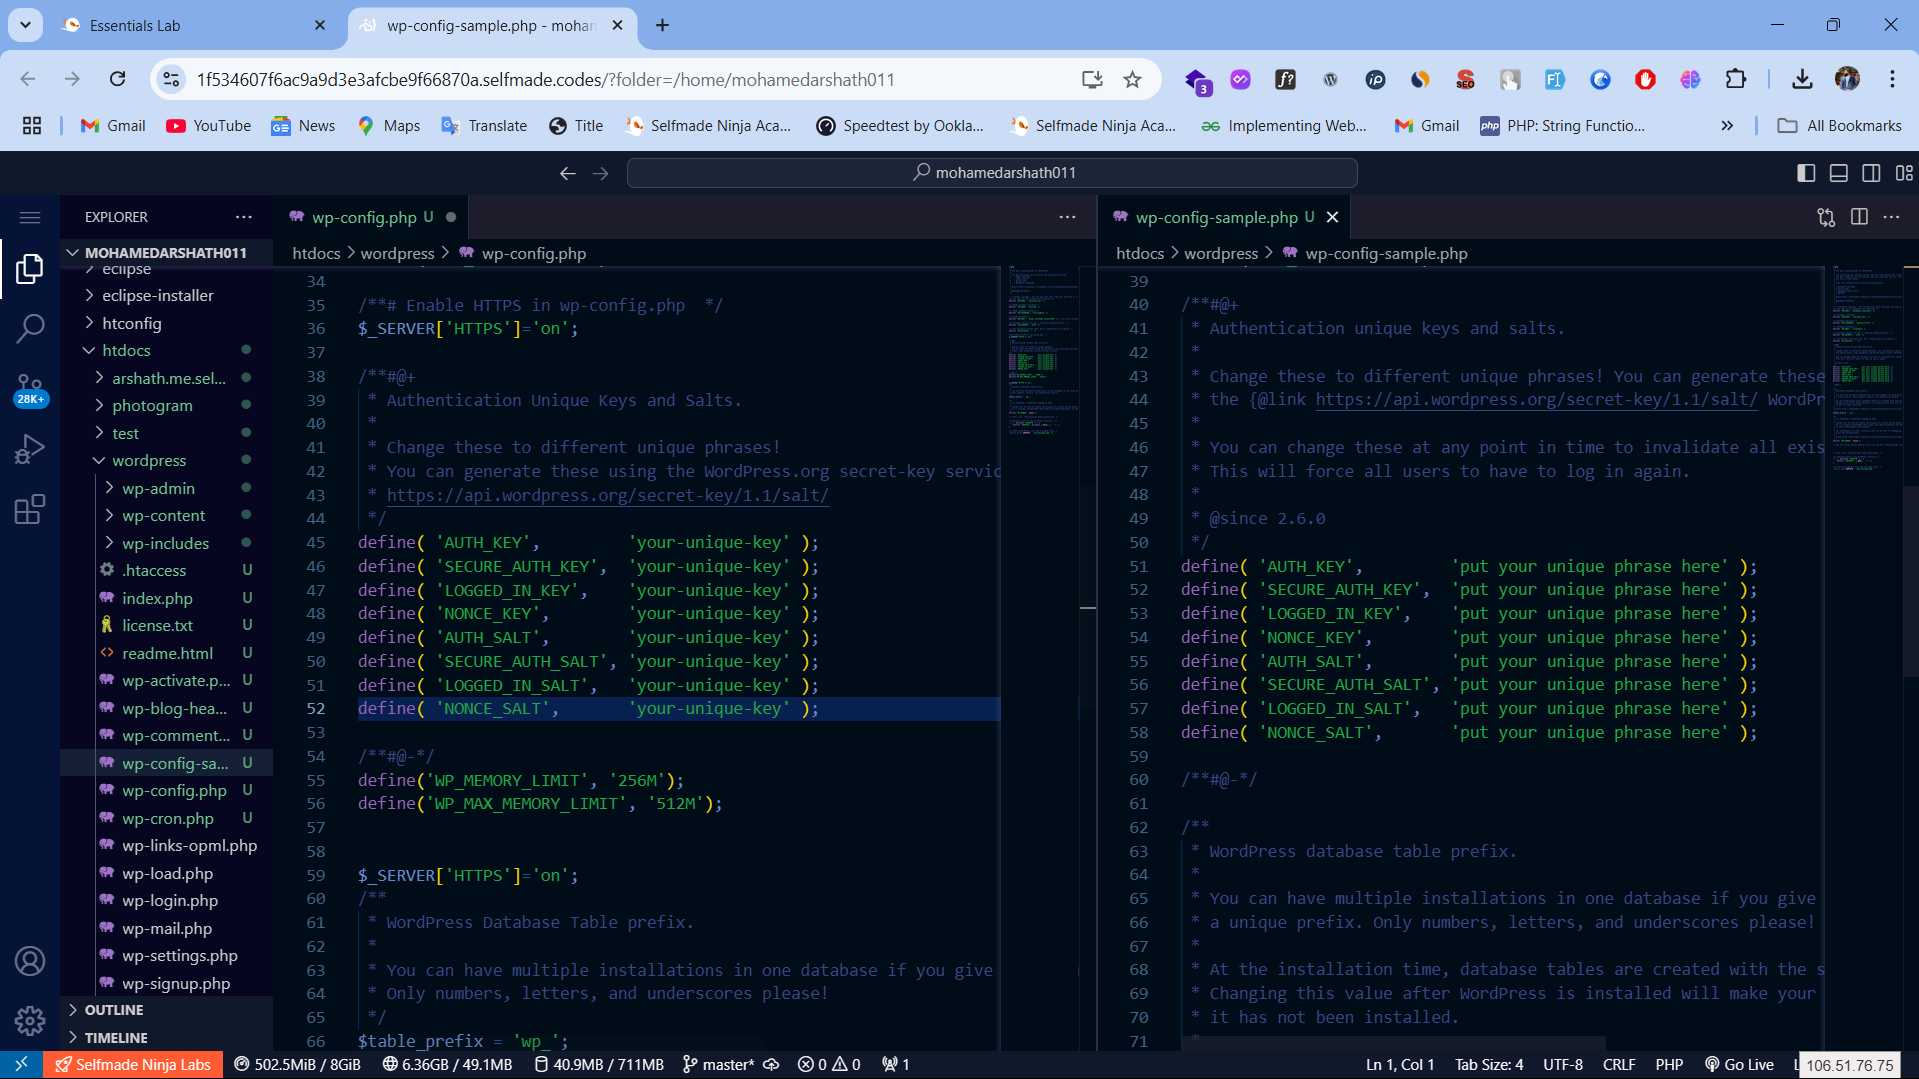
Next, update the database connection settings at the start of the file. You’ll need to modify the database name, username, and password to match the configuration you set up in MySQL.
Additionally, adjust the method WordPress uses to handle file operations. Since the web server has the necessary permissions to write to the required locations, set the filesystem method to “direct.” Without this configuration, WordPress may prompt you to provide FTP credentials for certain actions.
You can add this setting below the database connection details or anywhere else in the file.
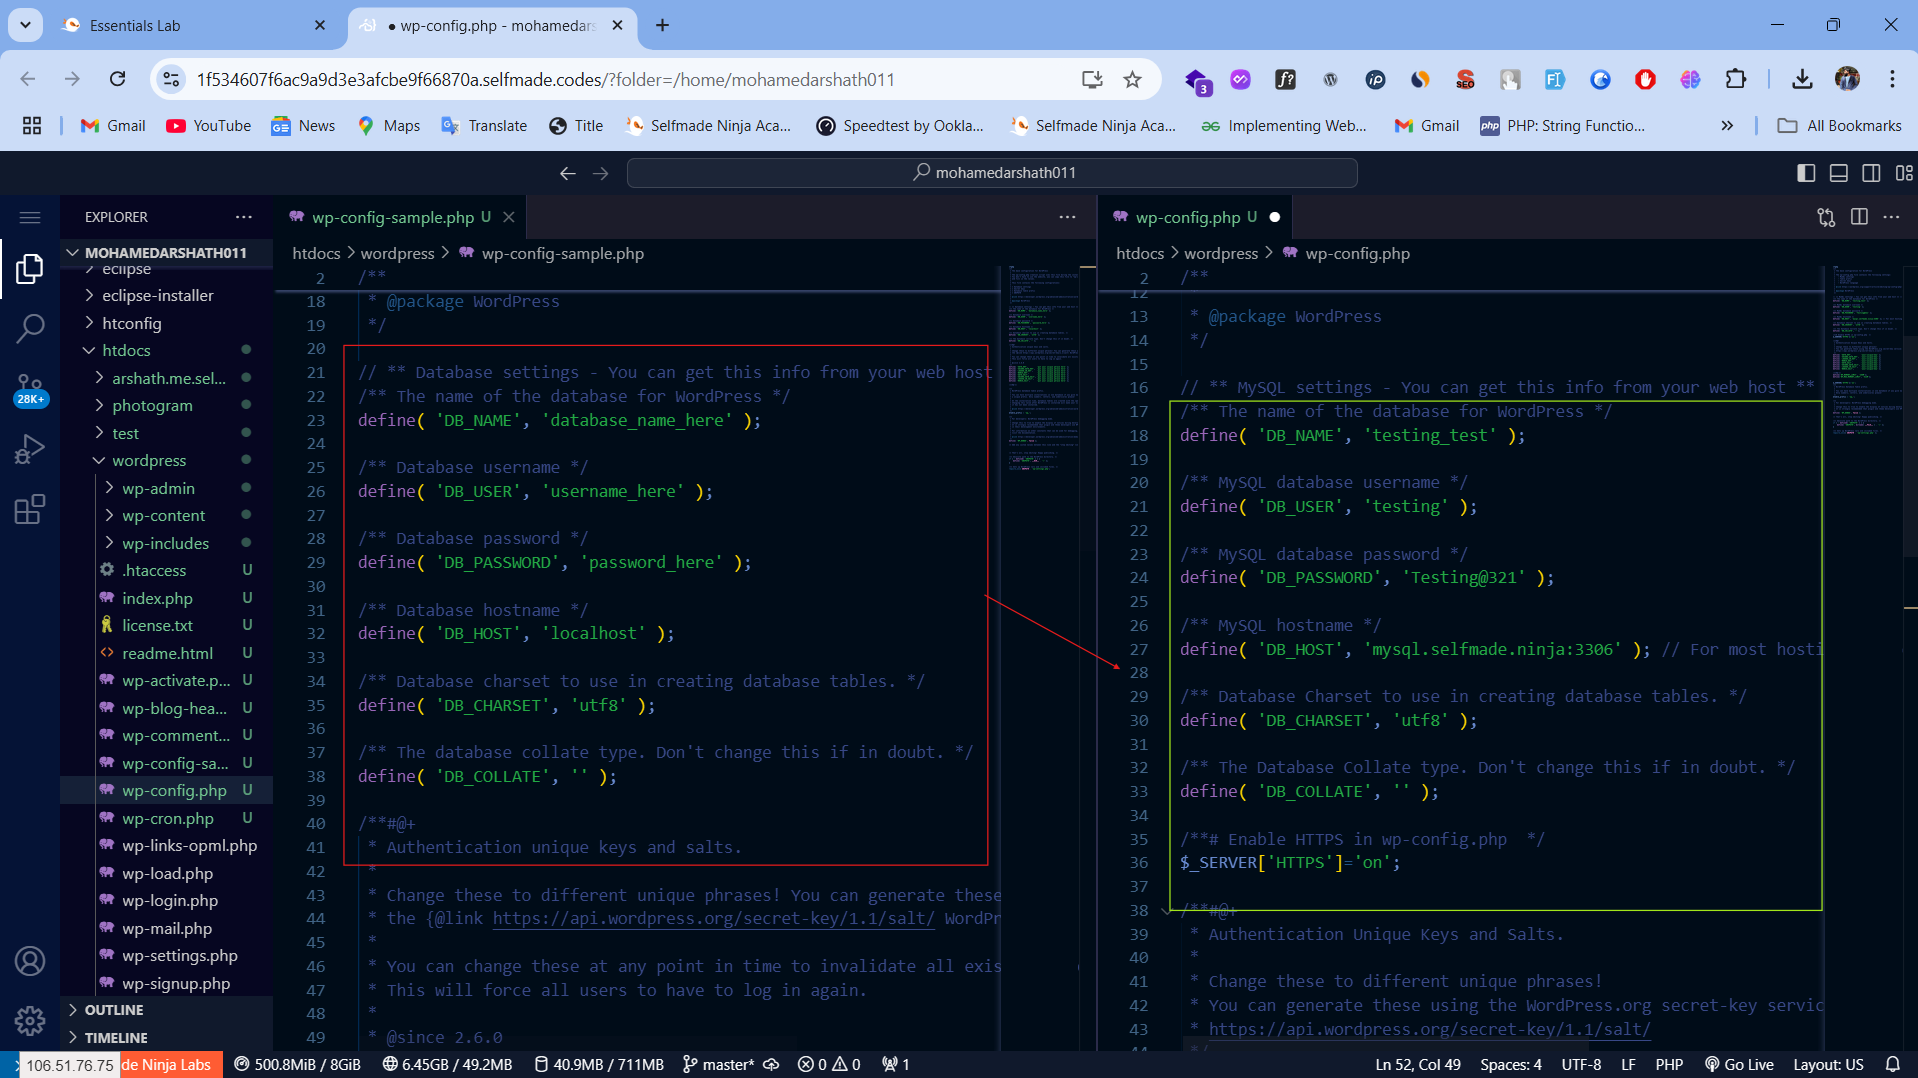
Save and close the file when you are finished.
Completing Installation Through the Web Interface
Now that the server configuration is complete, you can complete the installation through the web interface.
- Open your web browser and navigate to your server’s domain name or public IP address:
- For the primary user:
https://server_domain_or_IP/wordpress - For free users:
If you have port-forwarding set up, access your WordPress website by using port 80.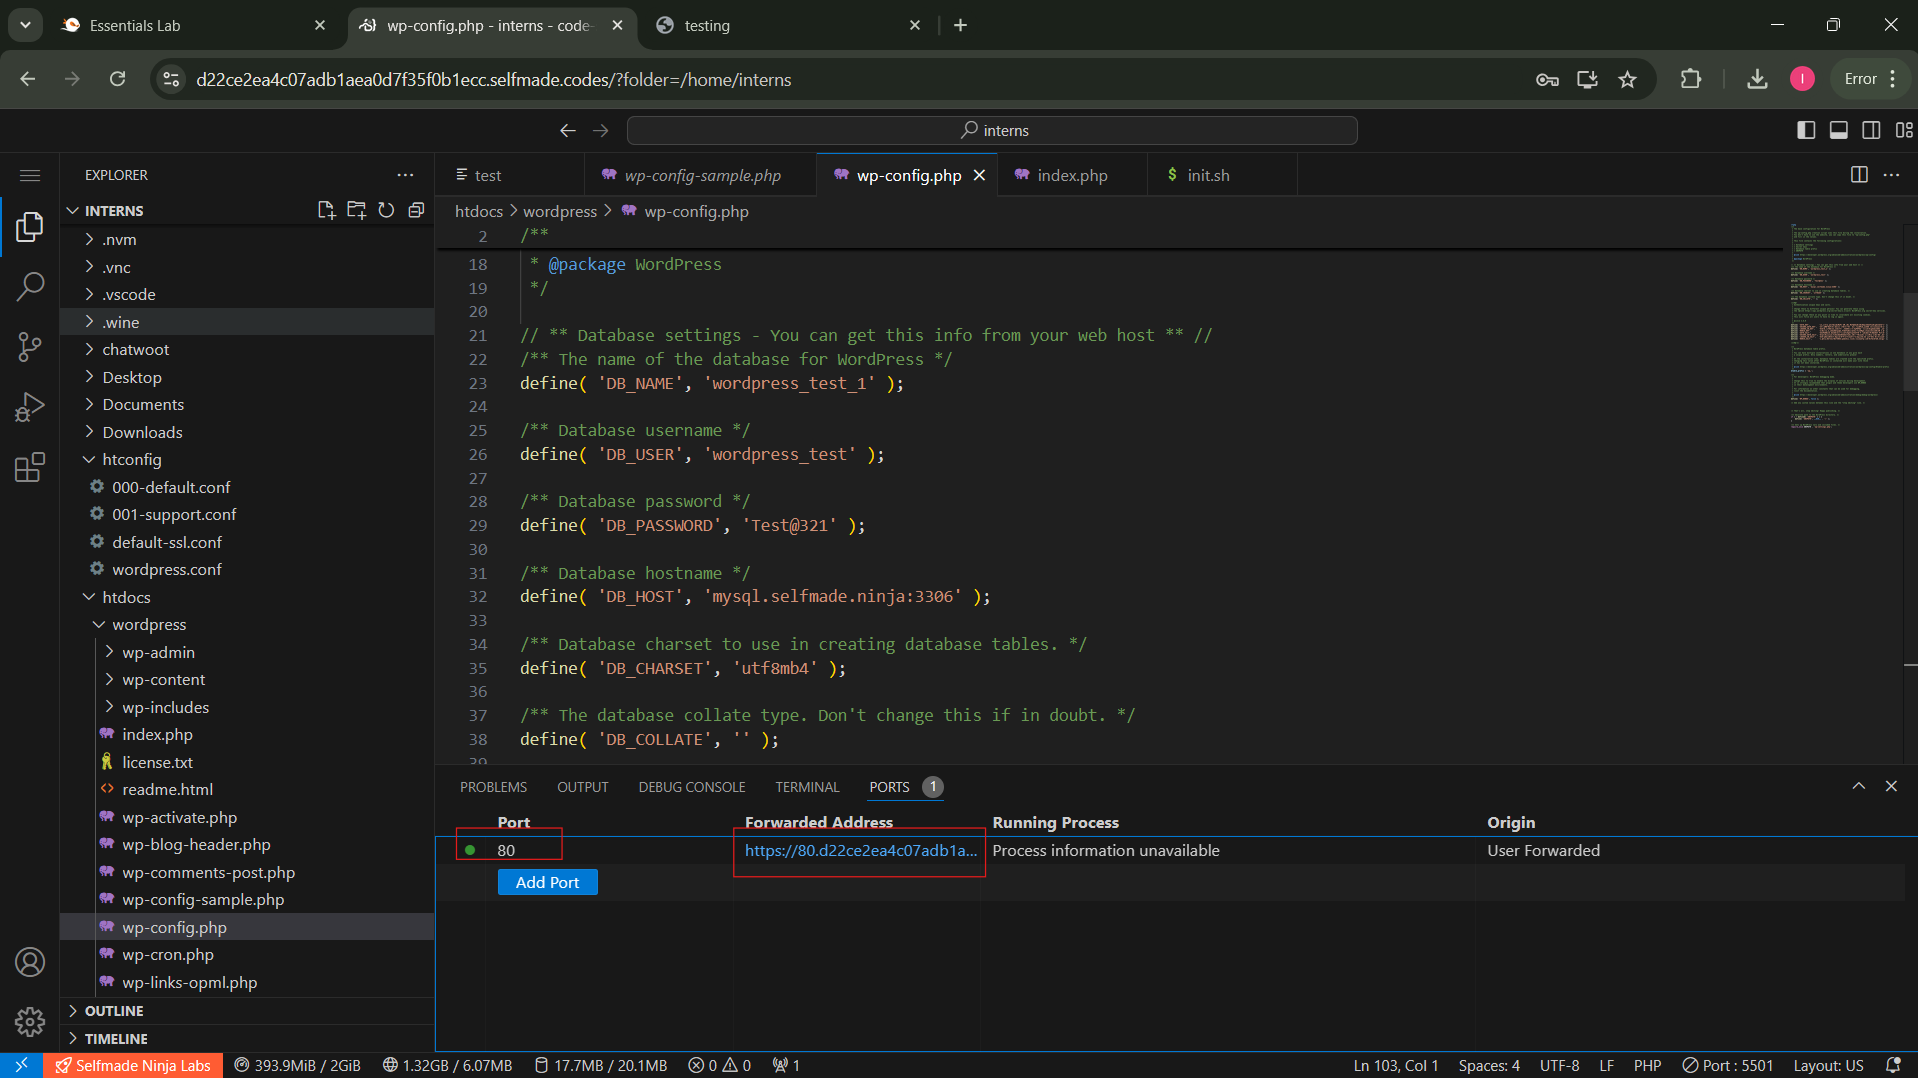
- For the primary user:
- You will be prompted to select the language you would like to use:
- Follow the WordPress installation wizard. Provide the database credentials you set up in Selfmade Ninja Labs (database name, username, and password)
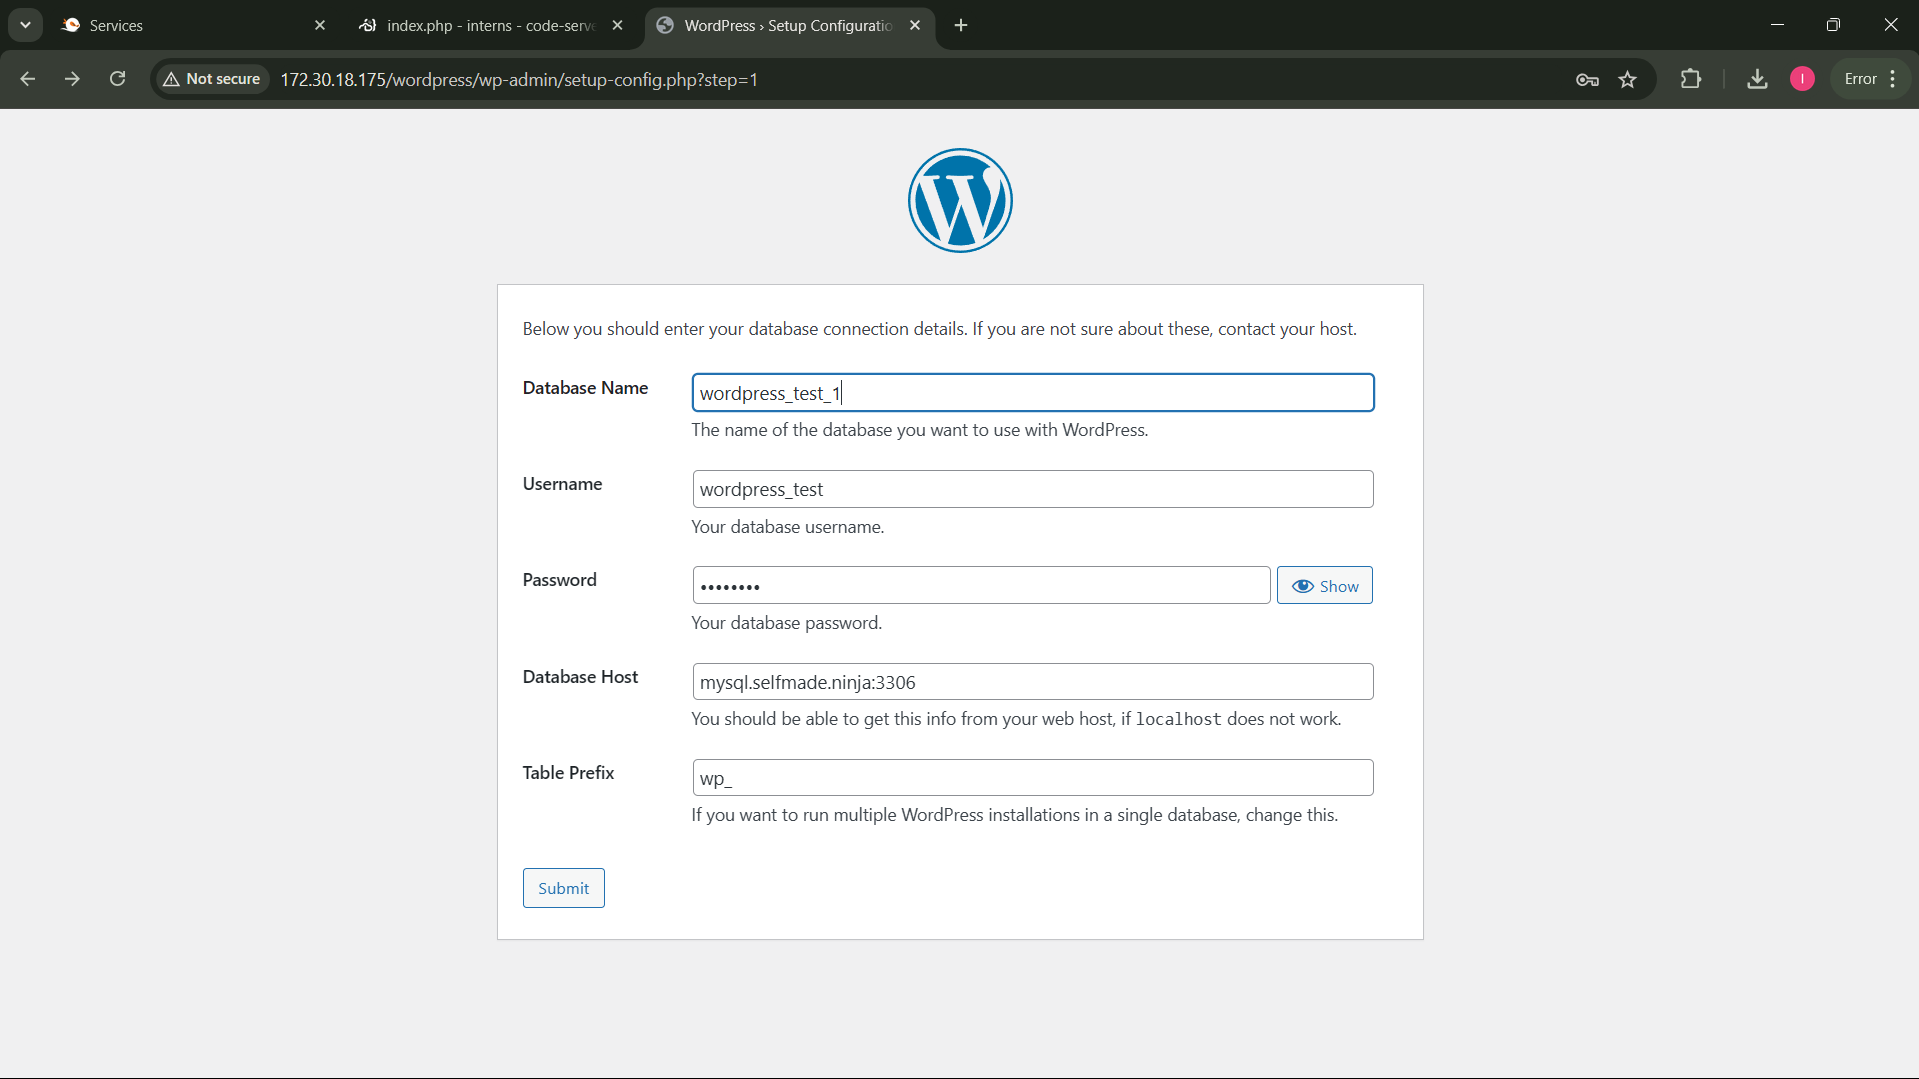
- If the details are correct, proceed with the installation.
- Fill out additional details such as the site title, admin username, and password. Ensure you use a strong password.
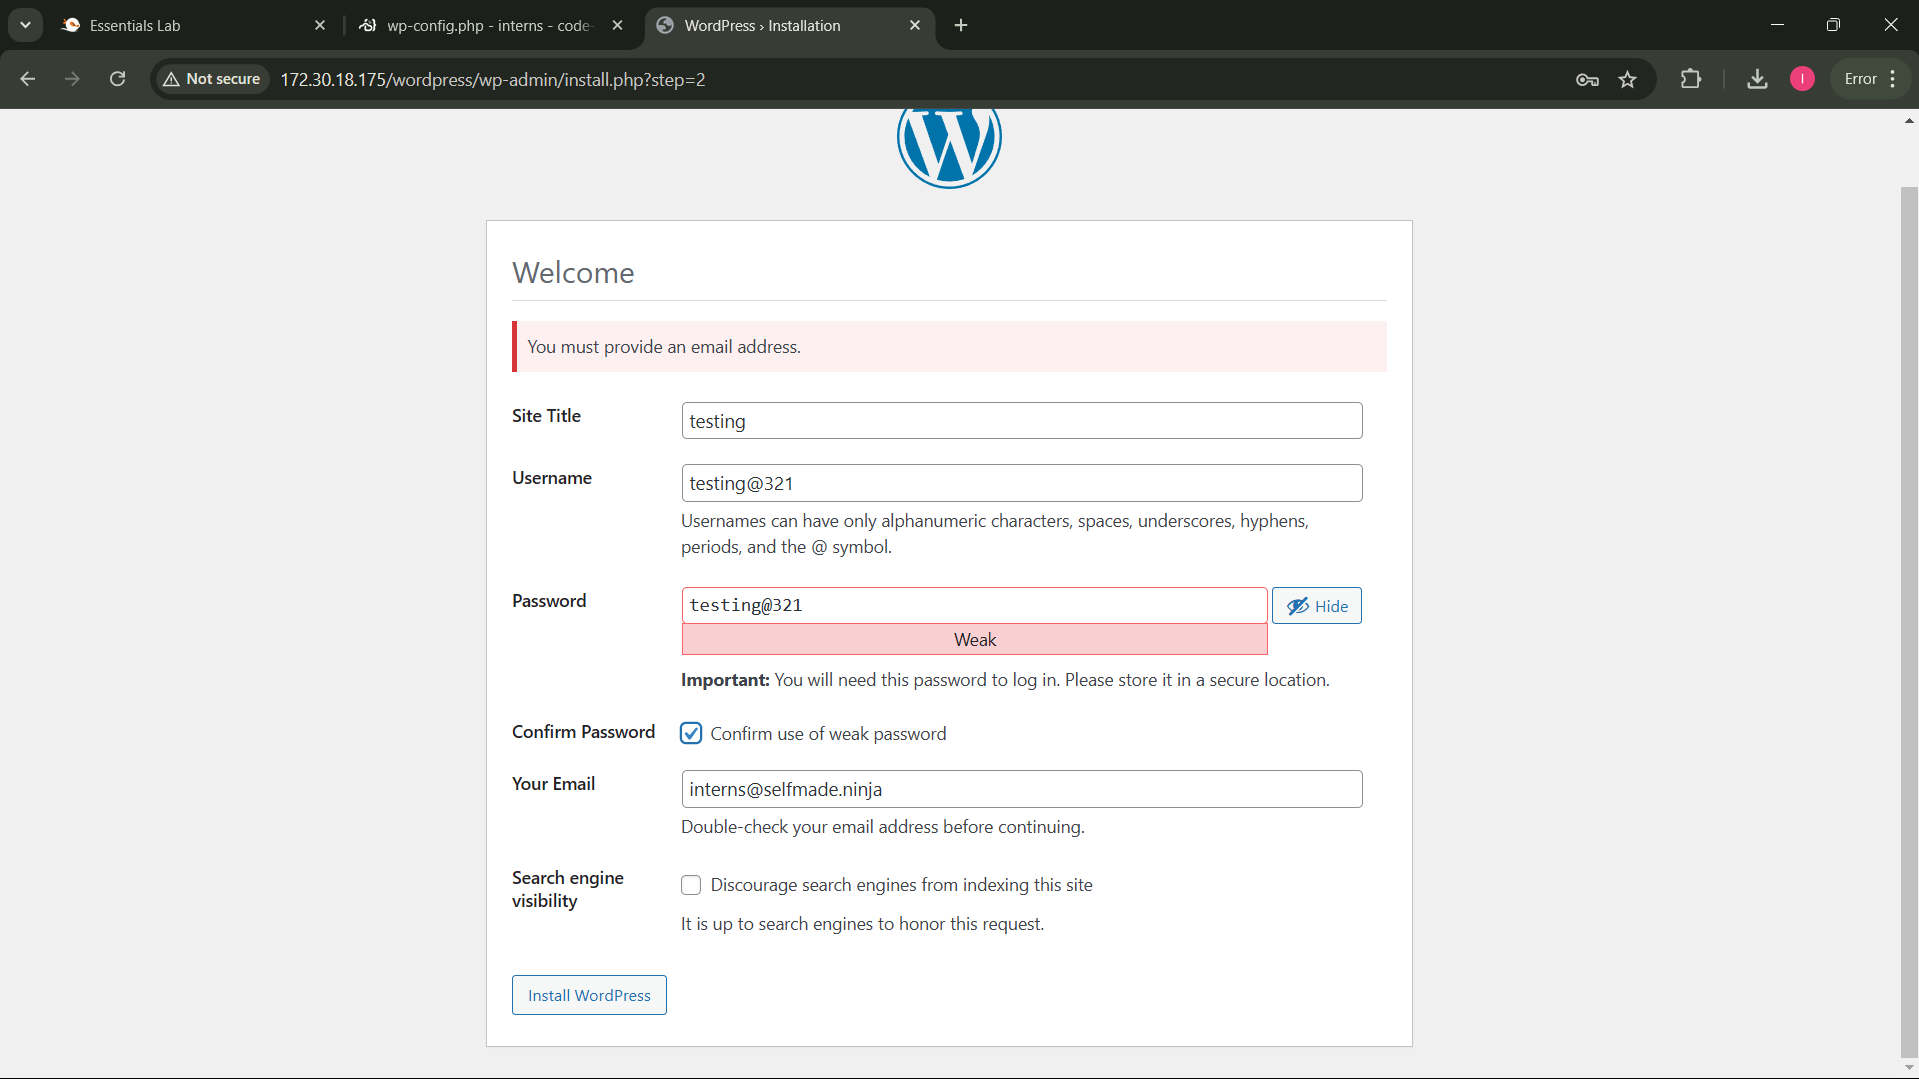
- Click “Install WordPress.” If successful, you’ll see a success notification.
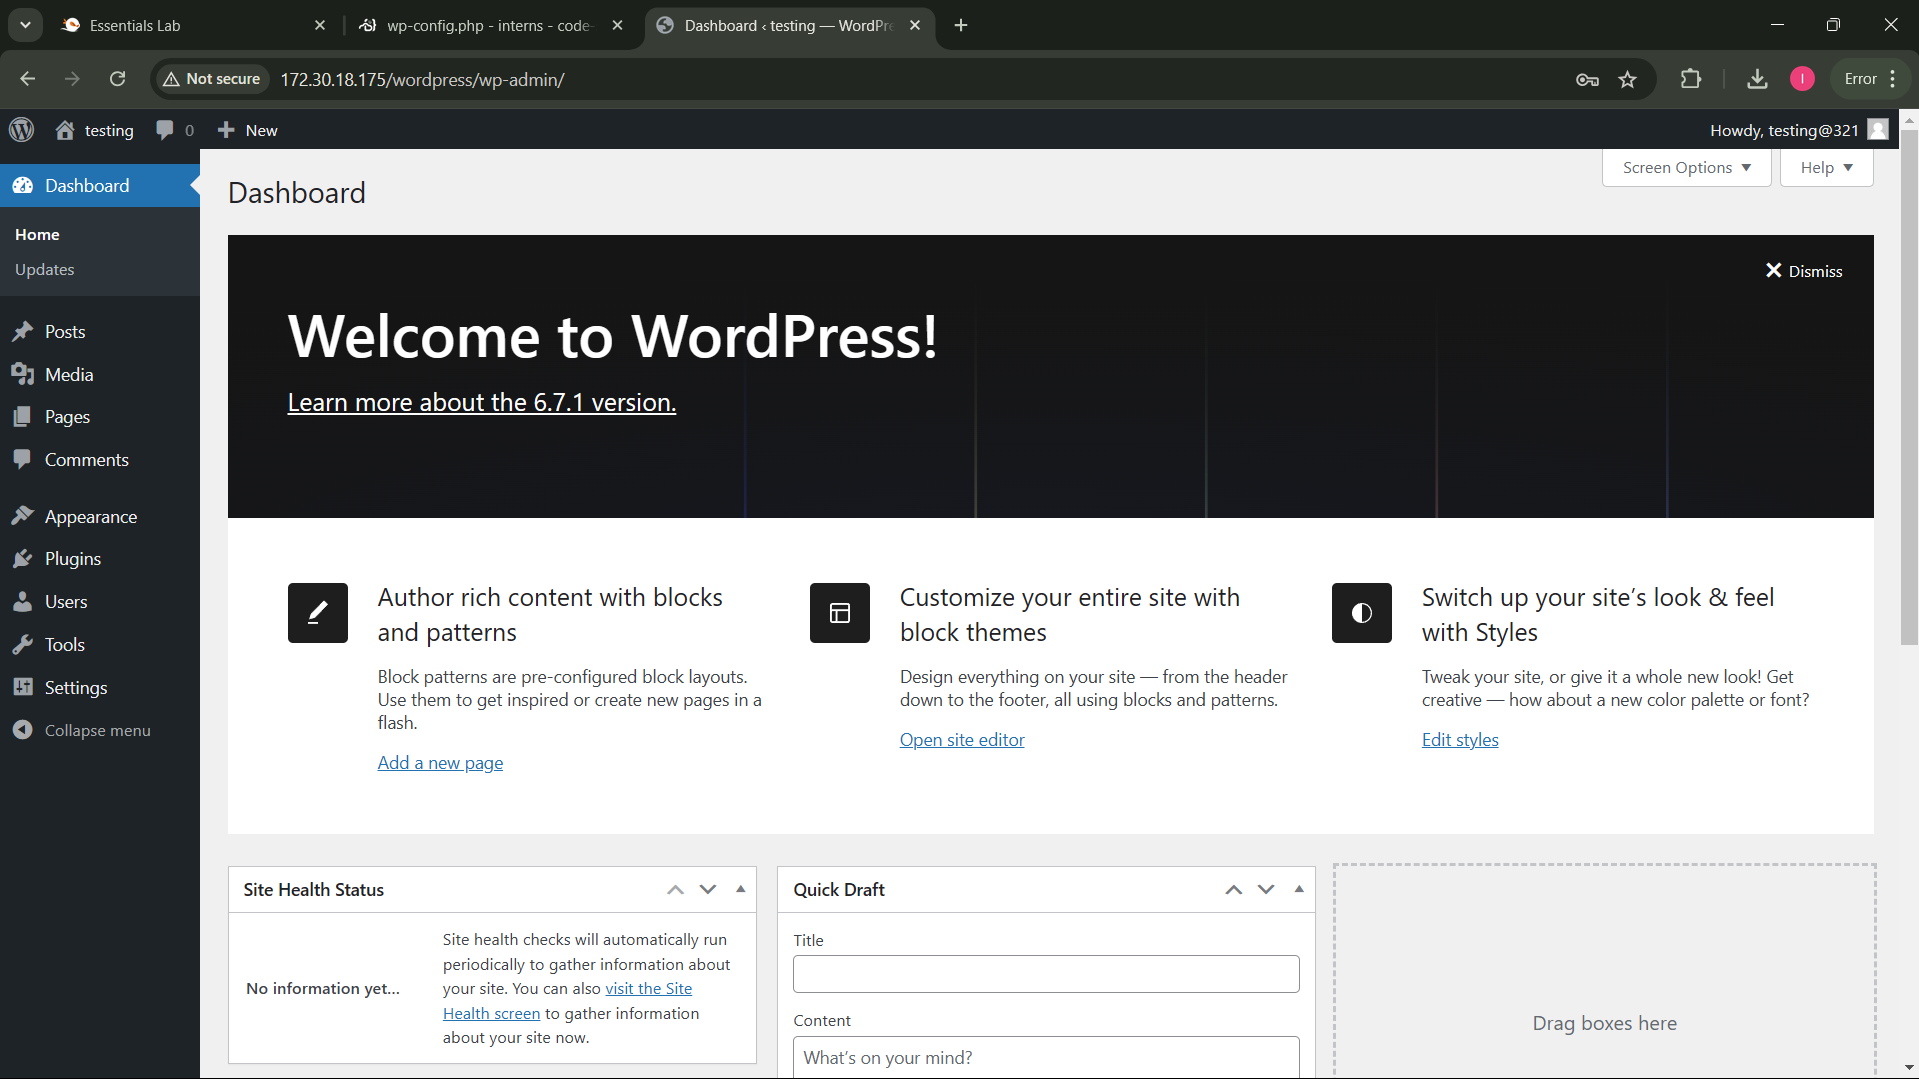
- Click “Login” to access your WordPress dashboard and start customizing your site.

Next Steps After Installation
Congratulations! WordPress is now installed and ready to use. Here are some additional steps to enhance your website:
- Permalinks: Go to Settings > Permalinks and choose your preferred structure for WordPress posts.
- Themes: Navigate to Appearance > Themes to select a new theme.
- Plugins: Install new plugins under Plugins > Add New to expand your site’s functionality.
- Add Users: If collaborating, add new users under Users > Add New.
Dive in and start creating your dream website or blog with WordPress today!
Why Choose Selfmade Ninja Lab for WordPress Hosting?
- Tailored for Aspiring IT Students: Selfmade Ninja Lab’s cloud lab training offers a real-world environment for developing and hosting projects.
- Secure and Scalable: VPN access and customizable settings ensure security and flexibility for all users.
- Hands-On Learning: Perfect for IT students looking to enhance their skills in managing servers, deploying applications, and database configuration.
By leveraging Selfmade Ninja Lab cloud lab training for aspiring IT students, you gain practical knowledge in a secure and reliable environment, making it an excellent choice for WordPress hosting and beyond.
Get started today with Selfmade Ninja Lab and elevate your IT skills with this powerful platform. Happy hosting! 😊
