Introduction
In the finals of the Yukthi CTF 2024, I, Meena, a cybercrime investigator from Chennai, undertook an intense Cyber Investigation CTF challenge. This journey provided hands-on experience in digital forensics, emphasizing the importance of securing sensitive information, identifying breaches, and managing server intrusions within a company’s infrastructure.
Key Takeaways for Aspiring IT Students
This article highlights several crucial techniques beneficial for students aiming to build their expertise in Cyber Investigation CTF challenges and Selfmade Ninja Lab cloud lab training.
- Analyzing exposed .git repositories to locate sensitive data.
- Strategies to obtain privileged web access using secret keys.
- Executing SQL injection to retrieve critical information.
- Leveraging setuid permissions for root access escalation on a Linux server.
Getting Started
To begin with, participants need to complete a few essential steps:
- Create an Account:
- Activate Wireguard:
- Access the Machine Labs:
- Navigate to the Machine Labs section from the dashboard on Selfmade Ninja Labs(Click here)
- On the left navbar, click My Lab > Challenge Lab.
- Browse through the list of challenges and locate the Fruity challenge.
- Start the Challenge:
- On the top-right, select Deploy Lab and click Start Mission.
- ou’ll receive an IP address. Forward this IP in your VS Code or terminal to access the environment and begin the challenge.
- To participate in this challenge, start by signing up at Selfmade Ninja Labs(Click here). If you don’t already have an account, create one using this signup link (Click here)
- After creating your account, activate Wireguard VPN to securely connect to the lab environment.
Challenge 1: Data Breach
Story
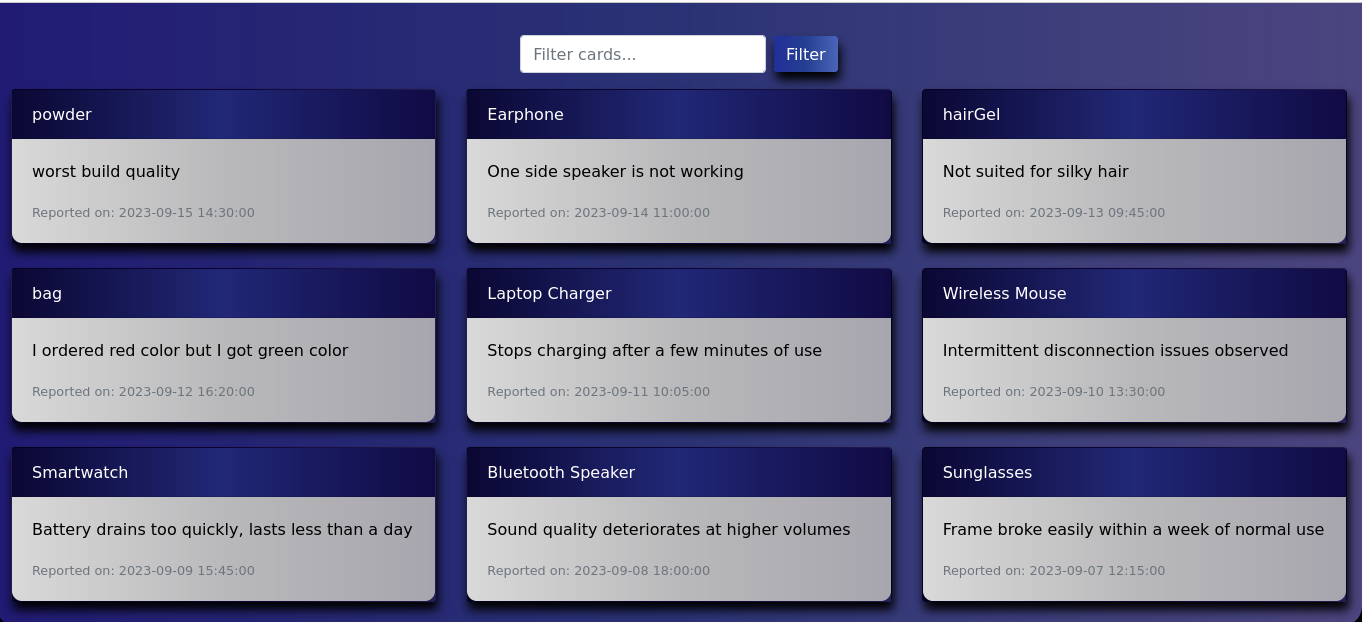
This challenge required me to investigate a data leak at a company using a dashboard to manage customer-reported product issues. The goal was to find the source of these leaks and secure a report from the /home directory.
Challenge Flow
-
Initial Reconnaissance: To start, I performed a network scan to identify open ports and potential entry points. The scan revealed two open ports: SSH (port 22) and HTTP (port 80), suggesting an accessible website and a potential way to gain shell access.

-
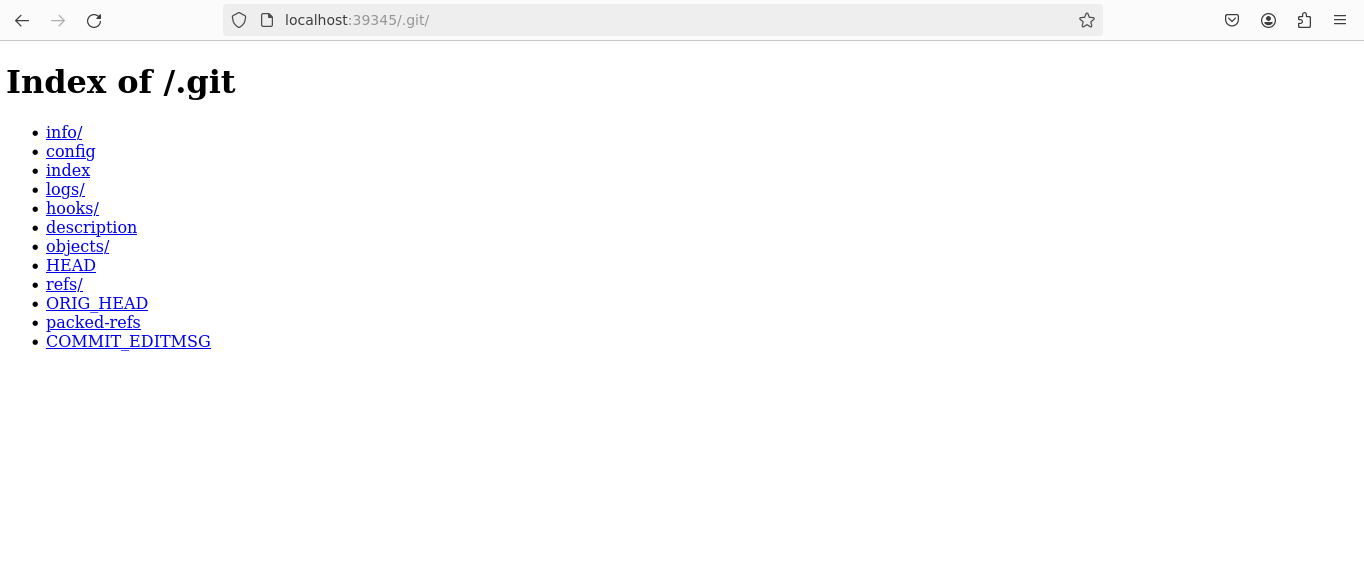
Website Analysis: Next, I conducted a thorough examination of the website’s structure and endpoints. During this process, I discovered a .git endpoint, which could potentially expose sensitive version control information.

-
Exploring the .git Repository: Then, I cloned the repository and inspected its commit history to uncover usernames, passwords, and a secret key. Notably, I found an access-list.json file in the prod branch containing user credentials and a secret key.

Repository: https://git.selfmade.ninja/Jawahar.s/old-project
From the repository, in the branch
prod, I retrieved anaccess-list.jsonfile filled with user credentials and discovered asecretkey. -
Gaining Dashboard Access: Using the credentials jamie and jamieKey@1415, I logged into the dashboard. While I could access the dashboard, the report page was restricted to admin users. Therefore, I hypothesized that the secret key from the master branch might also be used for session management in Flask.

-
Admin Session Forging: With the secret key and a script from https://git.selfmade.ninja/Jawahar.s/flask-sess-forge, I forged an admin session cookie. I pasted this cookie into the cookies tab of my browser, which granted me admin access.

This allowed me to access the admin-only report page.

-
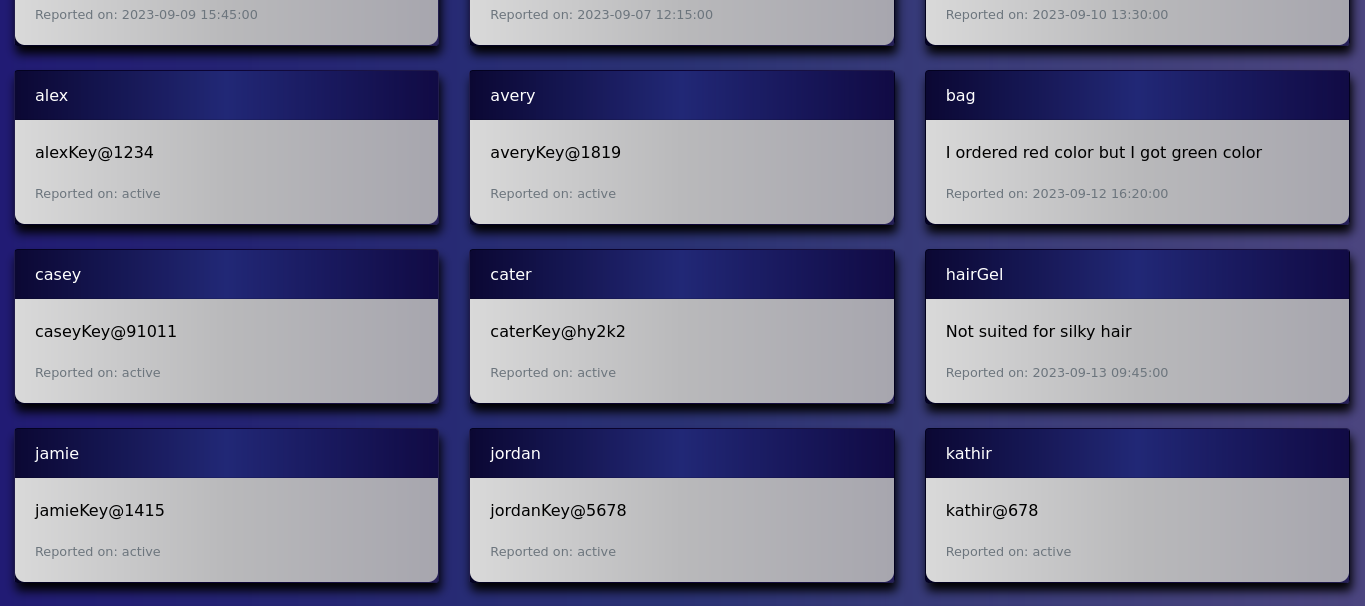
Executing SQL Injection: On the report page, I noticed a filter bar for products. I used an SQL union query to exploit this, extracting all user data from the database. As a result, I retrieved cater’s credentials (caterKey@hy2k2) and accessed the server via SSH to secure the report from /home/report.

I obtained all user data from the database, including some active admin users. Specifically, I retrieved
cater‘s username and password,caterKey@hy2k2, and accessed the server via SSH to find the report in/home/report.
Challenge 2: Server Intrusion
Story
After completing the data breach investigation, I faced a new challenge involving a suspicious file on the server, which hinted at a severe security breach linked to leaked income reports.
Challenge Flow
-
Finding SUID Binaries: The first step was to search for binaries with setuid permissions. Setuid binaries are executable files that run with the permissions of the file owner, which can sometimes be exploited to gain elevated privileges. I used the following command to find all setuid binaries on the system:
find / -perm -4000 -type f 2>/dev/nullThis command searches the entire filesystem (
/), looking for files with the setuid permission (-4000) and suppressing error messages (2>/dev/null). The search revealed several binaries, including an unusual one. -
Identifying Anomalous Binary: Among the setuid binaries, I identified an anomalous binary located at
/var/anomalous. Its presence and permissions stood out as unusual, making it a prime target for further investigation.
-
Executing the Anomalous Binary: I executed the
./anomalousbinary to understand its functionality. The binary launched a command-line application that prompted me to select from a list of options:
cater@secure_byte:/var$ ./anomalous
Welcome to our command-line application!
Please select a command (type 'options' to view available commands):

> options
Available options:
1. init - Initialize the system
2. welcome - Show the welcome message
3. options - Show this options menu
4. start - Begin the application

> init
Initializing system...
System initialized successfully!
The provided commands didn’t reveal anything useful, so I decided to dig deeper into the binary to uncover any hidden functionalities.
- Analyzing the Binary with Strings:
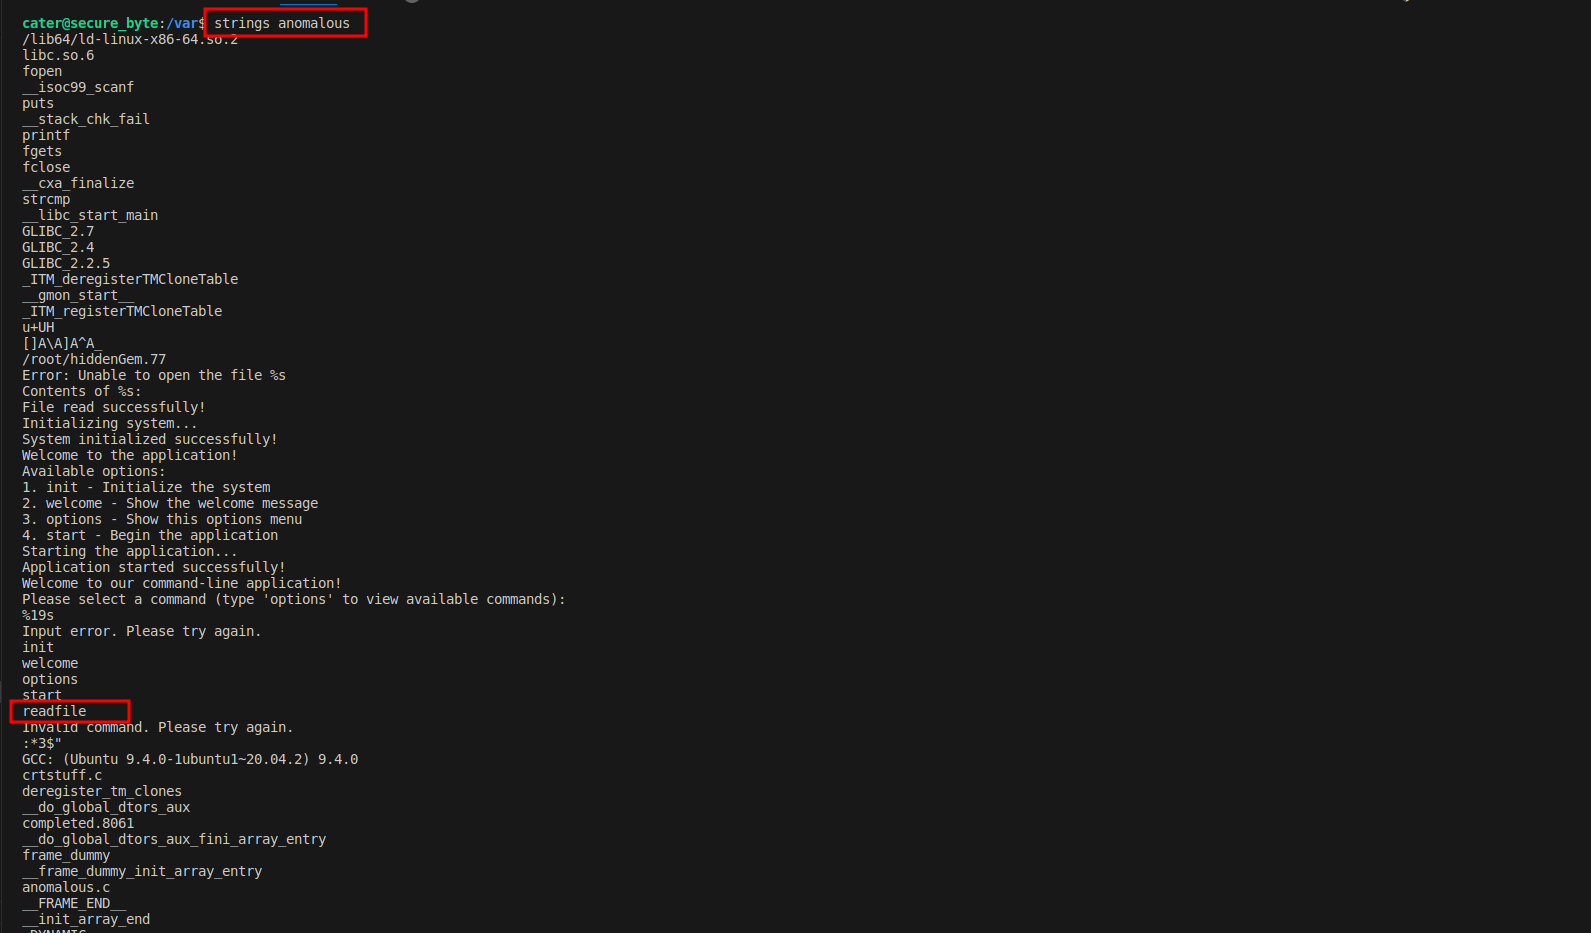
To explore the binary further, I used the
stringscommand, which extracts printable strings from a binary file. This is a useful technique for discovering hidden commands or embedded information within an executable.
strings anomalousRunning this command on the anomalous binary revealed a list of strings, including one that caught my attention: readfile.

-
Discovering the Hidden Command: The
readfilestring was not listed in the application’s available commands, making it a hidden or undocumented command. This discovery suggested that the binary had additional, hidden functionality that could be exploited. -
Executing the Hidden Command: I ran the
./anomalousbinary again and entered thereadfilecommand to test its effect:
cater@secure_byte:/var$ ./anomalous
Welcome to our command-line application!
Please select a command (type 'options' to view available commands):

> readfile
Contents of /root/hiddenGem.77:
1a441c9439402c7033e5b915e1aeffa3.ninja

File read successfully!

>
The hidden readfile command successfully accessed and displayed the contents of a file located in /root/hiddenGem.77, revealing a flag: 1a441c9439402c7033e5b915e1aeffa3.ninja.
Consultion
By following systematic digital forensics techniques and exploiting system vulnerabilities, I successfully completed the Cyber Investigation CTF finals. This experience reinforced my understanding of cybersecurity concepts and demonstrated the practical applications taught in Selfmade Ninja Lab cloud lab training.


