How to Use NGINX RTMP Lab for Live Streaming
Prerequisites:
-
VPN Connection: Ensure all devices (broadcaster and receiver) are connected to the same VPN network.
-
Streaming Software: Use broadcasting software like OBS Studio or a Raspberry Pi camera with software like
ffmpegto stream to the RTMP server. -
Viewer Software: Have a compatible media player installed, such as VLC or ffplay, to watch the live stream.
-
Network Configuration: Make sure necessary ports (1935 for RTMP, 8080 for HLS) are open and accessible.
-
System Requirements: Ensure your hardware meets the requirements for running the streaming software.
Step 1: Deploying the NGINX RTMP Lab
-
Open the RTMP Lab
Go to the URL: https://labs.selfmade.ninja/labs?type=machine. -
Select and Deploy the Lab
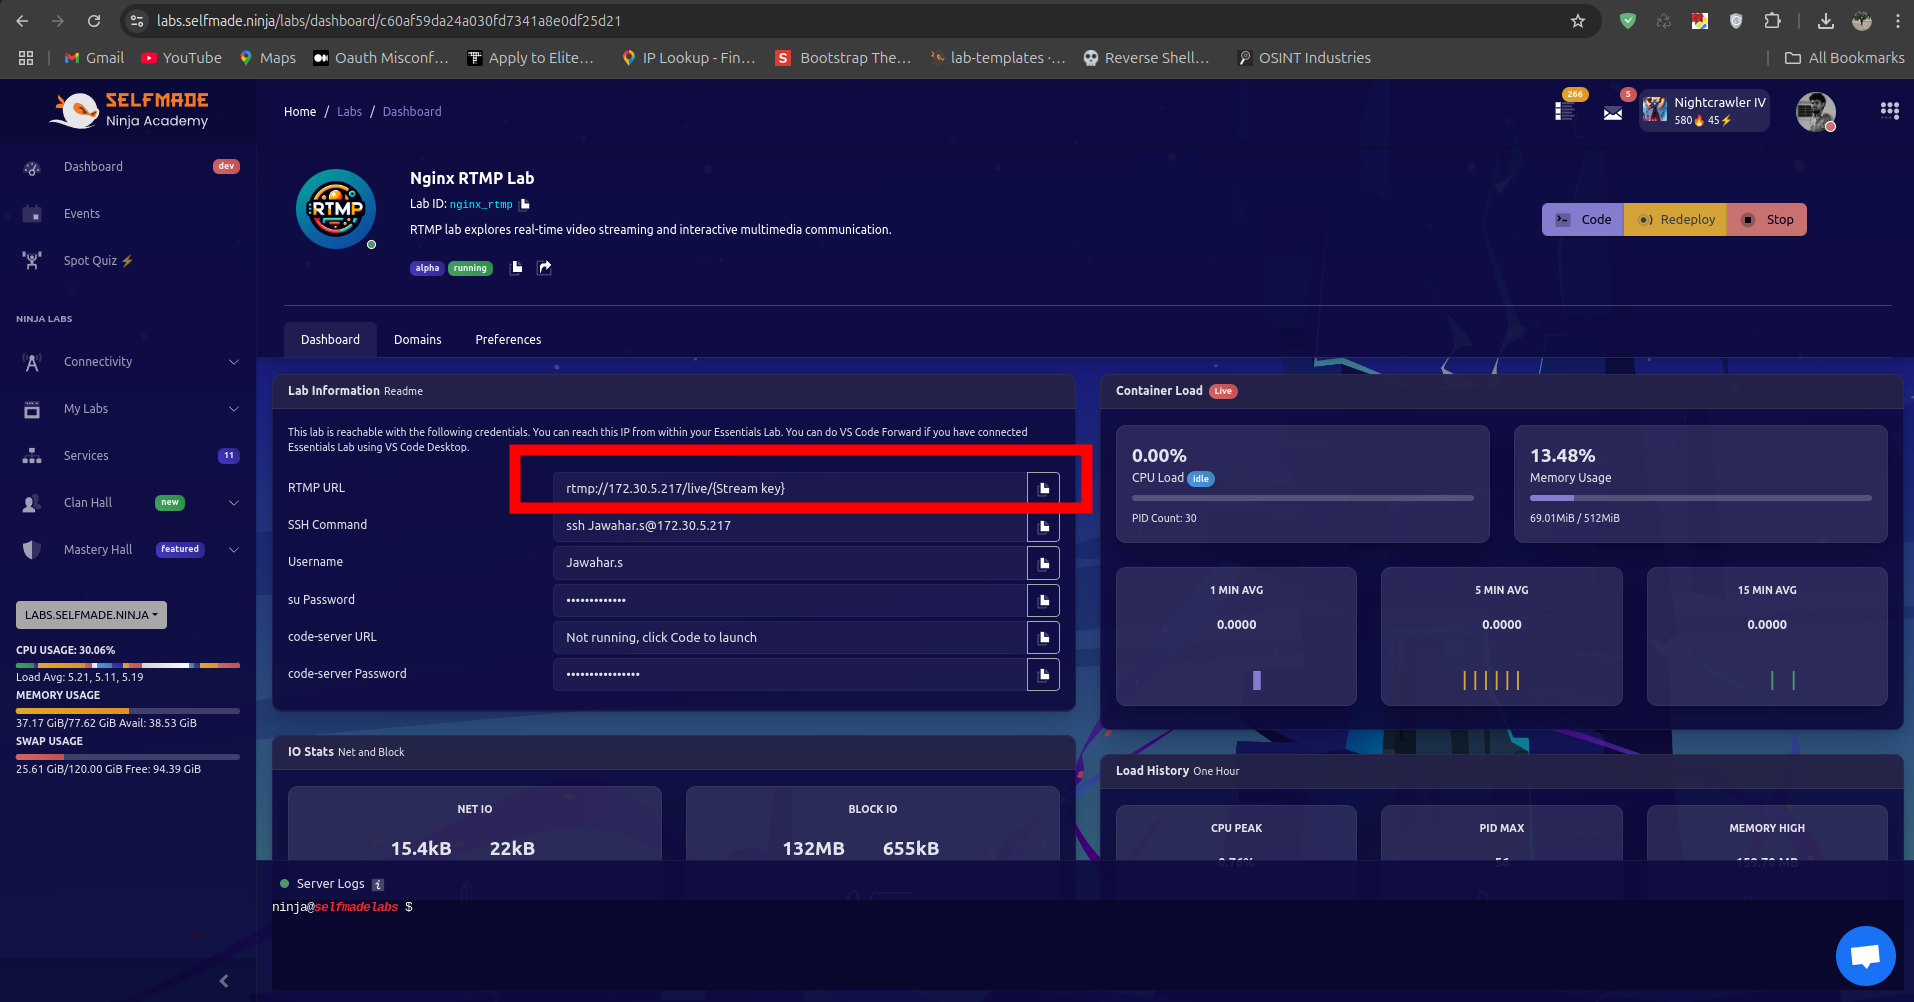
Click on RTMP Lab and then click Deploy. After deployment, you’ll get an RTMP URL like:rtmp://172.30.5.217/live/{Stream key}> Note: Keep your Stream key secure! It acts like a password and controls access to your stream.
-
Connect to the VPN
Connect your laptop to the SNA VPN. This will ensure both the broadcaster and viewer devices are in the same network.

Step 2: Setting Up OBS Studio for Live Streaming
-
Install OBS Studio
Download and install OBS Studio from https://obsproject.com. This software is free and widely used for live streaming. -
Configure OBS for RTMP Streaming
- Open OBS Studio.
- Go to Settings > Stream.
- In the Service dropdown, choose Custom.
- For Server, enter your RTMP URL (e.g.,
rtmp://172.30.5.217/live/). - For Stream Key, enter your stream key from Step 1.
> Important: Do not share your stream key with anyone. It’s like a password for your stream.
-
Add Your Sources in OBS
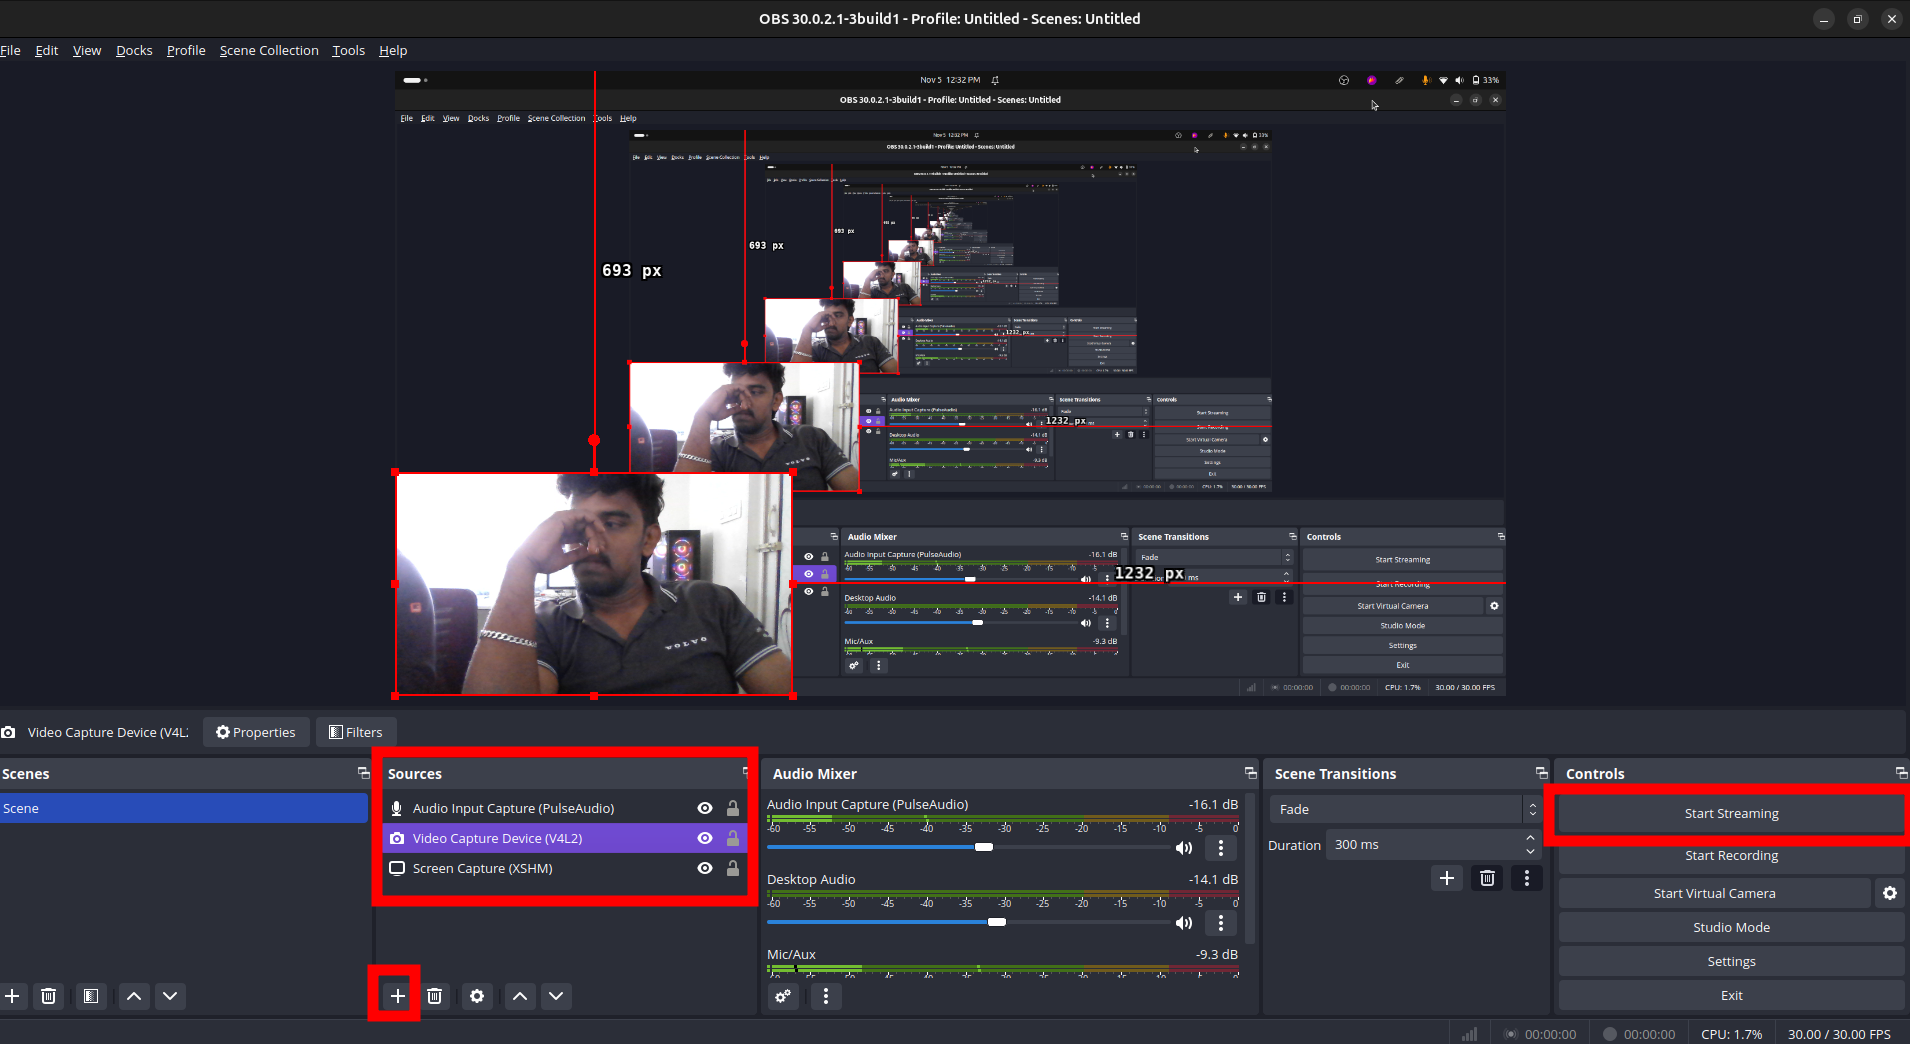
- Click on + under Sources to add video and audio sources (e.g., Screen Capture, Webcam, Audio Input).
- Arrange the sources as desired and adjust settings like volume.
-
Start Streaming
Once configured, click Start Streaming. OBS will now broadcast to the RTMP server.

Step 3: Using HLS and Viewing in a Browser
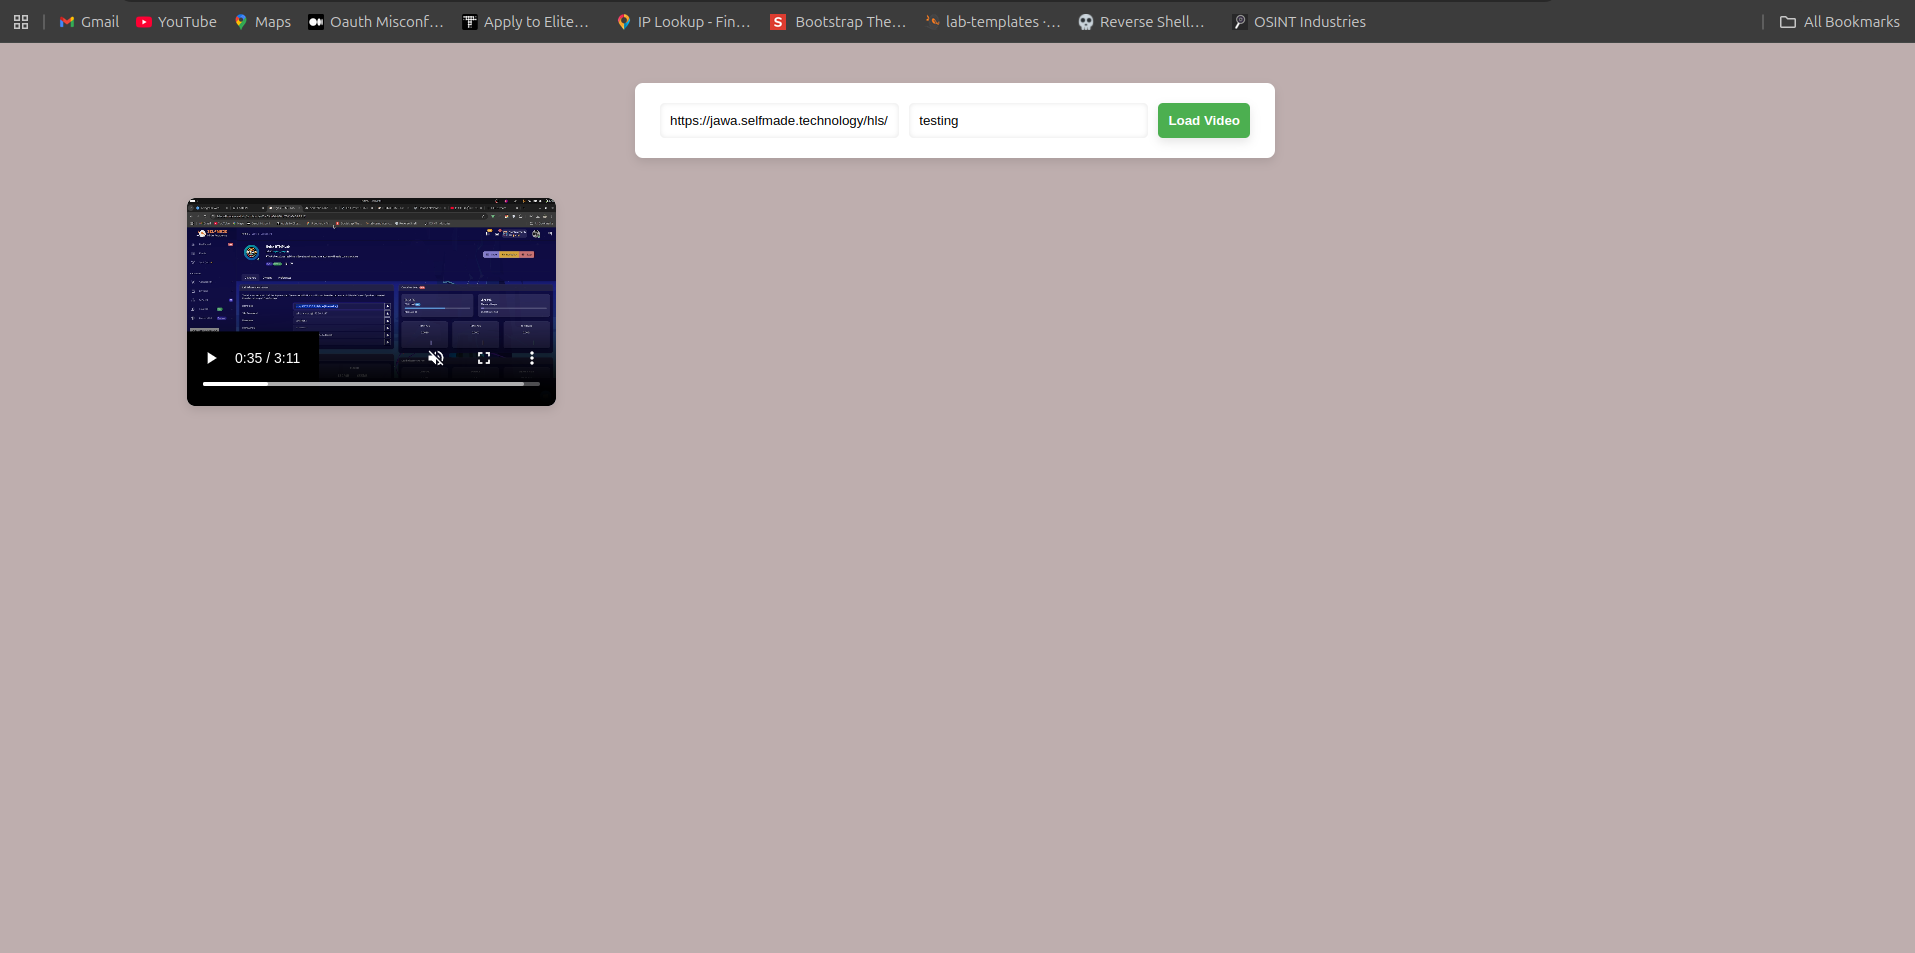
The NGINX RTMP lab offers HLS (HTTP Live Streaming) support, which enables you to view the stream in a web browser. HLS is a widely used streaming protocol that segments video into small chunks, making it ideal for live streaming over HTTP. To set up HLS streaming, follow these steps:
1. Set Up Reverse Proxy with Apache
To serve the HLS stream through a web browser, you'll need to configure Apache as a reverse proxy. Here's how to do it:
Install Apache
If you haven’t already installed Apache, you can do so by running the following command in your terminal:
sudo apt update
sudo apt install apache2
Enable Required Modules
Next, you need to enable the proxy, proxy_http, and rewrite modules for Apache:
sudo a2enmod proxy
sudo a2enmod proxy_http
sudo a2enmod rewrite
Configure Apache for Reverse Proxy
Create or edit your Apache configuration file to set up the reverse proxy. You can use the default configuration file or create a new one. For example, create a file named rtmp_proxy.conf in the /etc/apache2/sites-available/ directory:
sudo nano /etc/apache2/sites-available/rtmp_proxy.confAdd the following configuration to the file, replacing YOUR_IP with your server's IP address:
<VirtualHost *:80>
    ServerName YOUR_IP

    # Allow access to HLS
    <Location /hls>
        ProxyPass /hls http://{your_ip_address}:8080/hls/
        ProxyPassReverse /hls http://{your_ip_address}:8080/hls/
        Allow from all
    </Location>

    # Optional: Allow CORS (Cross-Origin Resource Sharing) if necessary
    Header set Access-Control-Allow-Origin "*"
</VirtualHost>
This configuration tells Apache to forward requests from /hls to the HLS server at http://{your_ip_address}:8080/hls/. The ProxyPass directive routes the incoming requests to the HLS server, while the ProxyPassReverse directive ensures that any redirects are correctly handled.
Enable the New Configuration
After saving your configuration file, enable it using the following command:
sudo a2ensite rtmp_proxy.confRestart Apache
To apply the changes, restart Apache:
sudo systemctl restart apache22. Access the Stream in Browser
Once the reverse proxy is set up, you can access the HLS stream through your browser. The HLS stream is typically served at the following URL format:
http://YOUR_IP/hls/{Stream key}.m3u8Replace {Stream key} with your actual stream key. For example, if your stream key is myStream, the URL will be:
http://YOUR_IP/hls/myStream.m3u8Open this URL in any modern web browser to view the live stream.

Tip: Ensure that your firewall settings allow traffic on port 80 (HTTP) to enable access to the stream.
Step 4: Viewing the Live Stream Using VLC Player
Now, let's set up a viewer to receive and watch the stream in real time.
- Install VLC
If not installed, download VLC from https://videolan.org. -
Open Network Stream
-
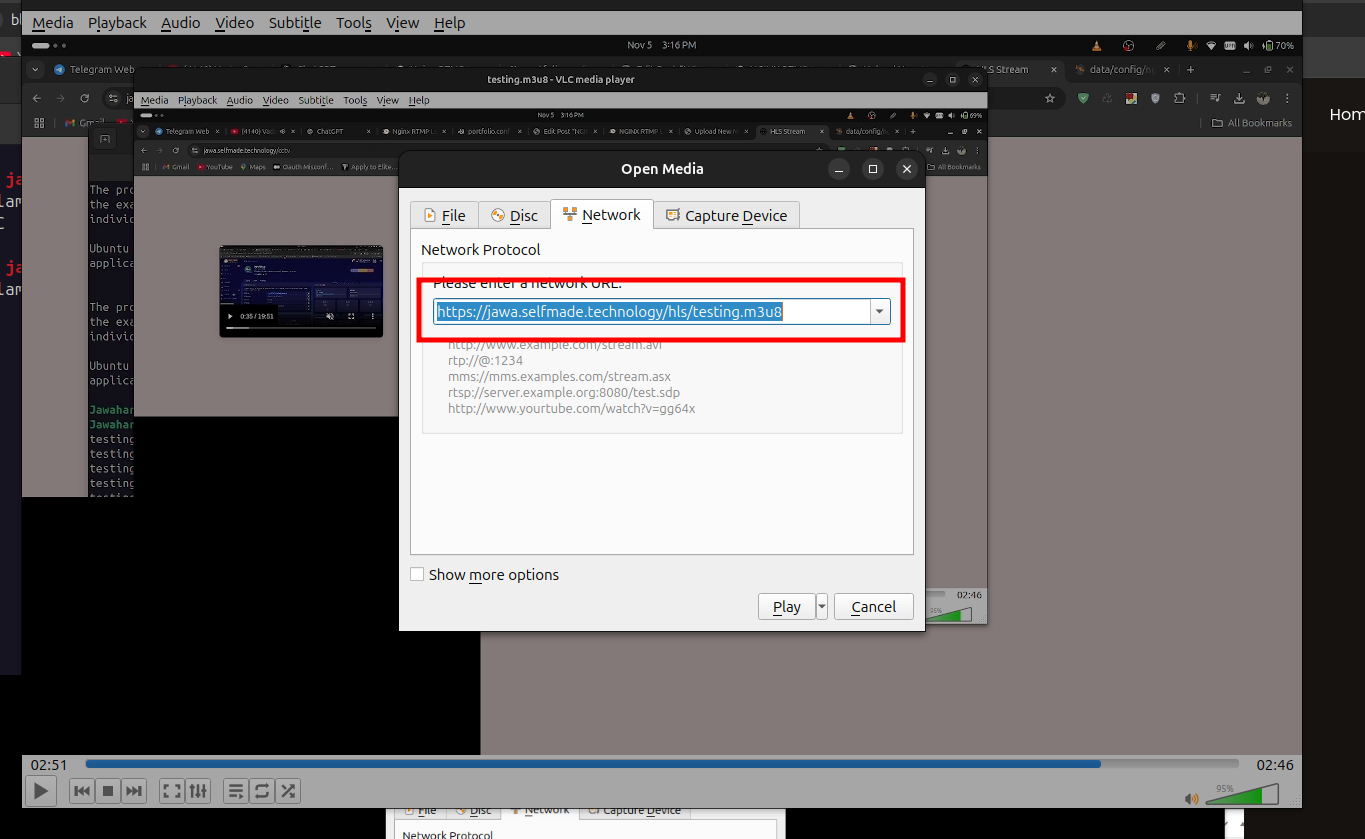
Open VLC and go to Media > Open Network Stream.
-
Enter the RTMP URL (replace
{Stream key}with your actual stream key) like this:rtmp://172.30.5.217/live/{Stream key} OR https://{domain_name}/hls/testing.m3u8 -
Click Play to start viewing the stream.

-
Additional Resources
For detailed information on configuring HLS and using the NGINX RTMP module, refer to the following resources:
- NGINX RTMP Module GitHub Repository - This is the official repository where you can find installation instructions, configuration examples, and additional features of the NGINX RTMP module.
- NGINX Documentation - The main documentation for NGINX, where you can explore various configurations and directives.
- HTTP Live Streaming (HLS) Overview - An introduction to HLS, including best practices and detailed explanations.
This guide simplifies the process, even for beginners unfamiliar with live streaming. Remember, protecting your stream key is essential for keeping your stream secure.


