Hosting a Flask Website via Apache Server [WSGI]: A Step-by-Step Guide
Welcome, students! If you're eager to learn how to host a Flask website using an Apache server with WSGI, you're in the right place. This step-by-step guide will walk you through the process, making it easy for you to deploy your Flask application and showcase your projects to the world.
Introduction
Flask is a web framework for Python that allows you to build and deploy web applications quickly. Hosting your Flask app on an Apache server using WSGI (Web Server Gateway Interface) is a common choice for production deployments. It provides a stable and scalable environment for your applications.
Benefits of Hosting Your Application in SNA Labs
- Blazing Fast Internet Connection
- Robust Denial-of-Service (DoS) Protection
- User-Friendly Setup and Understanding
- 24/7 Availability
- Free Services for Enhanced Functionality mongodb,memcache, etc ...
- Real-Time Learning Experience
Obtaining a Domain for Your Website
-
Navigate to Connectivity -> My Domains -> Add New Domains.
-
Enter your preferred domain name in the "Choose Domain" input form.

-
Return to https://labs.selfmade.ninja/labs.
-
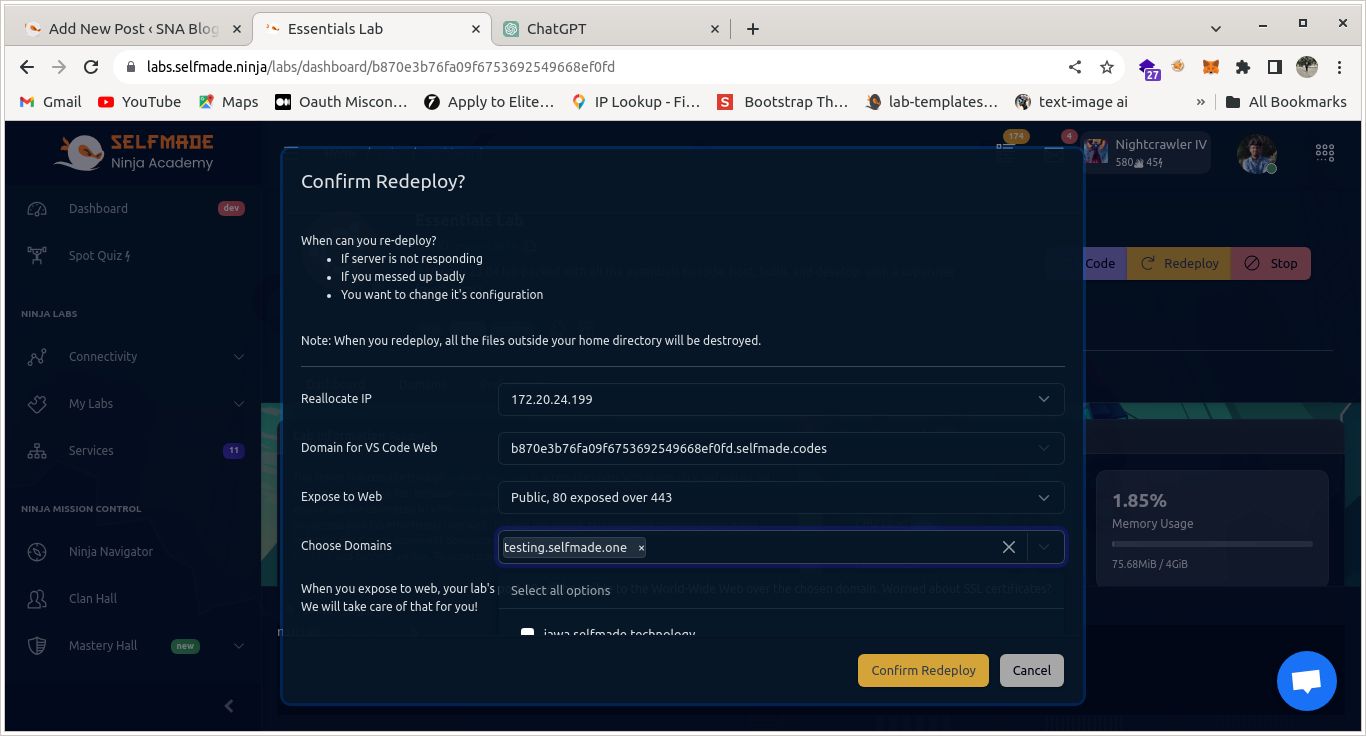
Select Essential Lab and initiate a Redeploy.
-
From the "Choose Domains" dropdown, pick your new domain.
-
Confirm the redeployment by clicking Confirm Redeploy.
Now, your website has its own domain. 🌐 It's ready to shine on the internet stage! 🚀
2. Install Python and Flask
Execute these commands in your terminal:
sudo apt install python3.10-venv
sudo apt-get install libapache2-mod-wsgi-py3
sudo a2enmod wsgi
3. Create a Virtual Environment
To create and activate a virtual environment for your Flask application, run the following commands:
python -m venv flaskEnev
source flaskEnev/bin/activate
pip install flask
4. Create a Flask App
You can use your own project or follow these steps to create a simple "Hello World" application:
-
Create a new directory and navigate into it:
mkdir helloworld cd helloworld -
Create a new Python file
app.py:nano app.py -
Add the following code to
app.py:
from flask import Flask

application = app = Flask(__name__)

@app.route('/')
def hello_world():
return 'Hello, World!'

if __name__ == '__main__':
app.run(debug=False)
5 Configure Apache to Serve Your Flask App
1. Navigate to Apache is sites-available directory and create a new virtual host configuration file:
cd /etc/apache2/sites-available
nano testingSite.conf
2. Replace the placeholders in the configuration file with your specific details:
<VirtualHost *:80>
    ServerName [Your domain name]

    WSGIDaemonProcess [project_name] user=[your username] group=[your username] threads=5 python-home=[env dir ex=/home/john/flaskEnev]
    WSGIScriptAlias / [application folder ex=/home/john/helloworld/app.py]

    <Directory [project_folder]>
        WSGIProcessGroup [project_name]
        WSGIApplicationGroup [project_name]
        Order deny,allow
        Allow from all
        Require all granted
    </Directory>

    ErrorLog ${APACHE_LOG_DIR}/[project_name]-error.log
    CustomLog ${APACHE_LOG_DIR}/[project_name]-access.log combined
</VirtualHost>
3. Test and enable your new site configuration:
sudo apachectl configtest
sudo a2ensite testingSite.conf
sudo systemctl reload apache2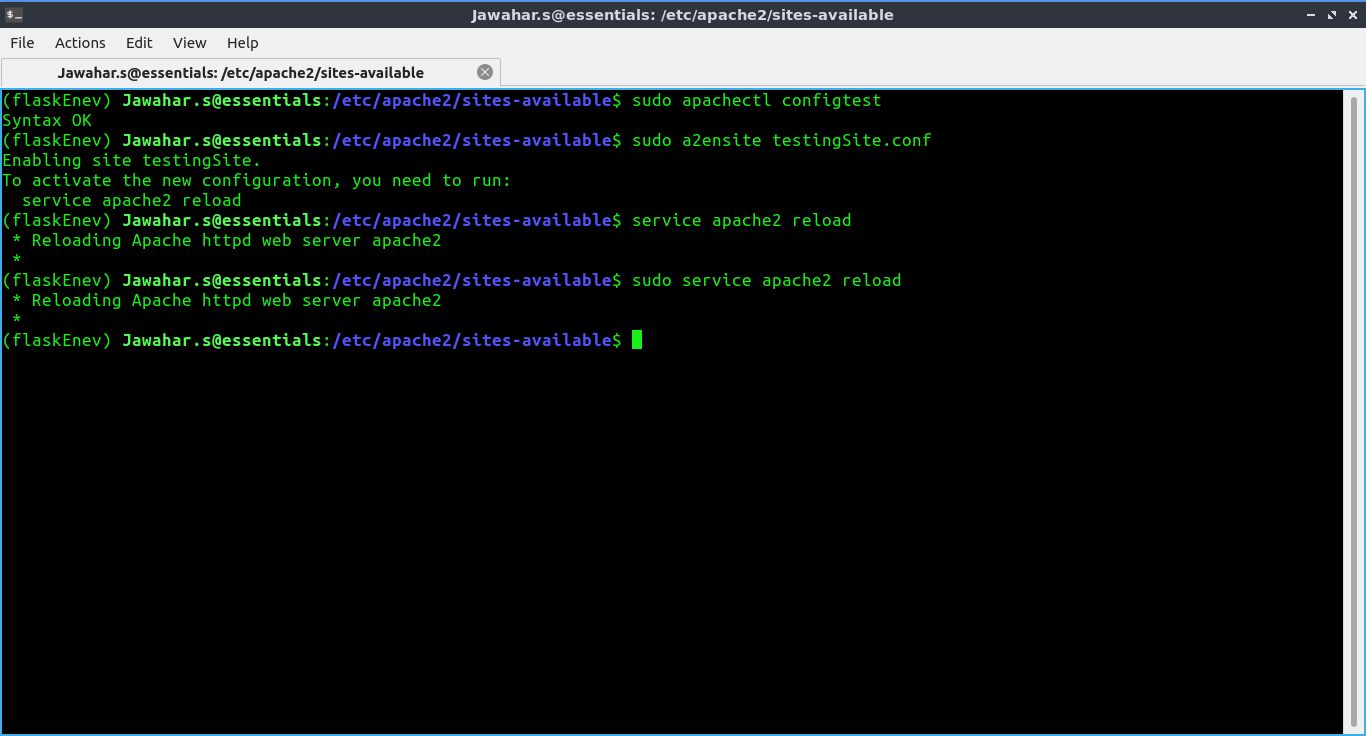
Now, your Flask application should be accessible via your domain.
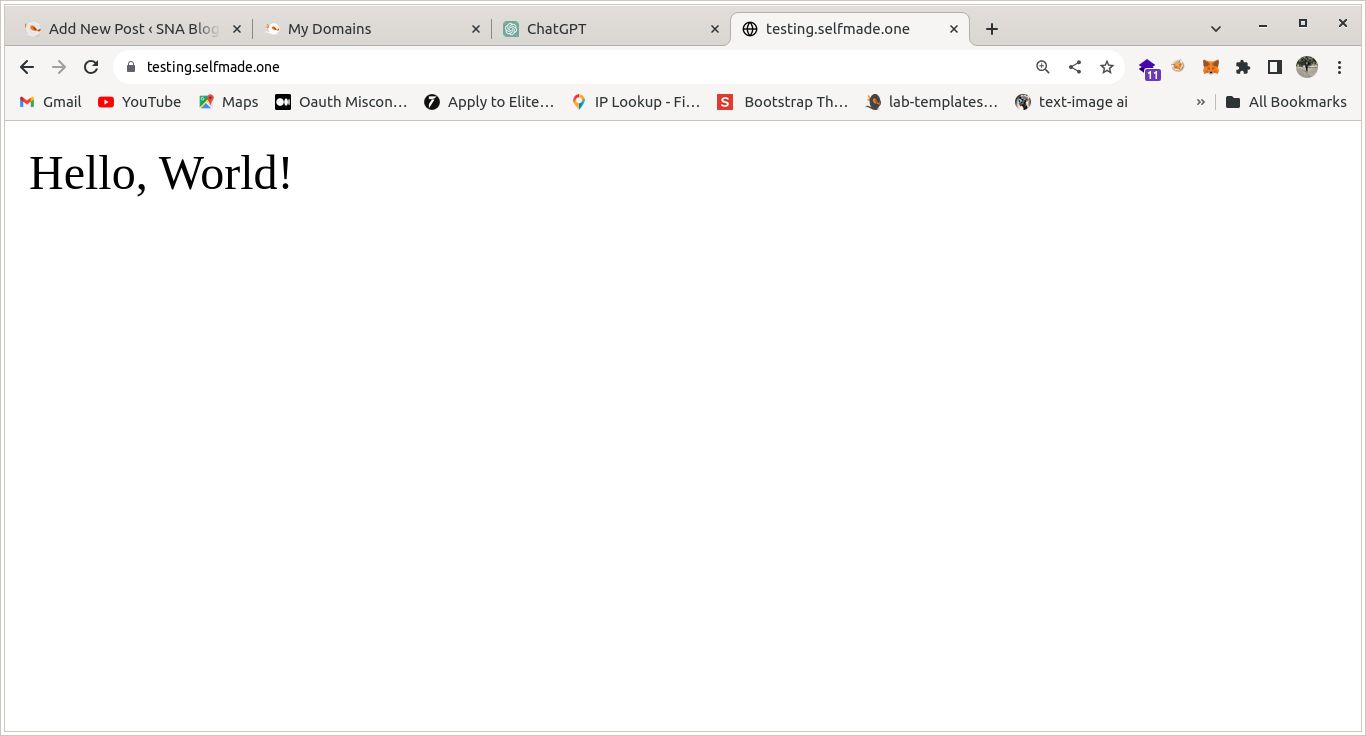
Congratulations on successfully hosting your Flask website via Apache Server using WSGI! If you have followed the steps correctly, your Flask app should now be live.
Feel free to explore and expand your Flask application. If you have any questions or run into issues, don't hesitate to seek help or refer to the documentation. Happy coding!
For more tutorials and tech insights, visit http://blog.selfmade.ninja/
Happy Coding!
Author : [Jawahar.s]
GITHUB : https://github.com/jawa77