Prerequisites:
1.A Laptop or a PC with stable internet connection.💻
2.Make sure laptop or PC is connected with Essential labs
3.A cozy cup of coffee for a productive session☕
Accessing SNA Labs 🌐
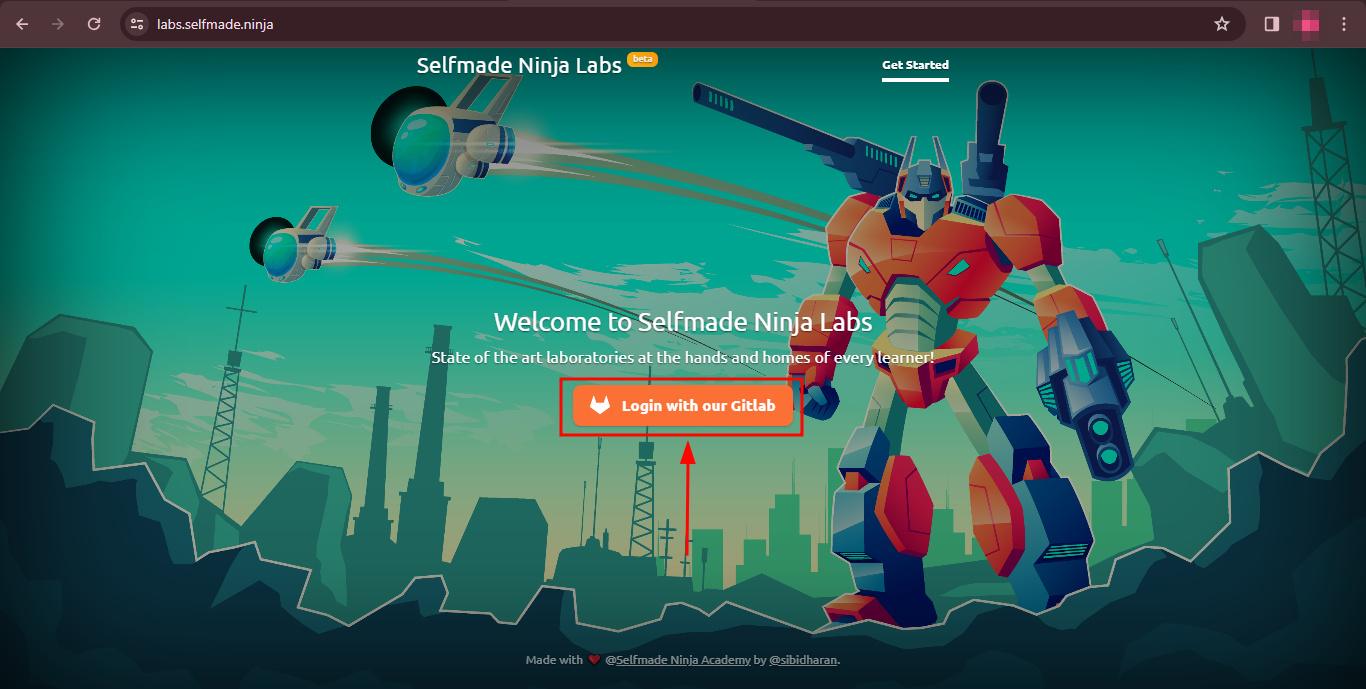
Start your journey by visiting the Selfmade Ninja Labs homepage: https://labs.selfmade.ninja
For Newcomers
New to SNA Labs? You'll need to log in. Look for the Login with GitLab option on the dashboard. This is your gateway to all the incredible features and challenges that await in SNA Labs. 🔑
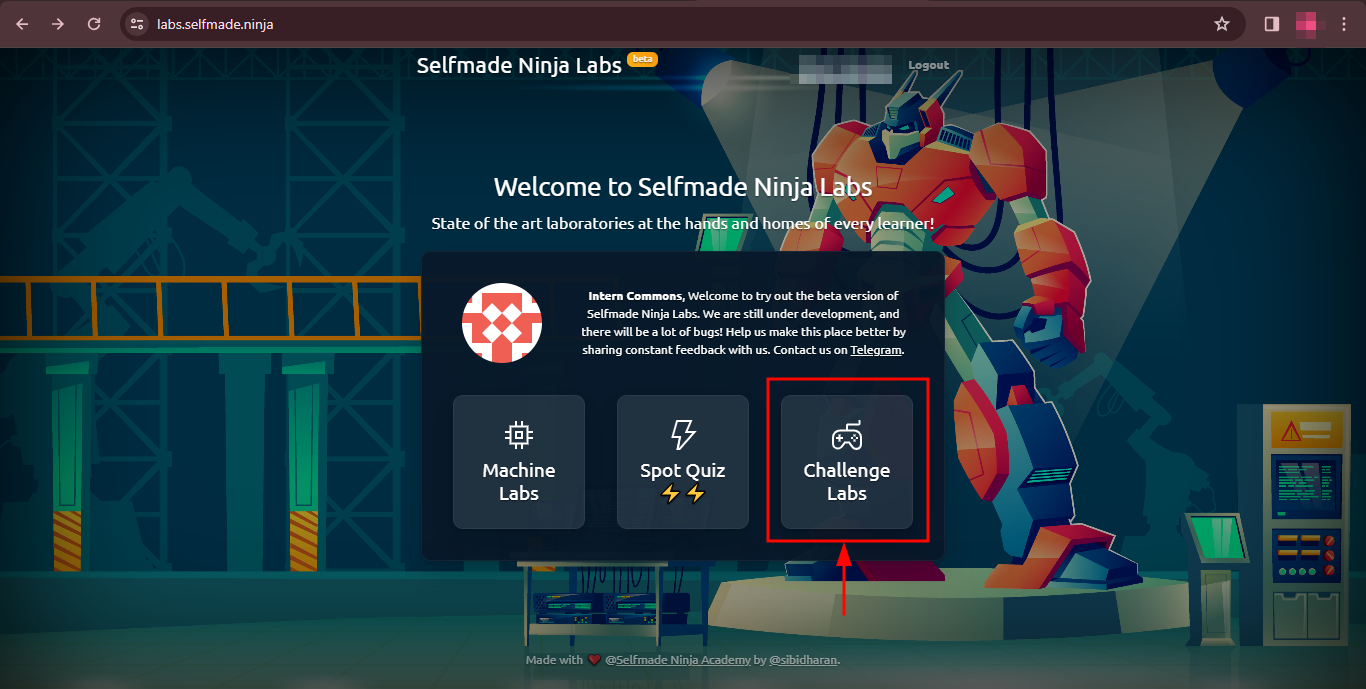
Navigating to the Challenge Labs Page🧭
Once logged in, simply click on Challenge Labs in the menu. This effortless step will lead you straight to a realm filled with diverse and exciting challenges.
[OR]
Clicking on this link will direct take you to Challenges page: https://labs.selfmade.ninja/labs?type=challenge
The page will appear as below

Here, all the challenge labs are neatly lined up, with all the necessary controls at your fingertips.
Note : Remember, some challenges are reserved for VIP account holders. However, as a free user, there are some free challenges that you can play.🎮
Choosing a Challenge to Engage In 🎲
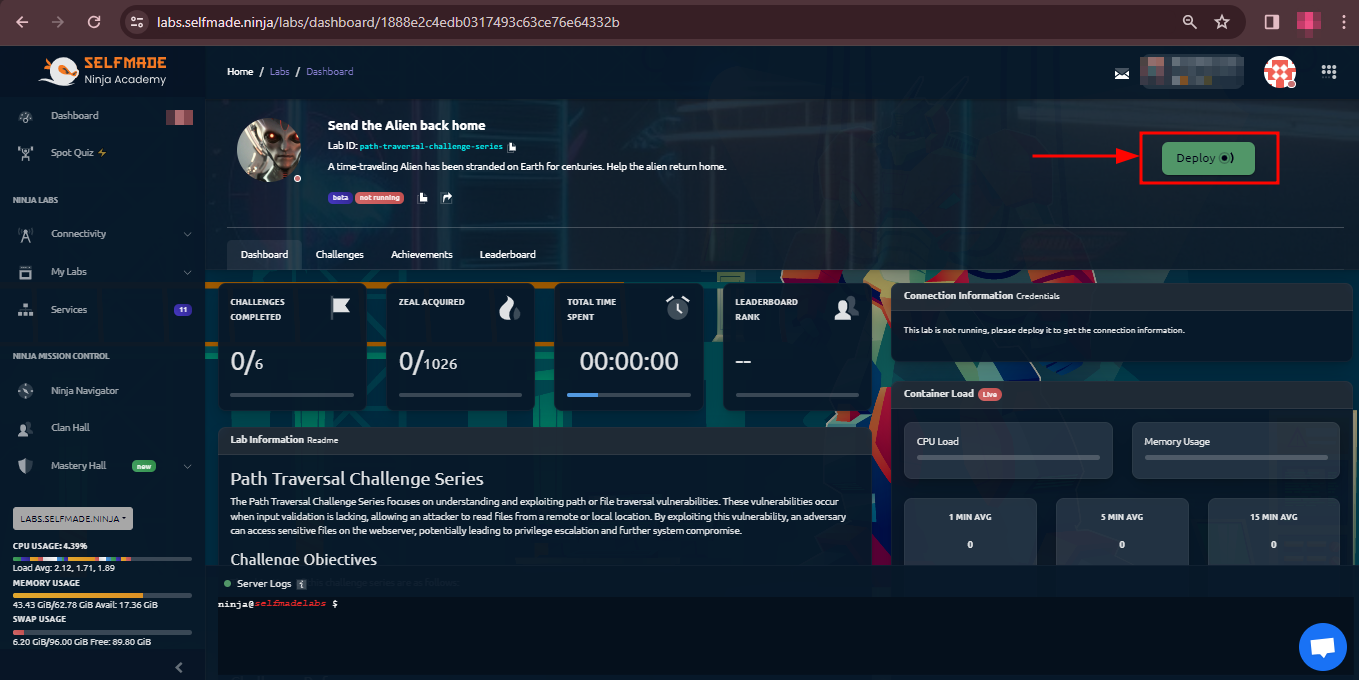
Got into the Challenge line-up page? Great! Now it's time to pick up a challenge. For example, you might choose Send the Alien Back Home challenge(You can find it by scrolling down the page), but feel free to select any challenge that excites you. Each challenge is a unique adventure that tests different skills.

Get ready to embark on an exhilarating journey and master the challenges in SNA Labs! Let the excitement unfold! 👾
Click on the Dashboard of the challenge that you desire to play.It displays the details of your challenge like the Challenges involved in it, time you took to crack it,Achievements and Leaderboard of that particular challenge.Here is the breakdown of what is in the above mentioned sections.
1.CHALLENGES: This section gives you what are all the sub challenges that you need to crack inorder to complete the whole challenge.You need to crack the present challenge inorder to unlock the next challenge. The mentioned amount of Zeal points will be awarded to you after cracking that respective challenge.
2.ACHIEVEMENTS: This section will give you side quests and targets.On meeting the targets and finishing the side quests you will be awarded with the mentioned Jolts and Zeal points.
3.LEADERBOARD: This section will display the leaders of the challenge based on the time they to crack it, achievements completed and the number of hints used.
Now that you've got an overview of how the challenge works,lets move further.
After selecting your challenge, here's how to get started:
1. Deploy the Challenge: Click the 'Deploy' button to set up your chosen challenge. Think of it as prepping your digital battleground.
2. Start Your Mission: Go to the Challenges click the 'Start Mission' button in the 1st challenge. This action kick-starts your challenge, take you into the heart of the adventure.

After clicking the start 'Start Mission',click on the Mission Brief button to see what the challenge is based on.
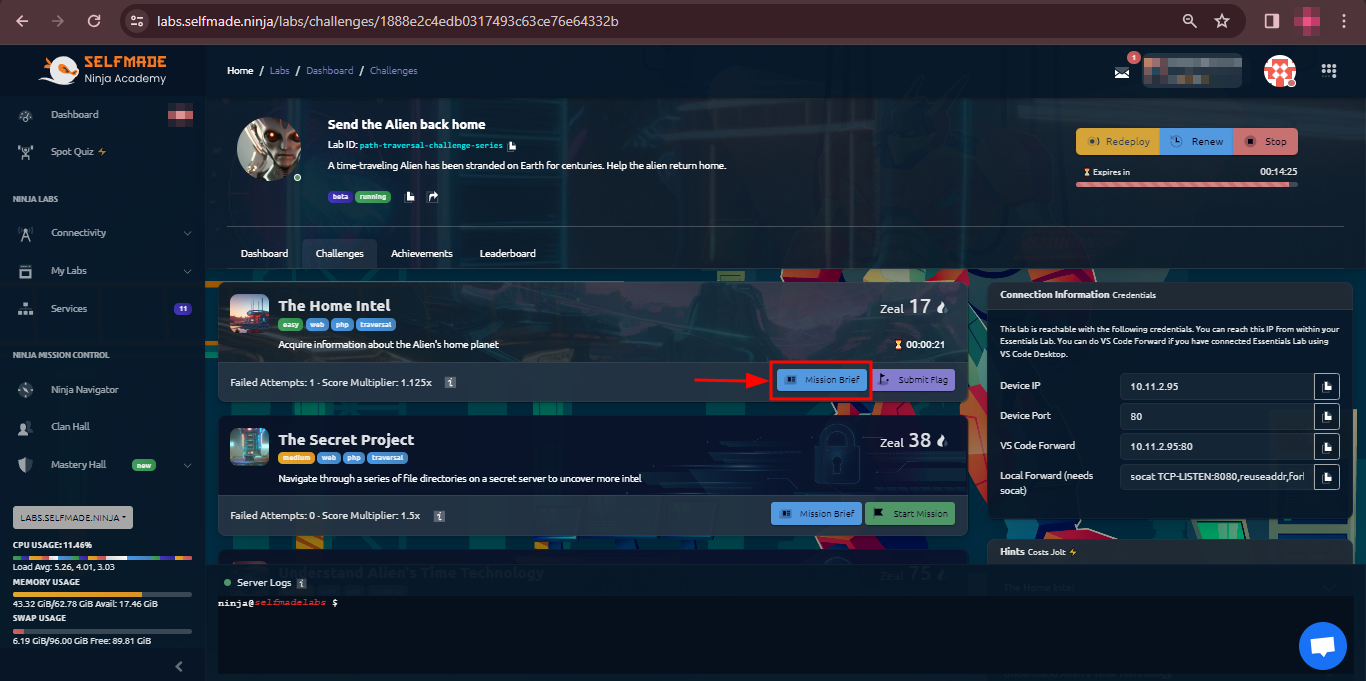
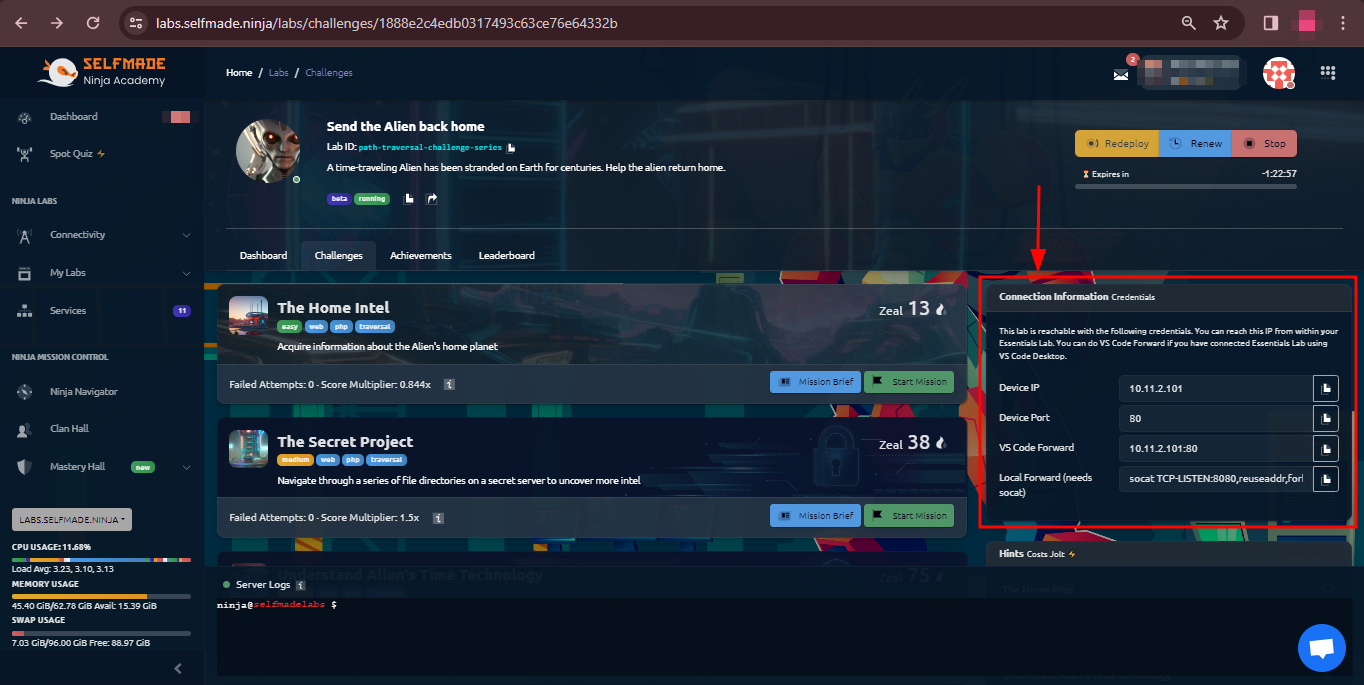
3. Access Connection Information: Post-launch, essential connection information will be displayed. This is the lifeline for your interaction with the challenge.
4. Copy Local Forward Contents: Within the connection details, locate and copy the Local Forward contents. These specifics are crucial for connecting to and progressing within the challenge environment.
Connecting to Your Mission!
You're almost ready to dive into the heart of the challenge. Follow these steps to connect everything up and get into the thick of the action.
Connecting to your mission can be done in 2 ways.
- With WebIDE that comes with our machine labs
- With VScode
First,lets see how to do it with the WebIDE.
🖥 Set Up Your Machine Lab
Now, it's time to bring your own digital toolkit into play.
Head to Machine Labs: Navigate to the 'Essentials Dashboard' in the Machine Labs section. The Machine Labs section is in the My Labs drop down in the left end of the page. This is like going to your personal command center.

Open the Code Server : After deploying, click on the 'Code' button. This will open a new tab where the magic happens – the code server. Think of it as opening a door to your control room.

Then launch the Web IDE.
Final Steps to Launch Your Mission
After setting up your Lab and entering the Local Forward contents, you're just a few clicks away from starting your challenge.
🛠 Activate the Port Forwarding
Copy the socat command from connection info,paste it in the WebIDE's terminal and then run it

What is Socat?
The socat command is a versatile utility that allows for bidirectional data transfers between two locations, and it's often used for port forwarding, among many other functionalities. To set up port forwarding using socat, you would use a command syntax that specifies the source and target locations for the data transfer. Here's a basic example of how you can use socat for port forwarding:socat TCP-LISTEN:localport,fork TCP:targethost:targetport
Port Forwarding Initiated: This action sets up port forwarding. Think of it as creating a secret tunnel that connects your tools directly to the challenge.
Code Server Alert and Action: Next, in your code server, an alert saying Open in Browser will pop up. This is like a friendly nudge to take the next important step.

Click to Proceed: Go ahead and click on this alert. It's like pressing the big red button that launches your mission!
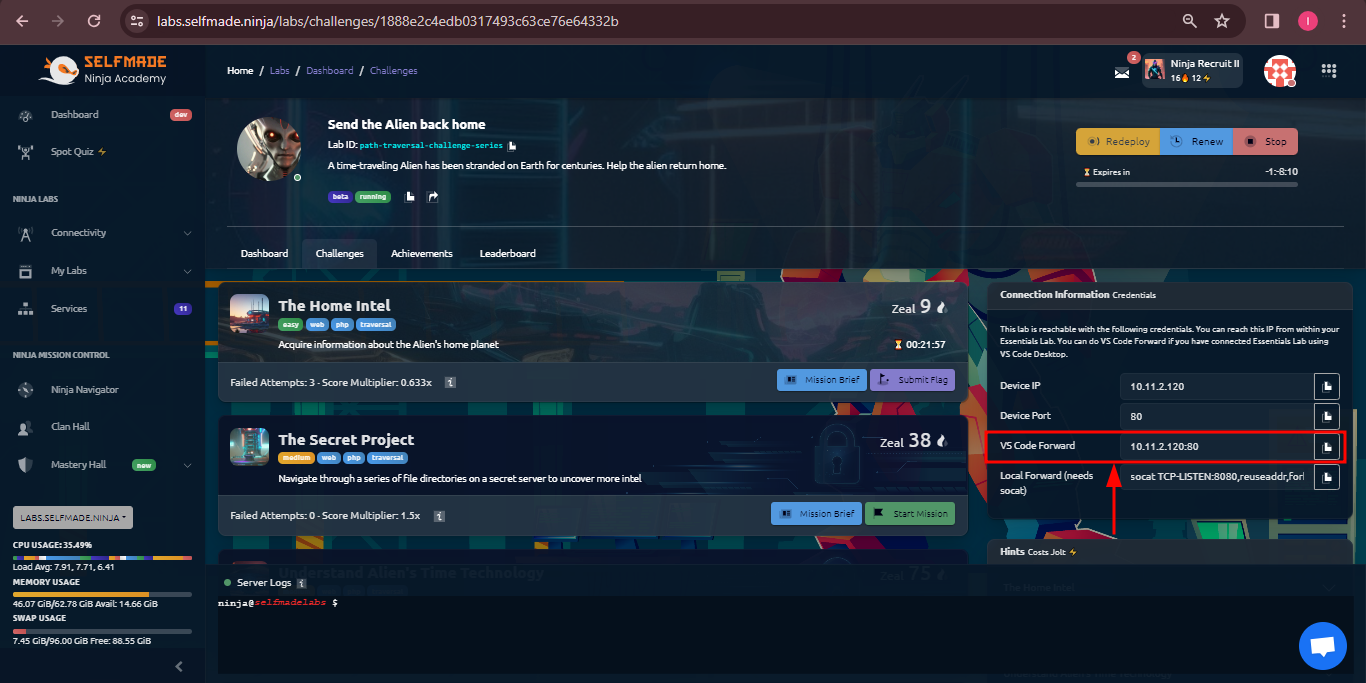
The Second way is how to connect to your mission with your VScode.
Open VScode on your local machine and connect with Labs using your SSH command.After establishing connection, go back to your challenges page and copy the VScode Port Forward command and port forward it in you Local VScode.
STEP 1
STEP 2
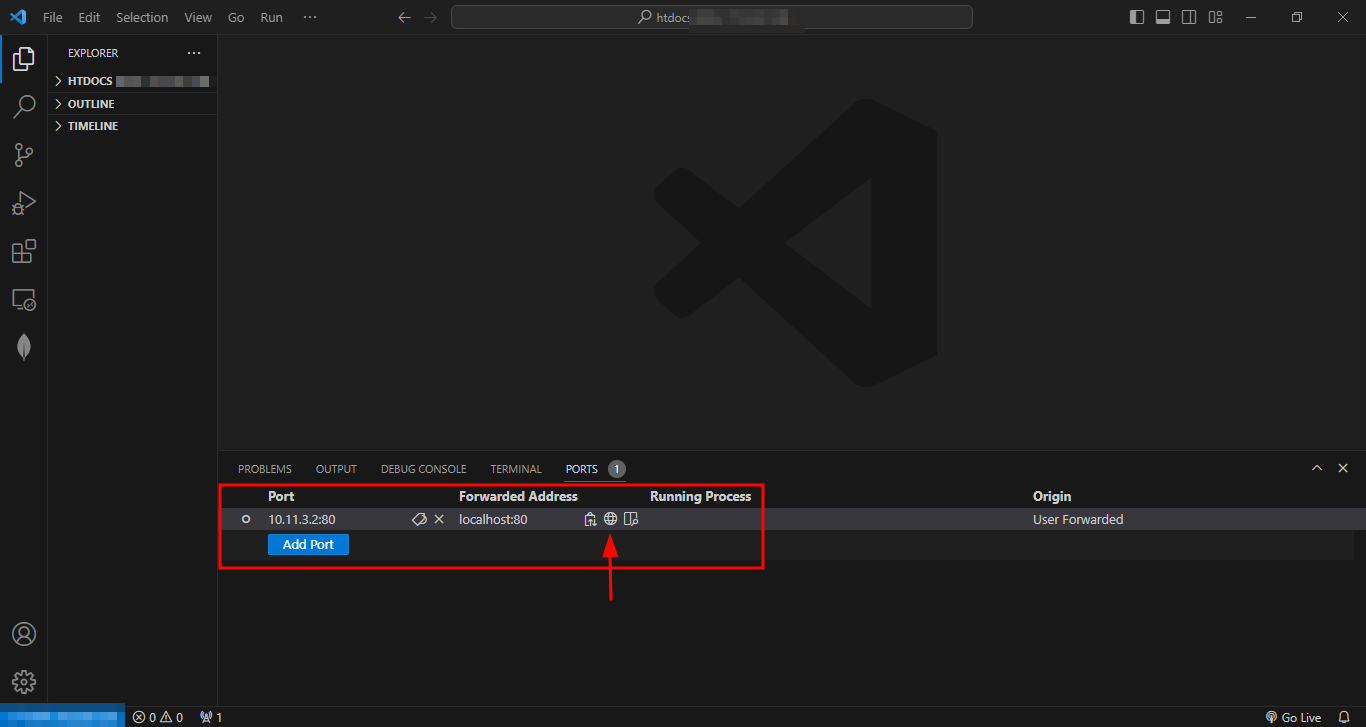
After completing Port Forwarding,click on Open in Browser as done in the above image and it will redirect you to your mission page.
Engage in your mission finally on the new tab that has opened. The mission page will look something like the image below.

Mission Dashboard: This is your battlefield, your playground, your world of adventure!.Get in and crack the challenge.
Need a complete guide for the challenge? Click this link: Click here
After decoding the challenge and finding the flag, take it and go to challenges lab page and submit it there as follows.
Similarly crack all the challenges to complete the main challenge and earn your rewards.
Great job! Challenge successfully completed. Wishing you more coding adventures!🥳