The Ultimate FREE Hosting Guide
Hey there!
Ready to dive into the world of websites without spending a dime? You’re in the right place! This FREE Hosting Guide will help you secure a free domain name and hosting. I’m excited to guide you through an easy, cost-free process to get your website up and running. Whether you want to start a blog, showcase a project, or experiment with a website, this guide is here to make it happen!
Before we get started, let's make sure you’re all set for this fun adventure.
Prerequisites
To follow this guide, you'll need:
-
SNA Labs Account: If you don’t have one, create it by clicking here.
-
SNA VPN Connection: Configure the VPN on your PC. For instructions tailored to your operating system, refer to these guides:
Awesome! Now that you’ve got your essentials ready, let’s dive into creating your website. We’ll make it easy, fun, and completely free. Your dream website is just a few steps away! 🌟🖥✨
Getting Started with SNA Labs
-
Open Your Browser: Grab your laptop and open your favorite web browser.
-
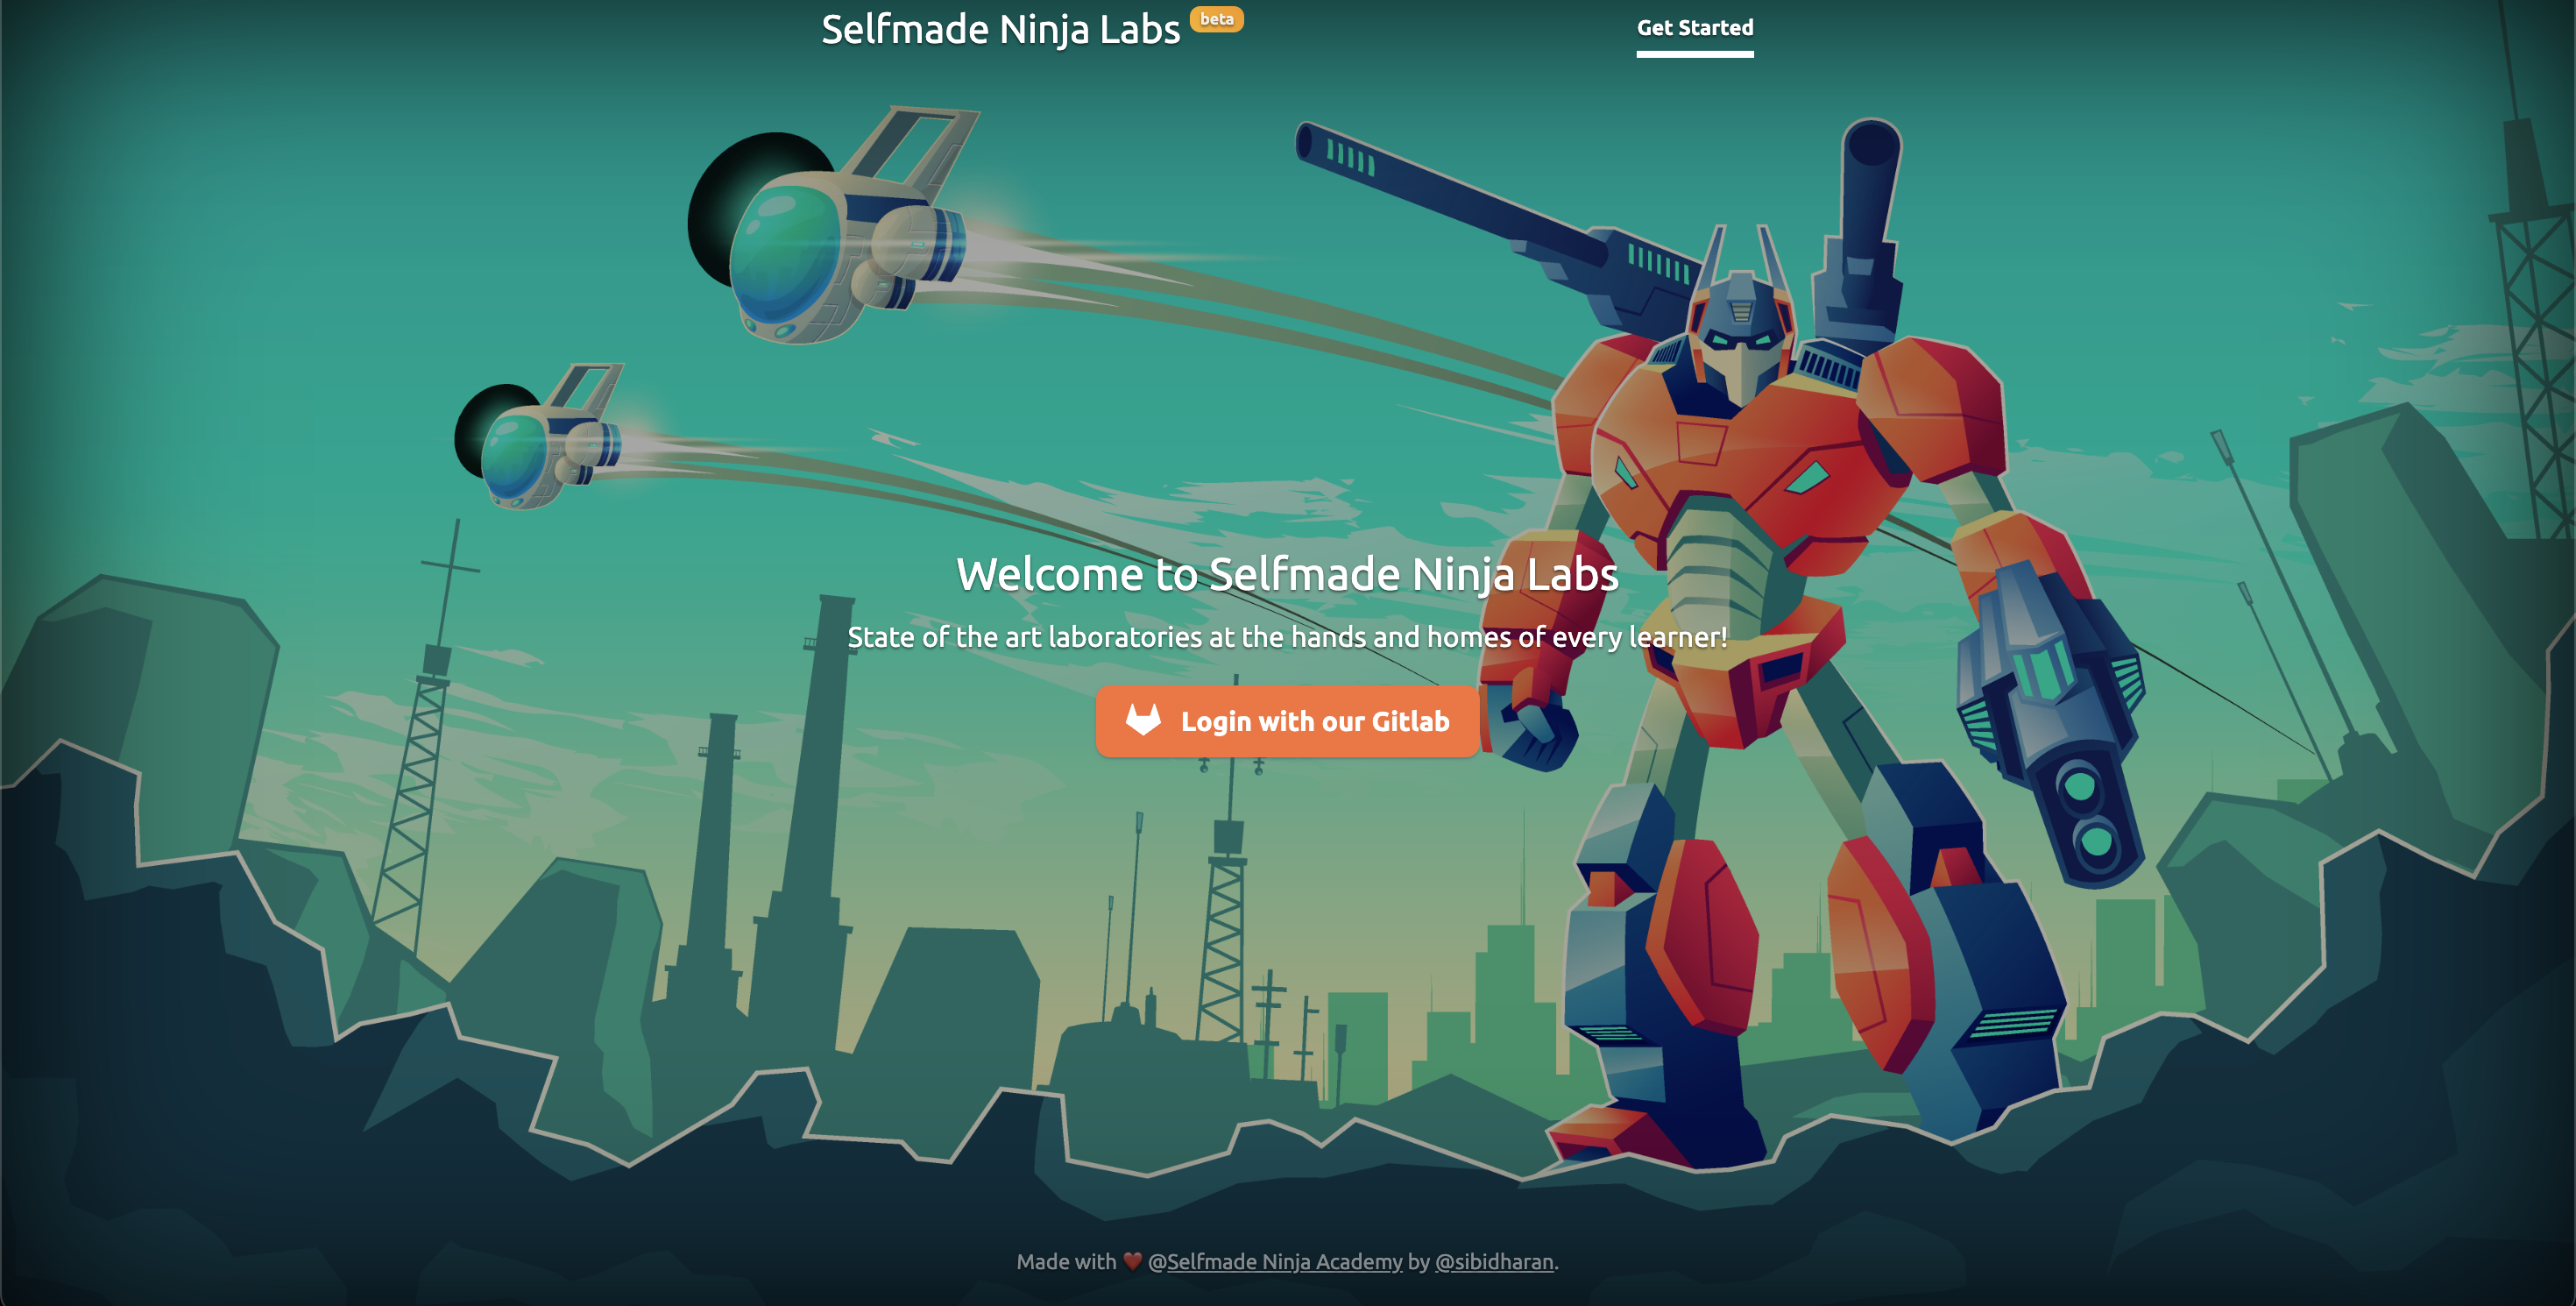
Visit SNA Labs: Type labs.selfmade.ninja into the address bar. You’ll see a login page.
-
Login: Click the 'Login with GitLab' button. If you don’t have a GitLab account, you can log in using your Google account or create a new account by clicking 'Register now'.

The best part? This whole process is free. No credit card information required! Let’s set you up and dive into the exciting world of website hosting.
Setting Up Your Free Domain
Once you’ve logged in, you’ll see the dashboard, which looks like this:
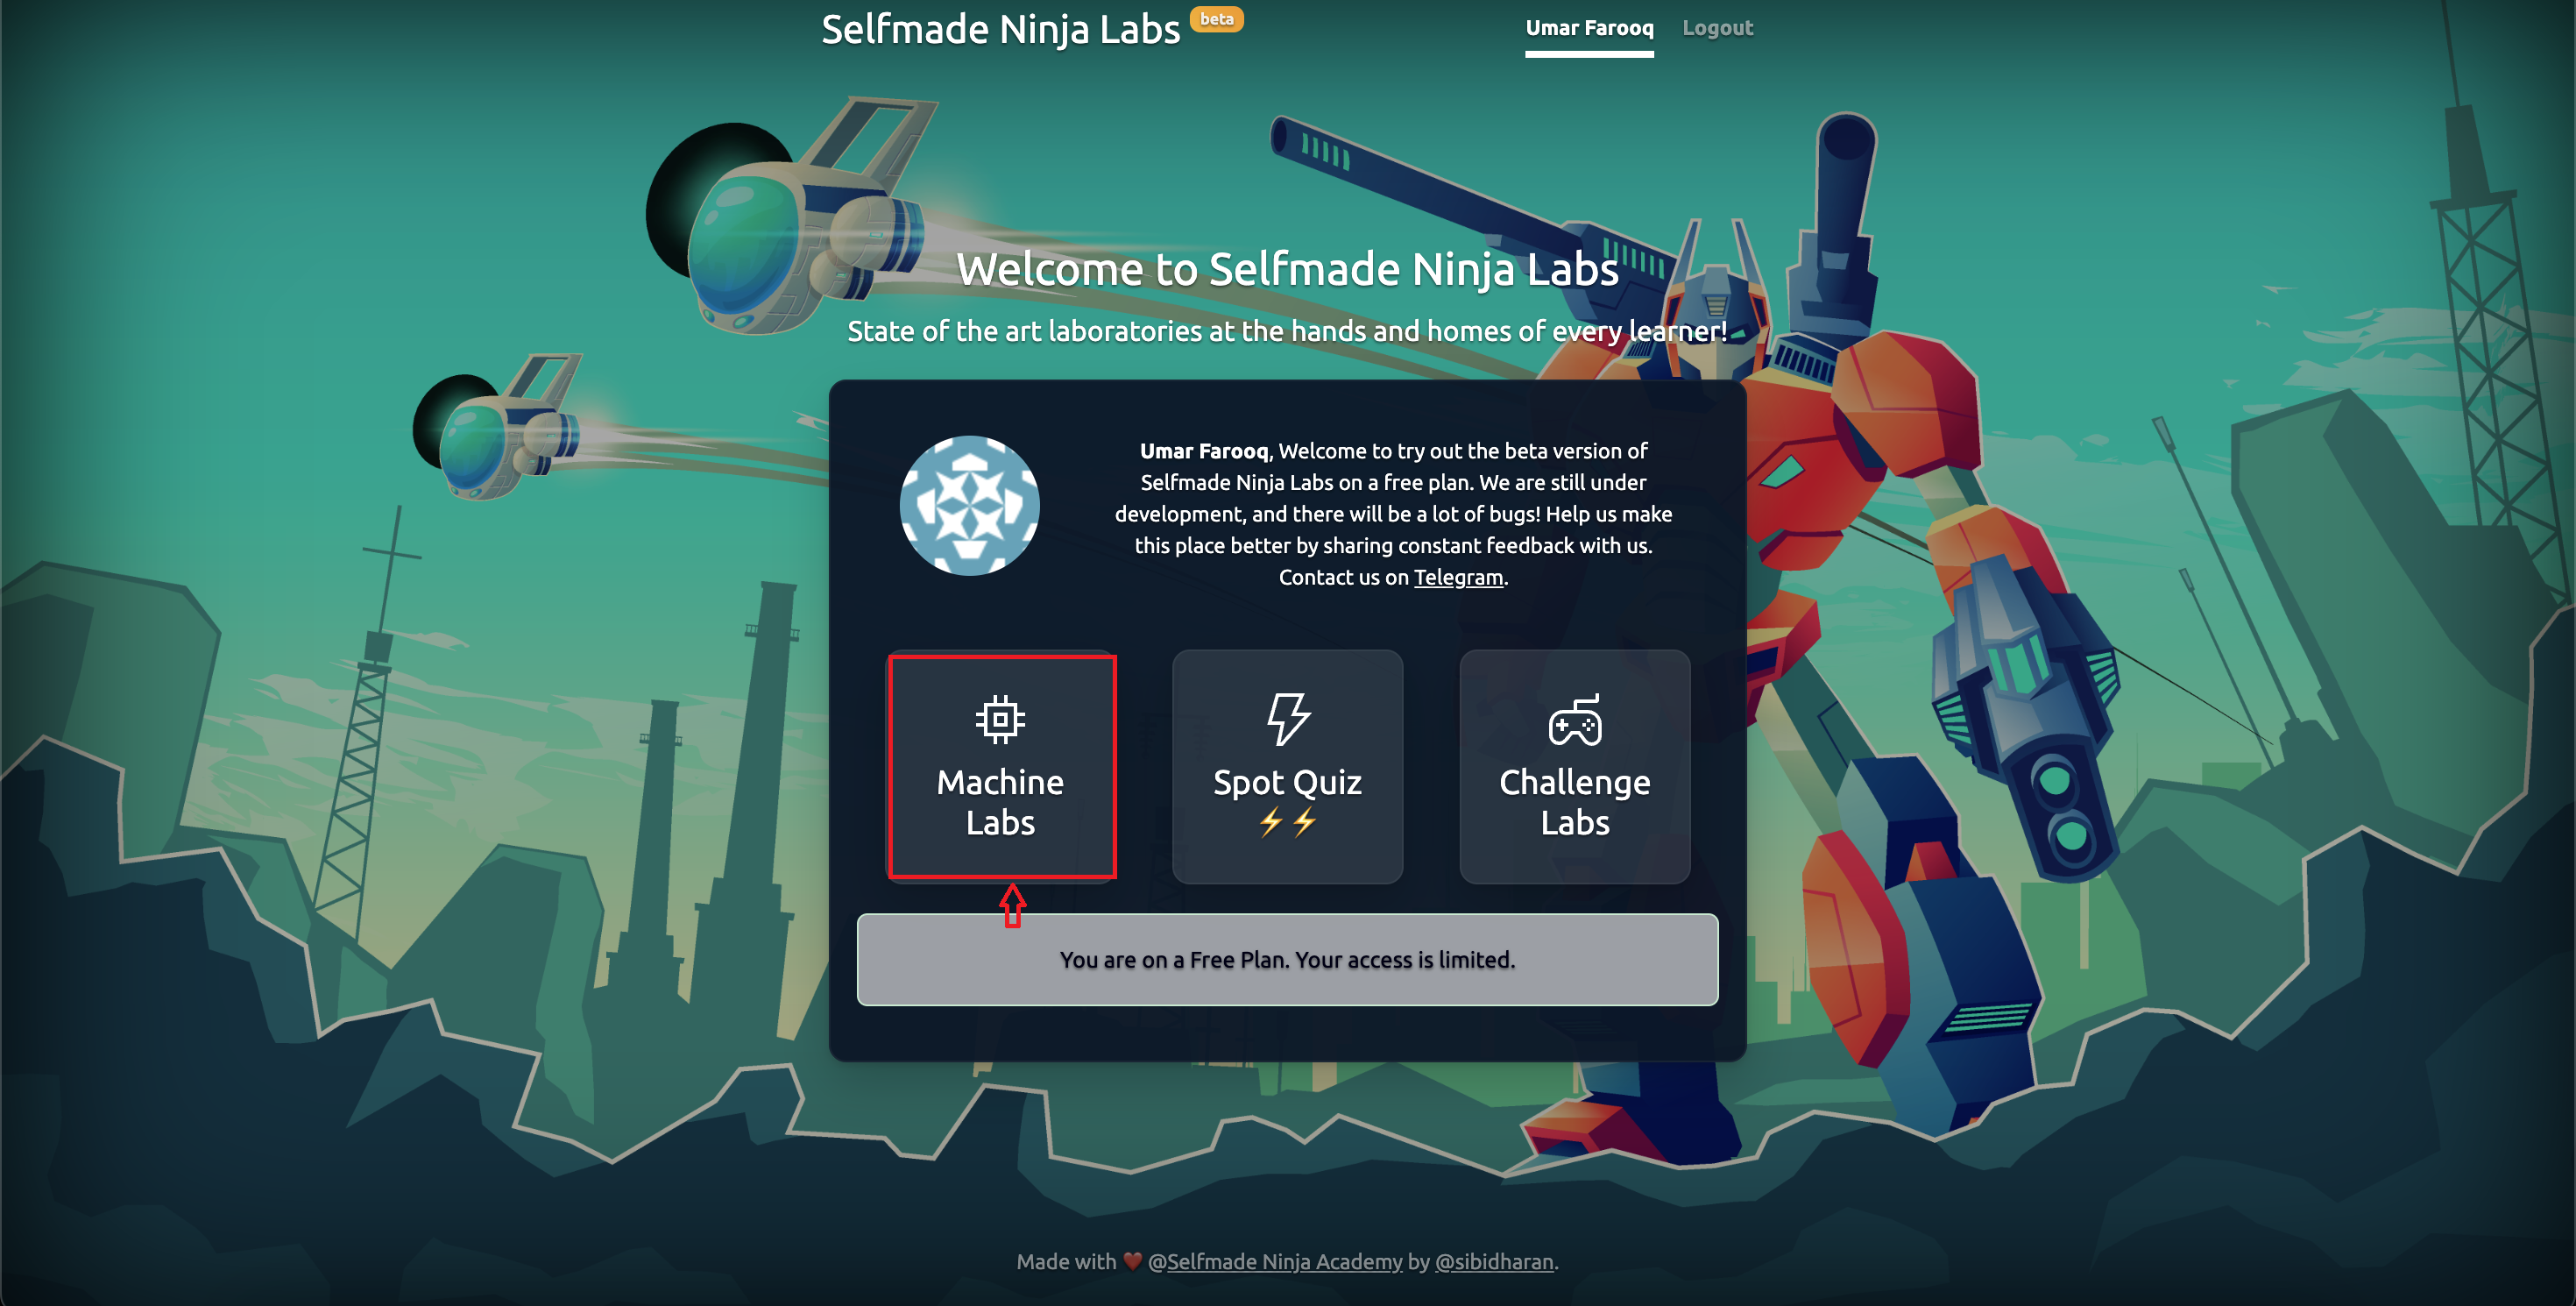
If you see a message saying, "You are on a Free plan. Your access is limited," don’t worry. Even with a free plan, you can still secure a domain and host your website at no cost. 🌐💻✨
Exploring Dashboard Options
Before redeeming your free domain, let’s explore the three key options available on your dashboard:
-
Machine Lab: Think of this as your personal cloud computer, available 24/7. It's powerful enough for both development and hacking. Even if your laptop is low-end, we've got you covered. I'll cover this in more detail in an upcoming blog post.
-
Spot Quiz: This feature helps you test your aptitude with gamified quizzes. Correct answers earn you 'Zolts,' a platform currency that can unlock extra features, like additional domains. I’ll explain how to redeem these Zolts in a future blog post.
-
Challenge Lab: This is where you can learn hacking in a fun, game-like environment. It's an engaging way to improve your hacking skills.
Note: Stay tuned for detailed explanations of these features in upcoming blog posts! 🌟💡👩💻👨💻
Adding Your Domain
Let’s get started with building your website. Go to the 'Connectivity' navbar and find the 'My Domain' section. Click on 'My Domain' to be redirected to a new page:
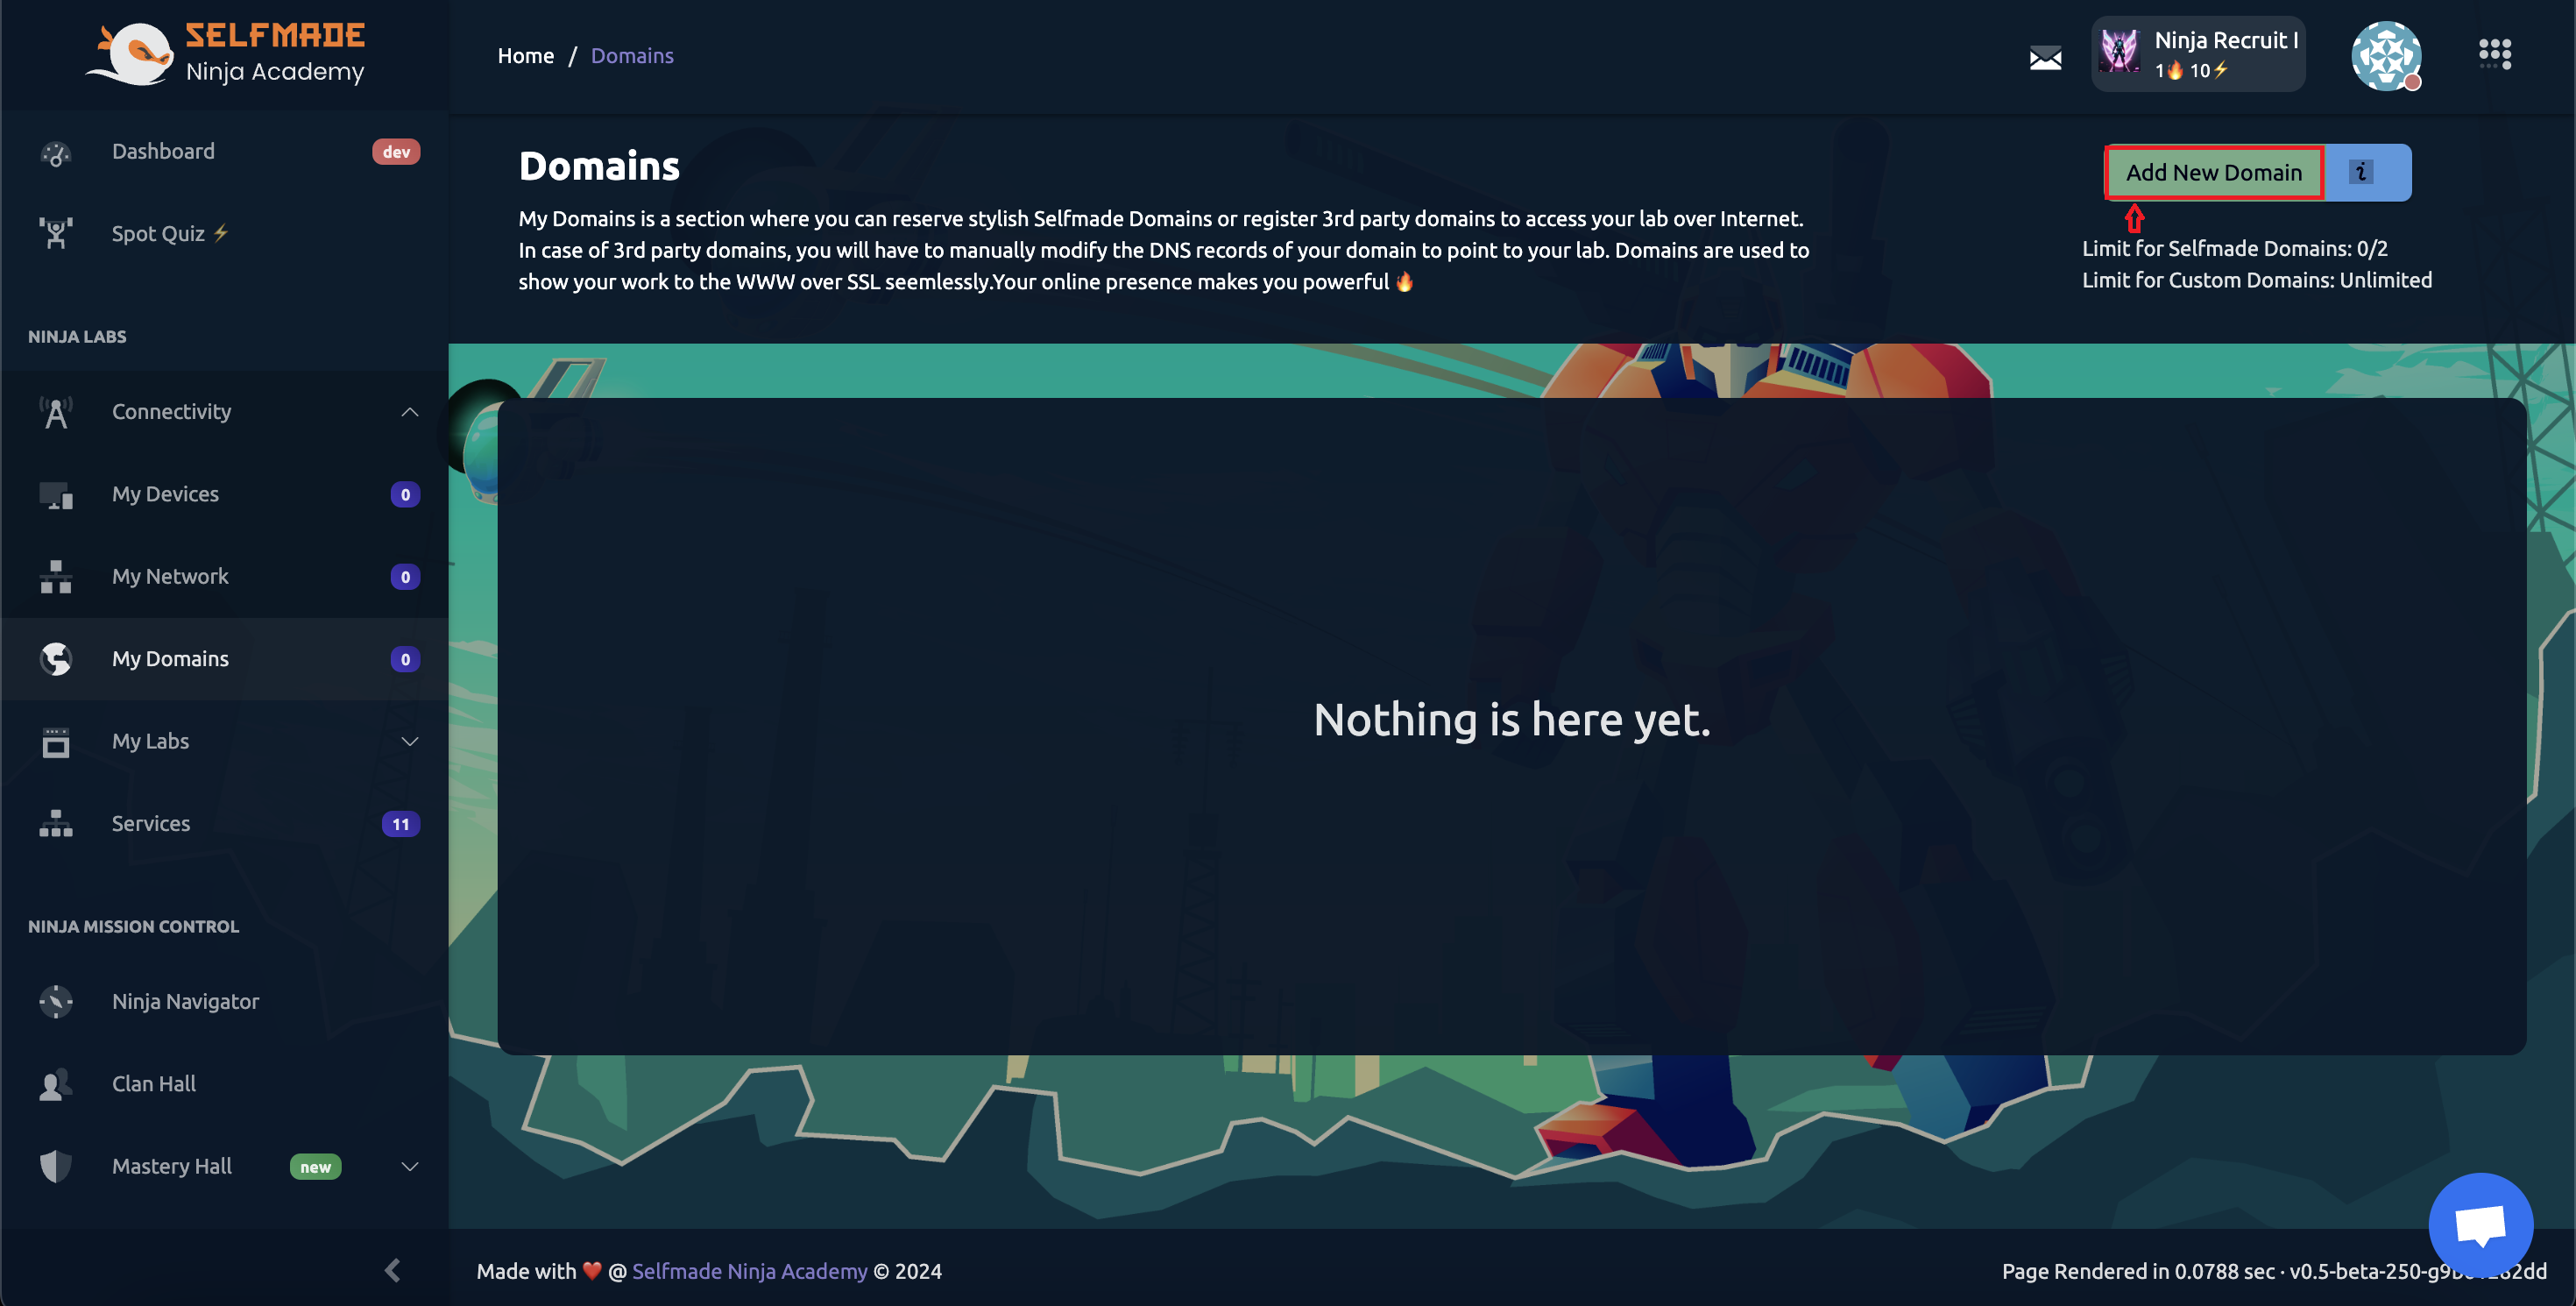
Here, you have two options: Add New Domain and How to Use Domain. Click 'Add New Domain,' and a dialog box will appear prompting you to enter your domain name. For example, I chose helloworld, resulting in helloworld.selfmade.fun. You can select from a list of subdomains or use your own.

After entering your domain name, click 'Verify and Add' to check its availability. If the domain is free, you can use it immediately. Congratulations on adding your domain! 🎉💻🌐👍
Setting Up Your Hosting Server
With your domain ready, let’s move on to setting up your hosting server. Navigate to the 'My Labs' section and select 'Machine Labs'. You’ll be taken to a page similar to this:

In the dashboard, the free version offers access to one lab, which is an Ubuntu machine. Premium versions include more options, like Docker, which I’ll cover in future blog posts.
Deploying Your Server
-
Access the Dashboard: Click the 'Dashboard' button, then press 'Deploy'. A dialog box will appear. Select 'Expose to Web to Public' and set the exposure to '80 over 443'. This step is crucial for making your server accessible online. Don’t forget to select your domain from the options. Click 'Confirm Deploy' when you’re ready.
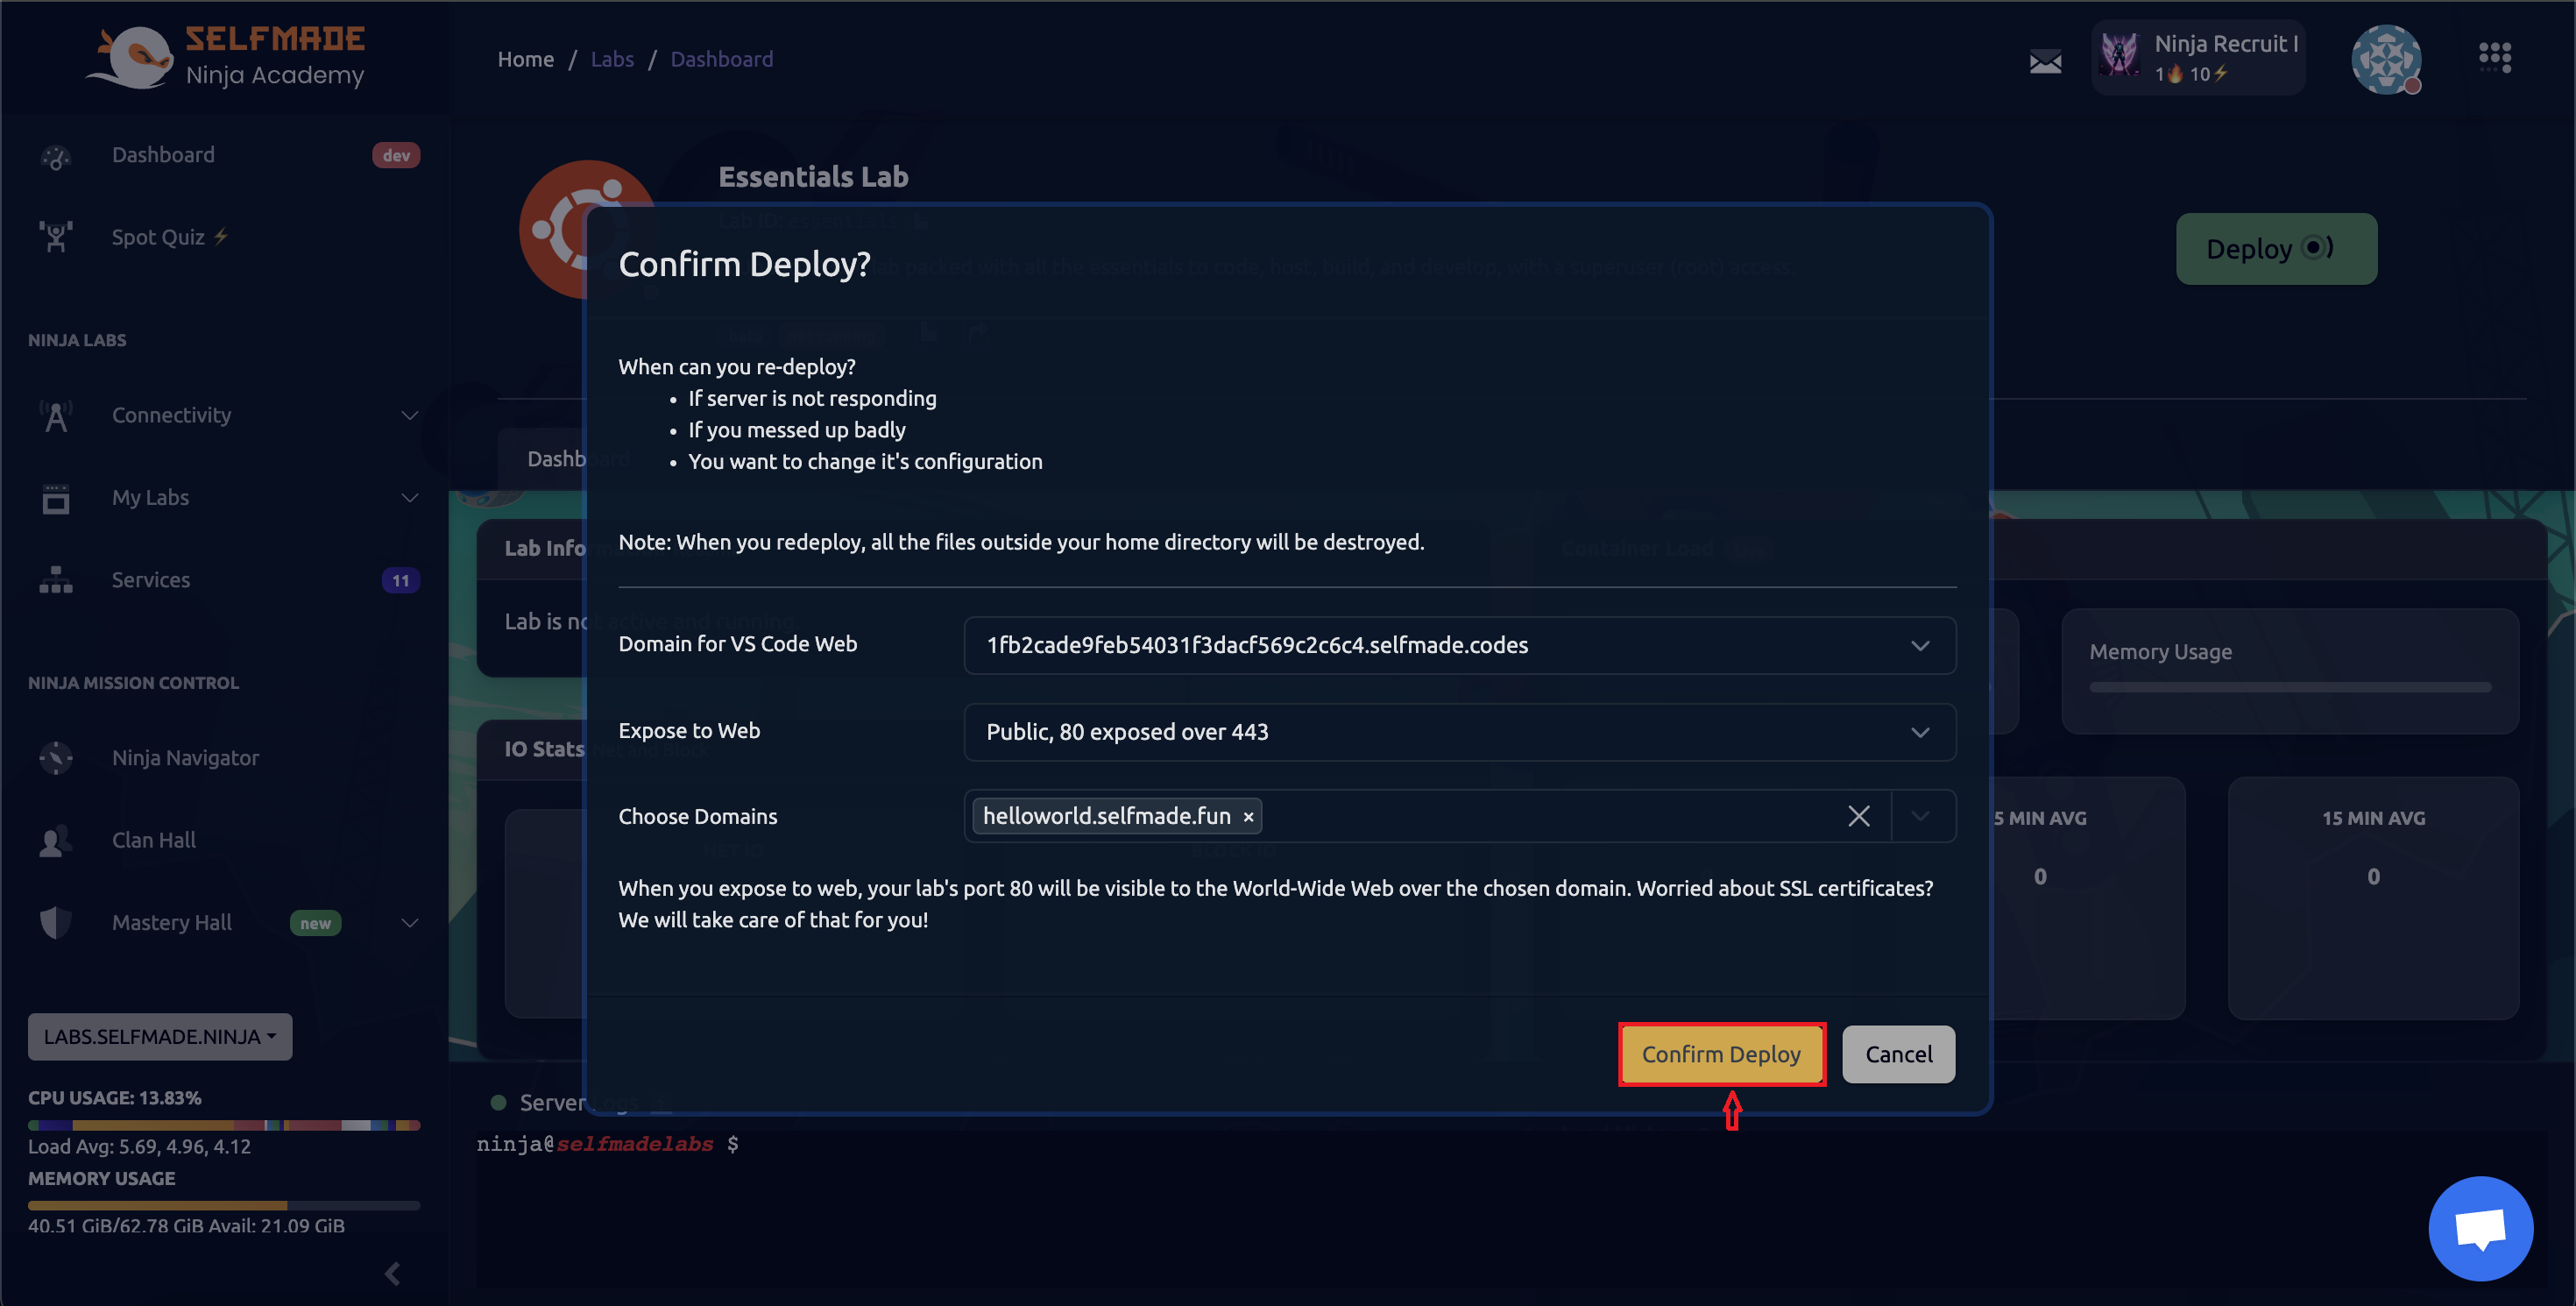
This process might take a minute. Use this time to relax and anticipate the launch of your website! 🌐🖥✨🥤
-
Dashboard Overview: Once deployment is complete, you’ll see a dashboard with various options:
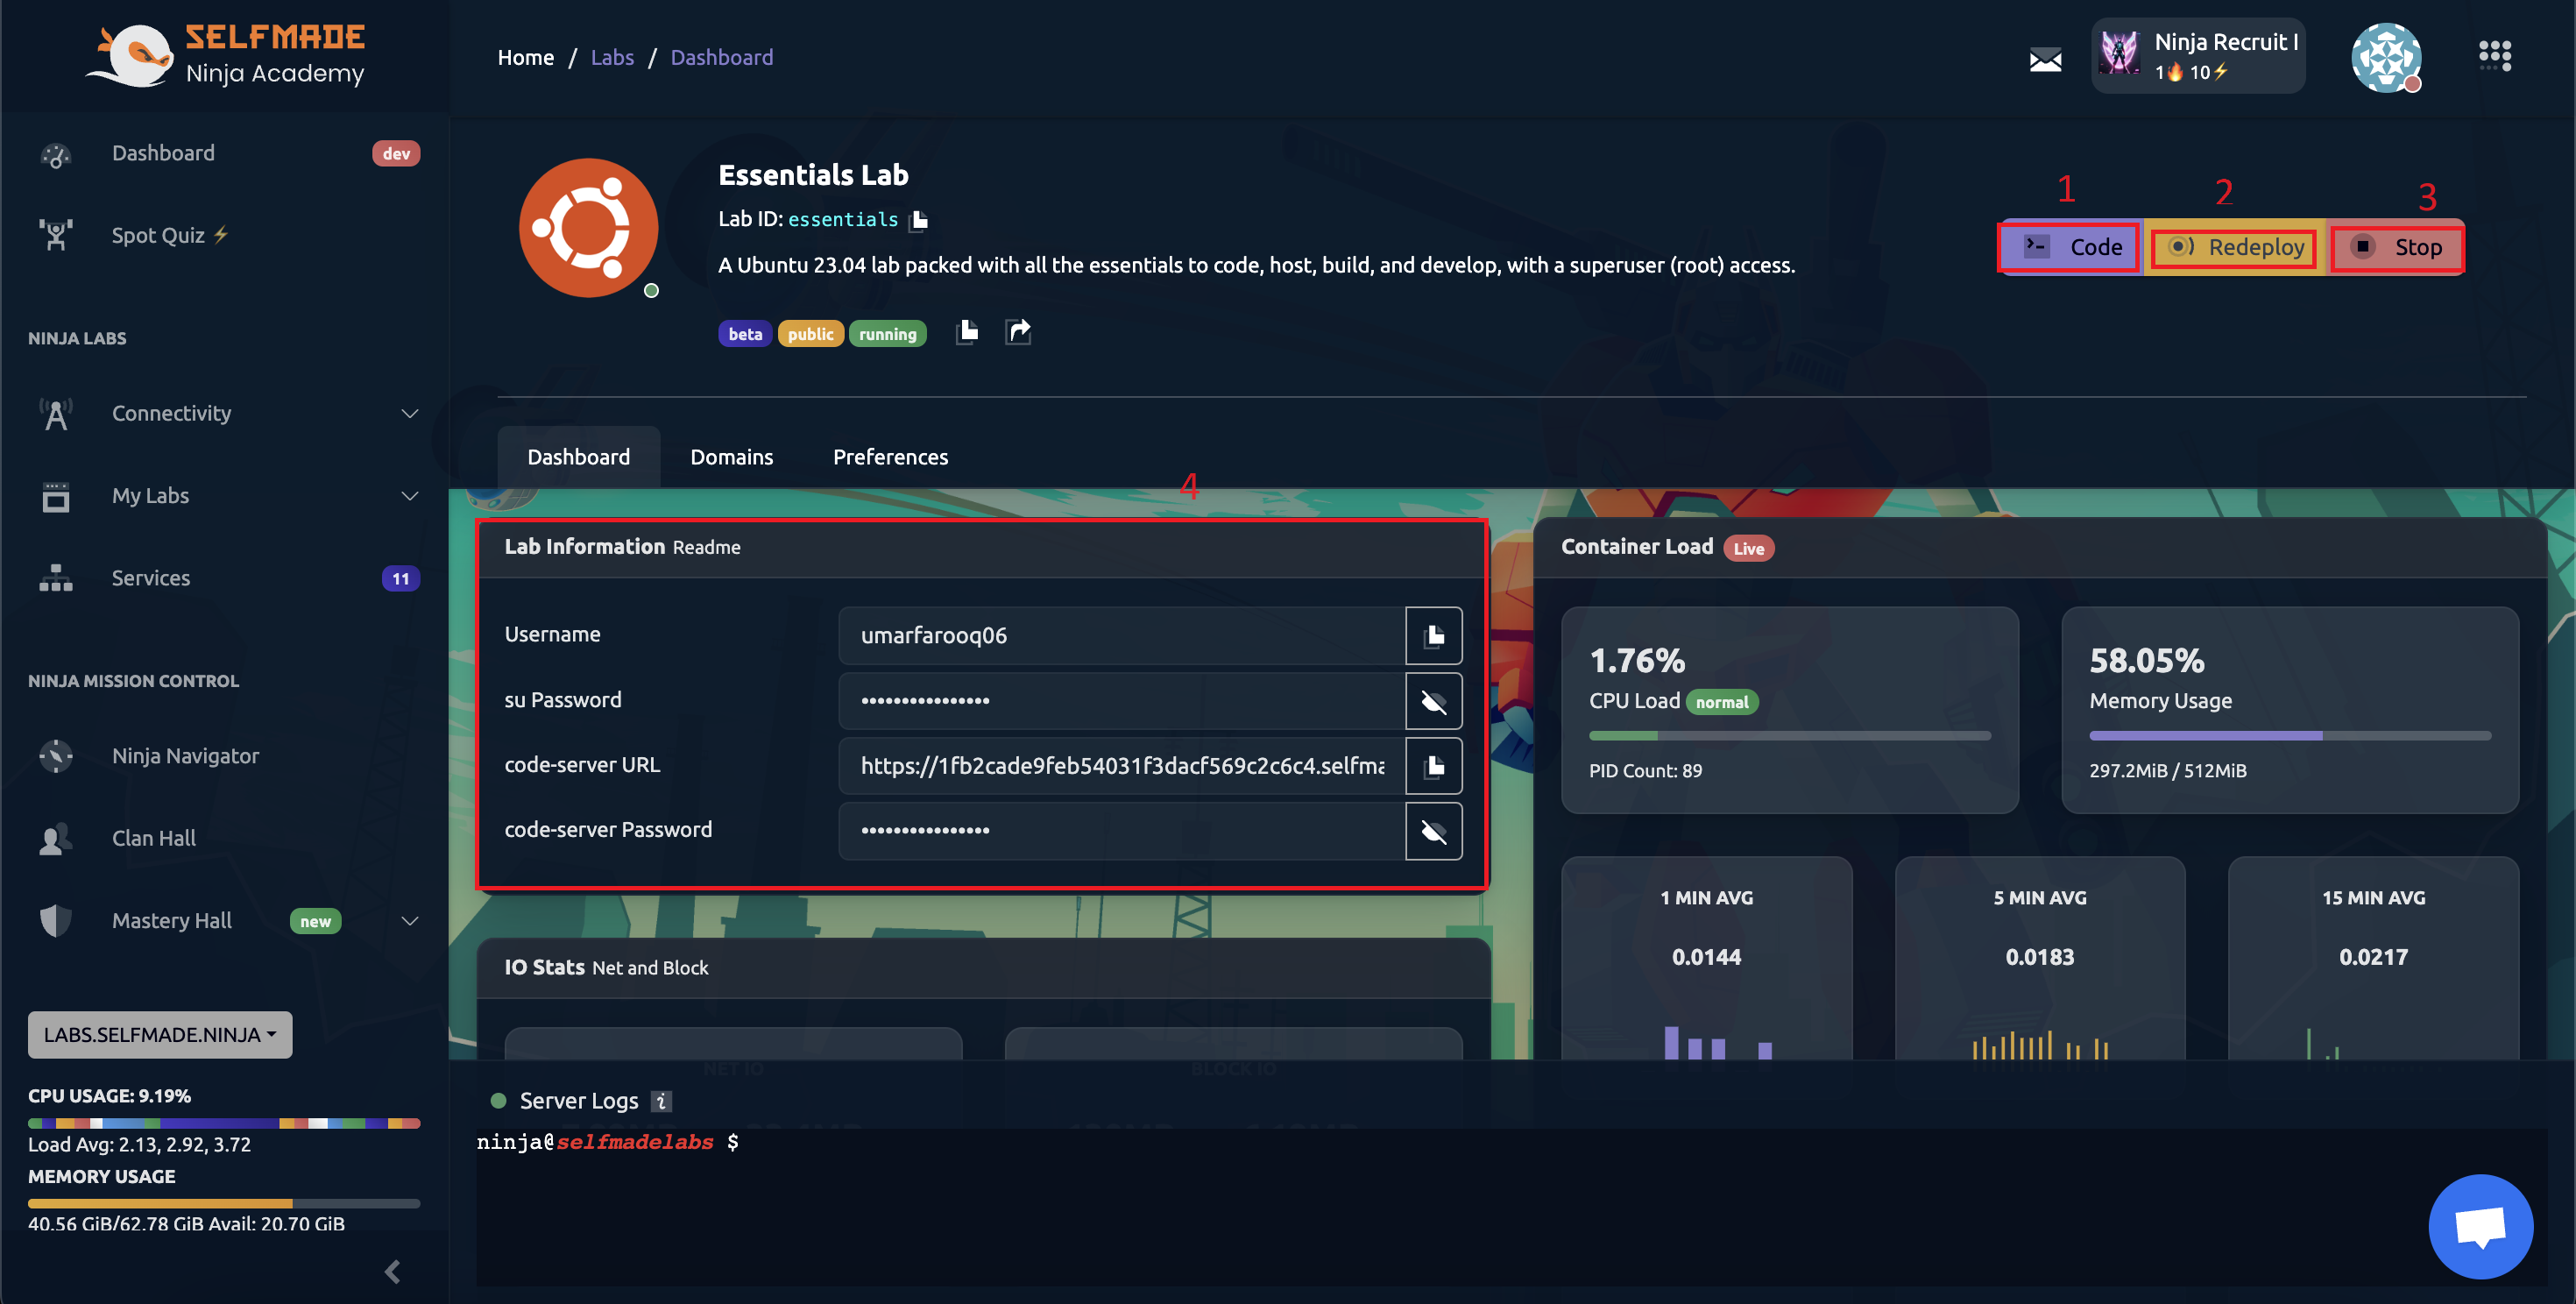
- Code Button: Interact with your server directly through your browser.
- Redeploy Button: Restart your machine for a fresh start.
- Stop Button: Stop the machine as needed.
- Lab Information: Find your username, password, and links to your VS Code server.
Configuring Your Server
-
Open VS Code: Click on the 'Code' button. A dialog box will appear with a password. Copy this password and paste it into the new page that opens. Click 'Submit'.
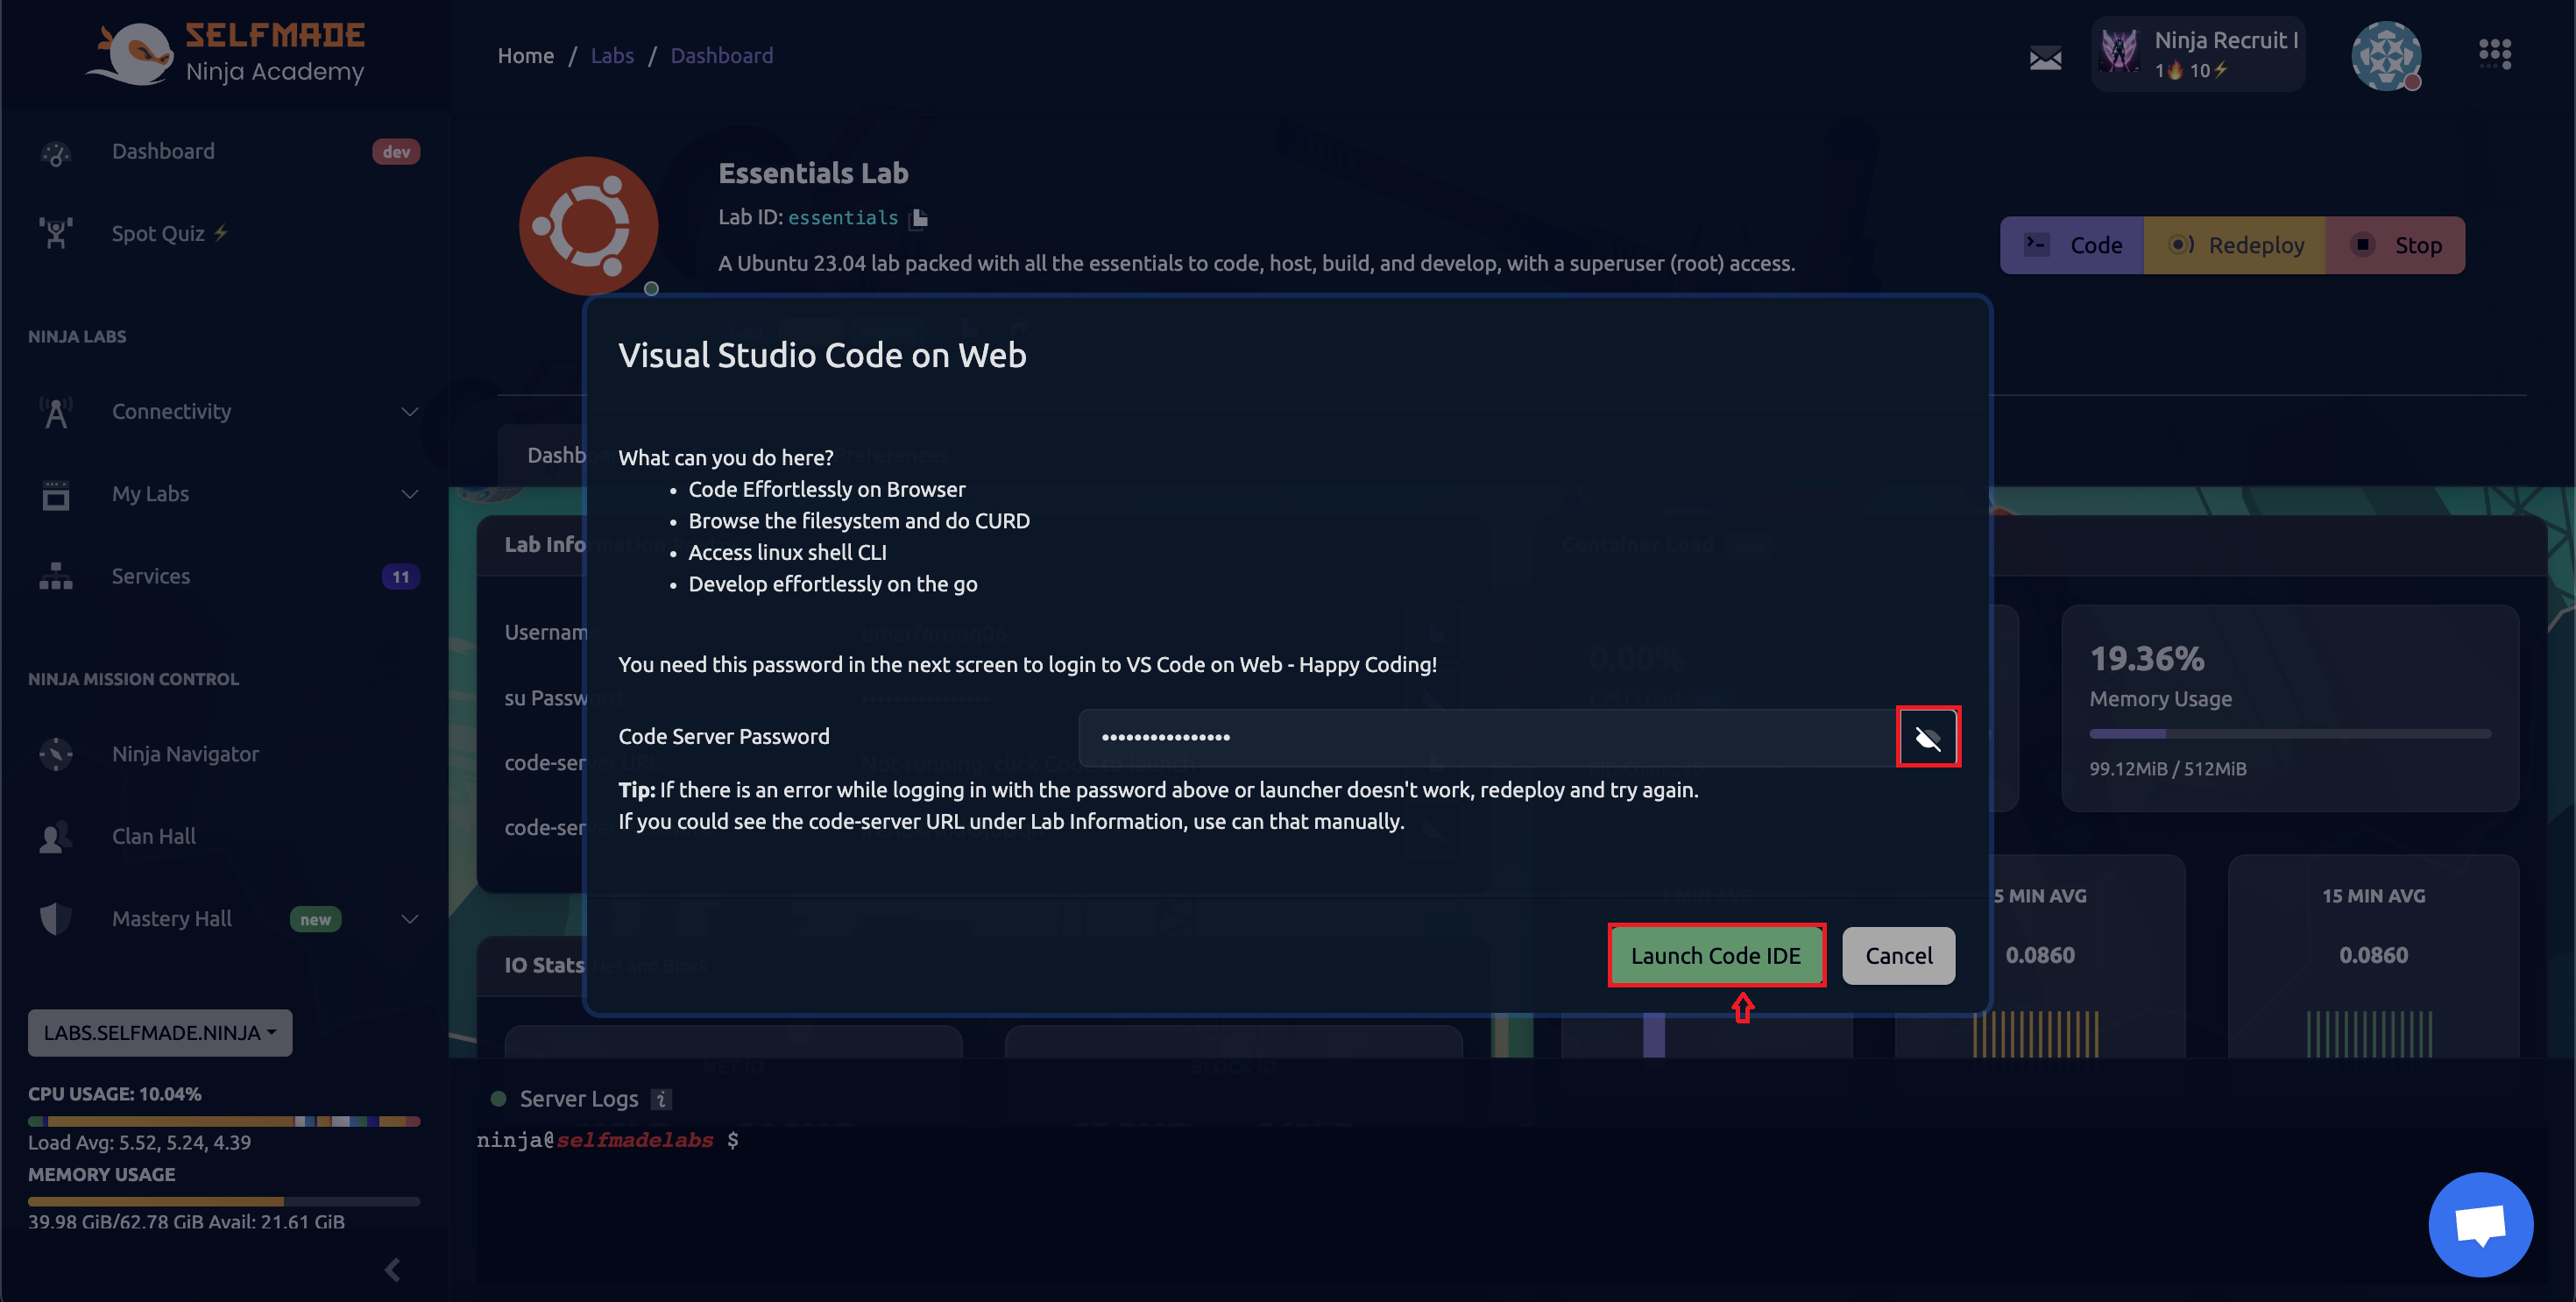

You now have VS Code running in your browser. Click on the file icon, then 'Open Folder', and navigate to the folder shown below.

-
Create Document Root: Inside your home folder on VS Code, open the
htdocsfolder. Create a new folder for your document root and anindex.phpfile. Paste your HTML page into this file.
-
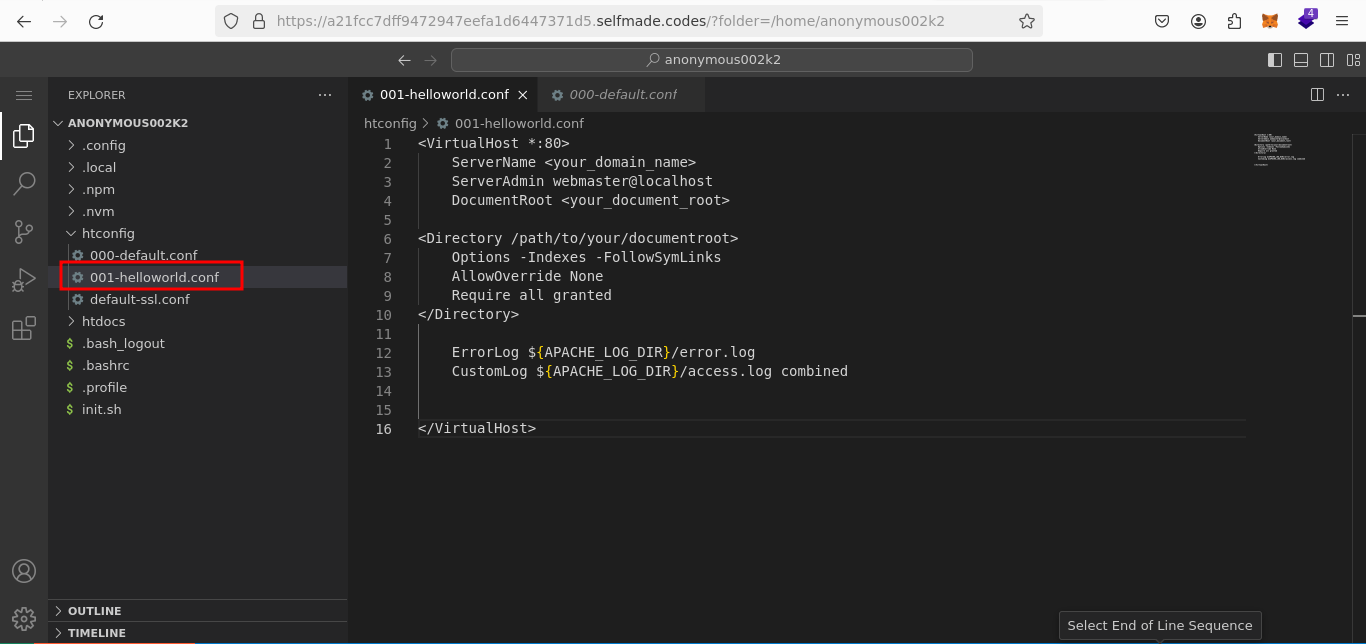
Set Up Apache Configuration: In the home folder, there’s a folder named 'htconfig'. Create a new config file inside this folder.
Copy and modify the following configuration:
   ServerName
   ServerAdmin webmaster@localhost
   DocumentRoot


   Options -Indexes -FollowSymLinks
   AllowOverride None
   Require all granted


   ErrorLog ${APACHE_LOG_DIR}/error.log
   CustomLog ${APACHE_LOG_DIR}/access.log combined
4.Update init.sh: Add the following commands to the init.sh file in your home folder:
sudo a2ensite <your_config_name>
sudo service apache2 restart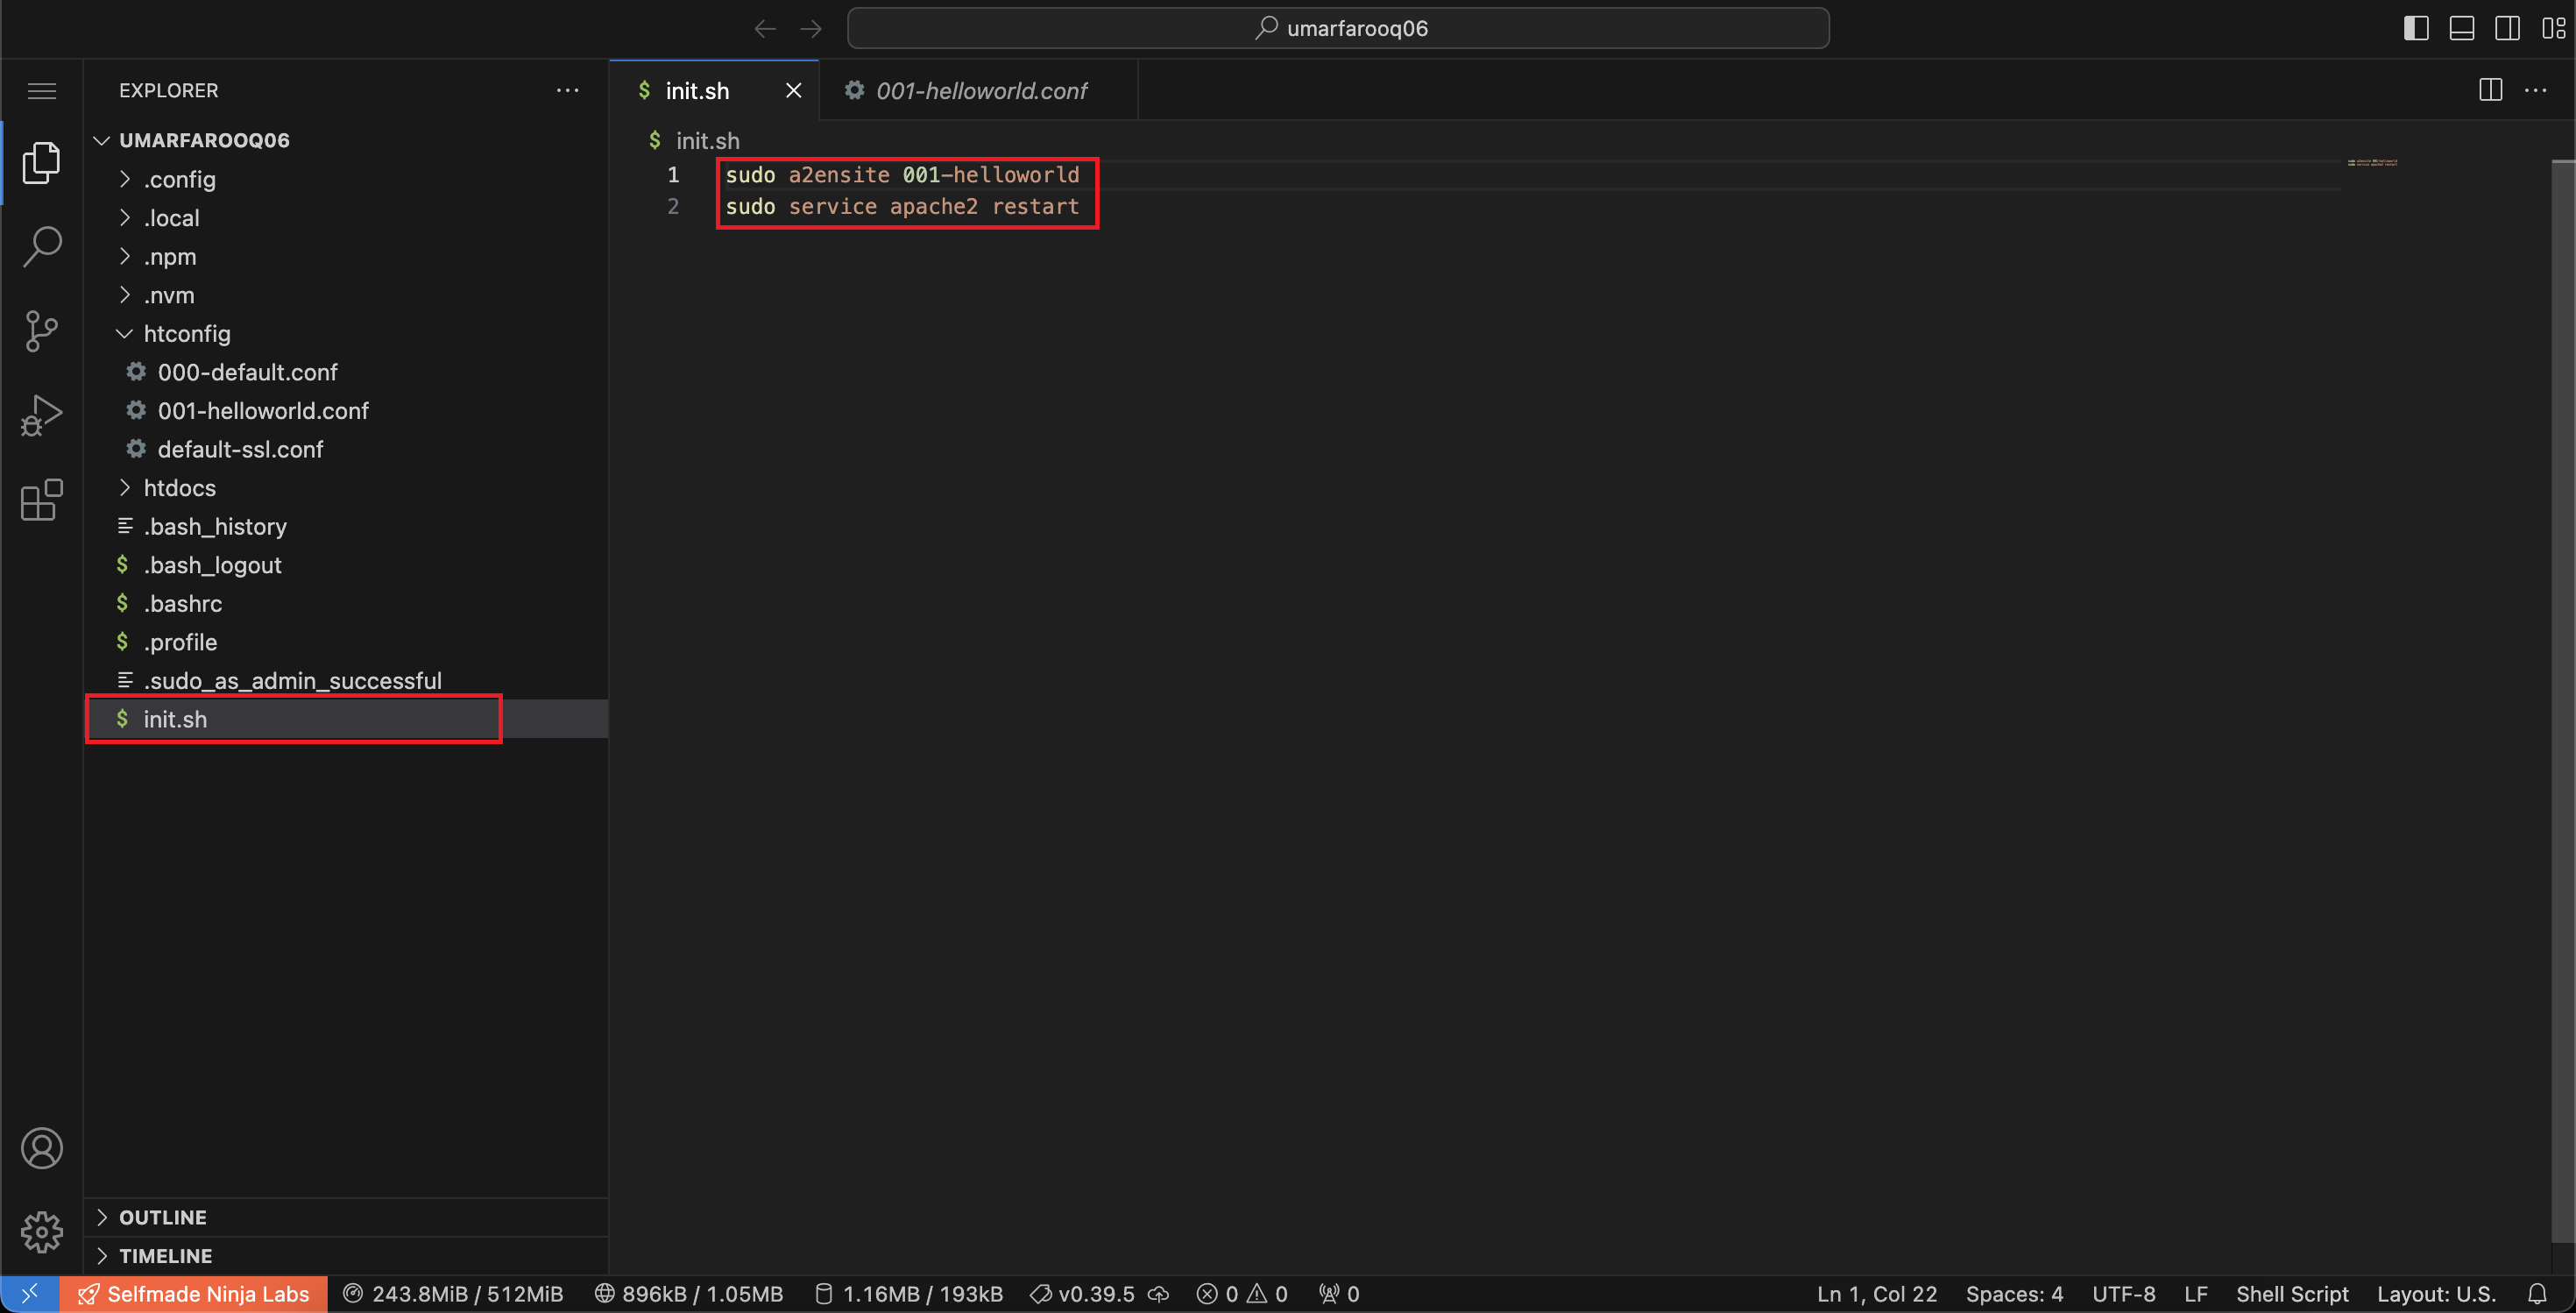
- init.sh automates initialization and configuration during redeployment. It preserves the state and configurations set by the user, eliminating the need for manual command execution.
5.Redeploy Your Instance: Go to 'Machine Labs' under 'My Labs' and click 'Redeploy'.


6.Verify Your Setup: Once redeployment is complete, open your web browser, type in your domain, and hit enter. You should see your static page hosted publicly.

If everything’s been done correctly, your page should now look like the one in the following image. It's truly exciting to see your hosting server come alive with such a powerful editor at your fingertips. Let's keep this momentum going!